fbq('track', 'PageView');
Using Color in your Photo Book.

Using Color in your Photo Book.

color in photo book

Lately, I’ve been in the mood to add color to my layouts. In my last blog post, I should 10 ways to add color to layouts. But those suggestions were more for you to pick and choose. In today’s blog post I want to share how you can add a color palette throughout one of your photo books. 

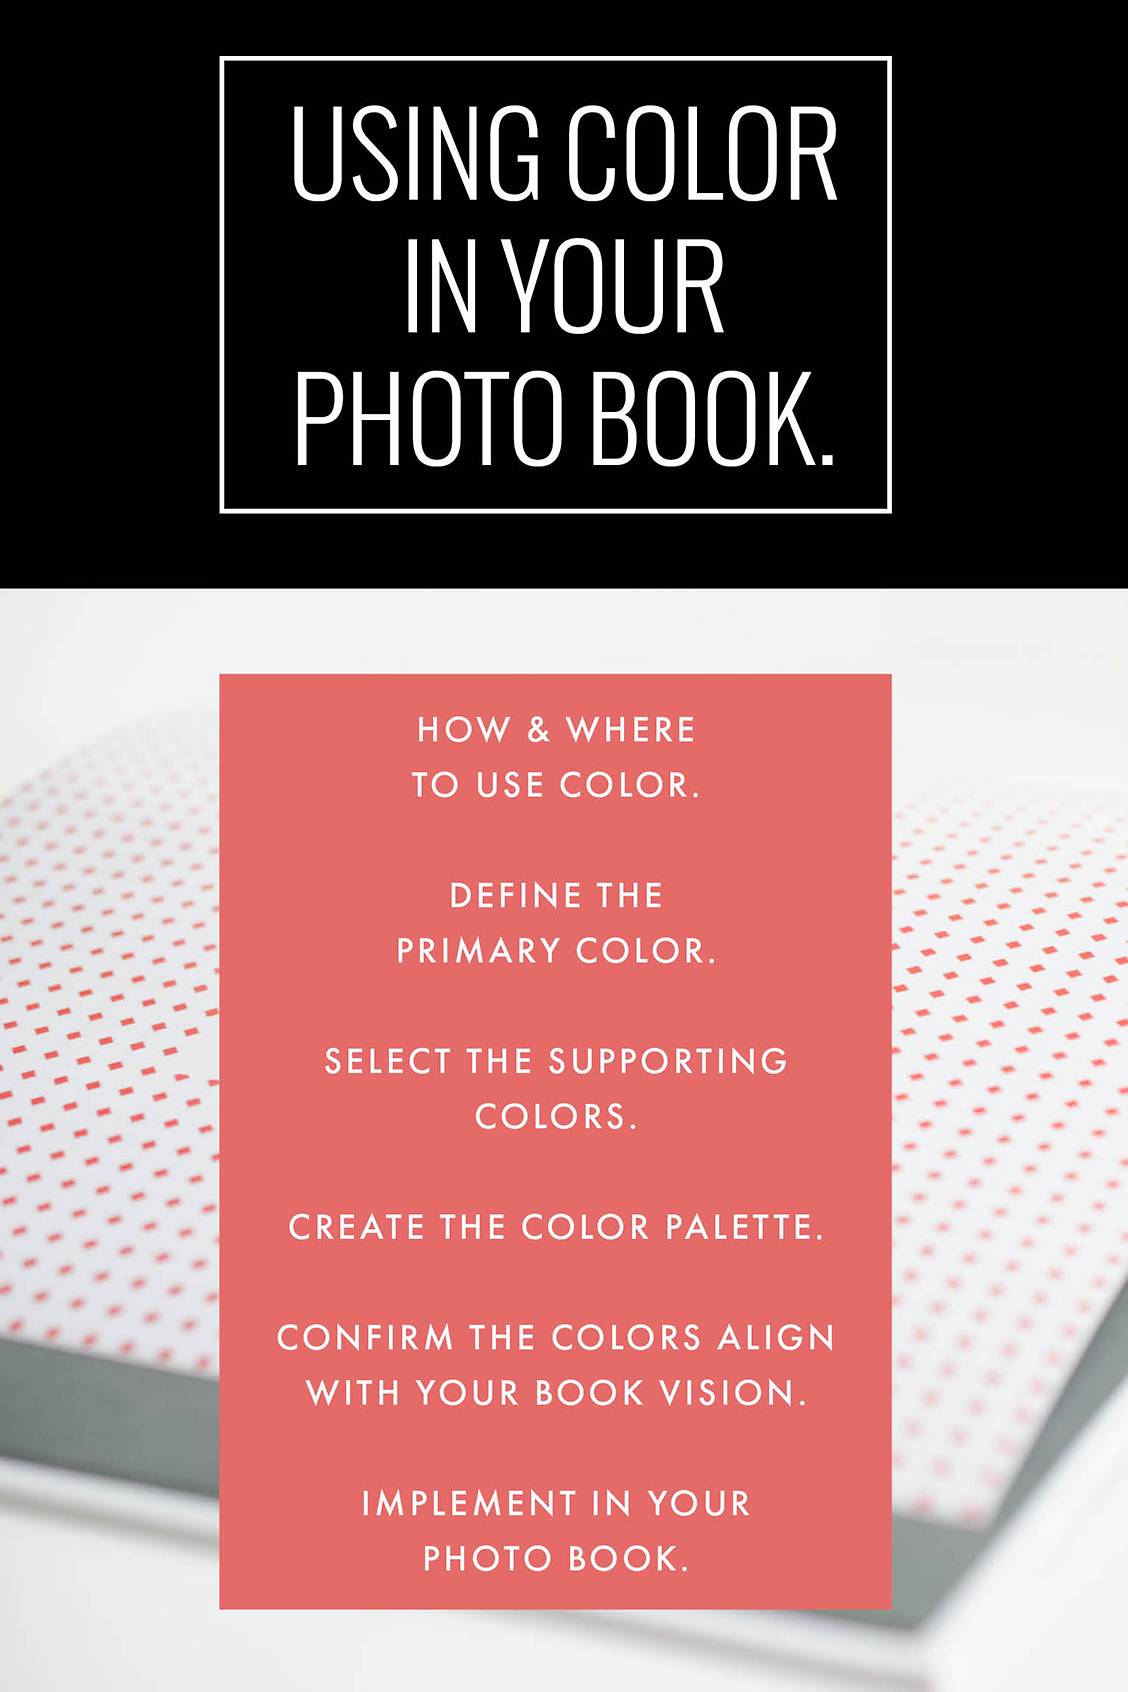
This step is something that you should consider the beginning of the design process, if possible. Here are my decision-making steps: 

-1-  Select how and where you want to use color. 

-2-  What is the primary or dominant color you want to use?  

-3-  What color(s) could support the main color, if any. 

-4-  Define the full color palette. 

-5-  Does this color palette support the overall vision you originally wanted? 

-6-  Implement in your photo book design. 


Now let’s see these steps in action. I’m going to use a typical annual photo book for this example. 

I want to use a color palette for section pages, page numbers and any titles on the page. I want to use the same color for all three places. But on the section page, I want to use two other colors to add design variety. 

The dominant color will be the 2018 Pantone color: Ultra Violet.

The supporting colors should be more neutral to balance the purple color. On the Pantone website, they provide several different color combinations. I selected one that resonated with the balanced scheme I was looking for this particular photo book. 

Here is my color palette. 

color in photo book

This color palette matches my original vision because I wanted my family photo book to be fun yet classic. I want the design to have personality without being too bold. 

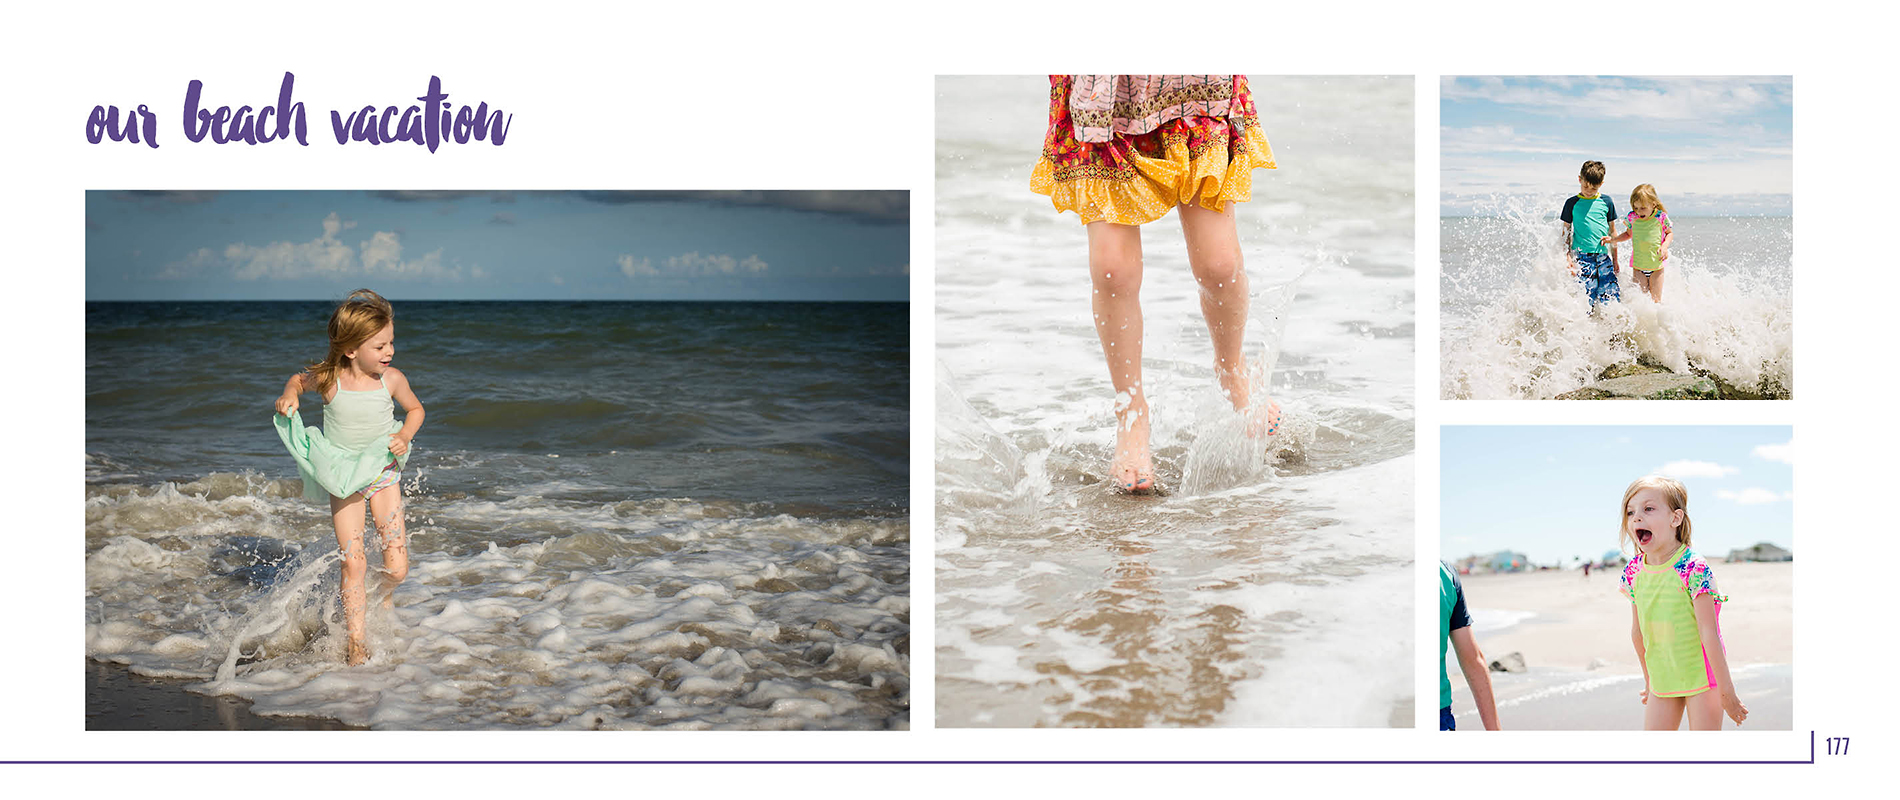
And here’s the result: 

Section Page:

color in photo book

Typical Page:

color in photo book

Family Cookbook Organization

Family Cookbook Organization

Photo Book Organization


When making a photo book, one of the first things to do is establish an organizational structure for your book. This helps when someone flips through the finished book and it also speeds up your workflow. It gives you a clear structure to help you select photos and to figure out where and how the photos fit into your book.

If you’re making an annual photo book, the structure is easy – you can organize it by month. For a vacation book, you can organize it by day or the events that happened during your vacation.

When it comes to making a cookbook, there are several options available for organization. It could be organized by the meal (breakfast, lunch, dinner), the ingredient, or the season to name a few. While it helps to have choices, often it makes the decision harder to make. And I don’t want you to get stuck so I’m starting a new design series tracking six cooksbooks I own that will help illustrate key design decisions.

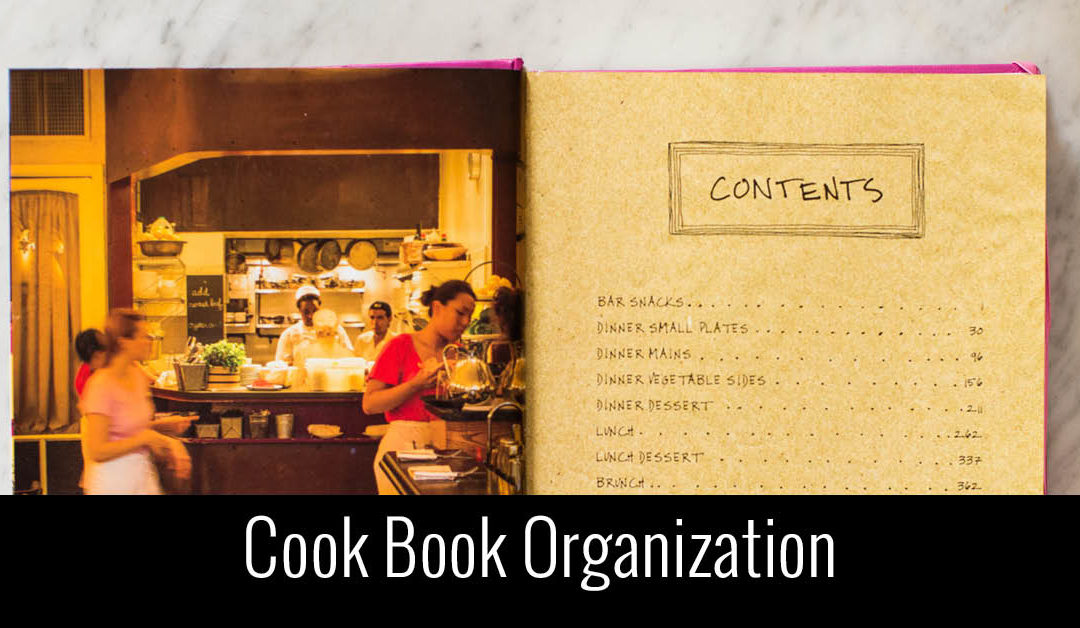
In this blog post, I’m starting with the Table of Contents to help identify how other cookbooks have organized the recipes.


Cookbook Organization

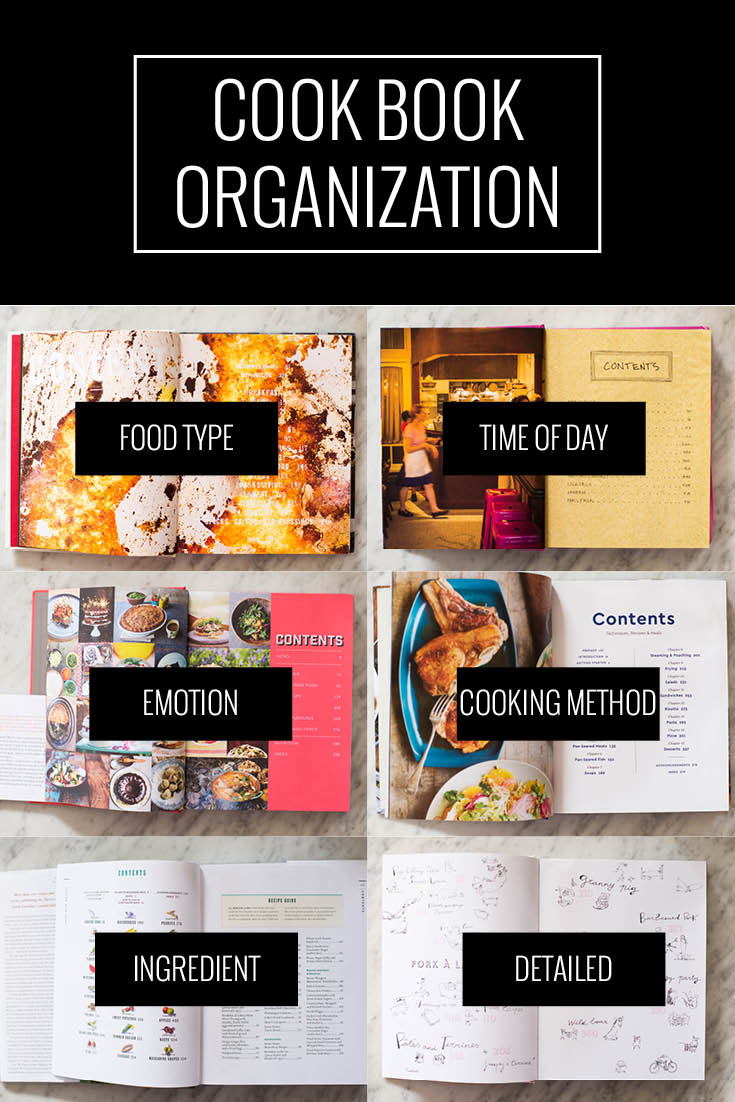
With each of the cookbooks I’m sharing, I’m including the basic organization, the title & author, and a few examples of the sections. Use this as inspiration to look in your own cookbook collection and see how some of your favorites have organized the recipes.

Food Type

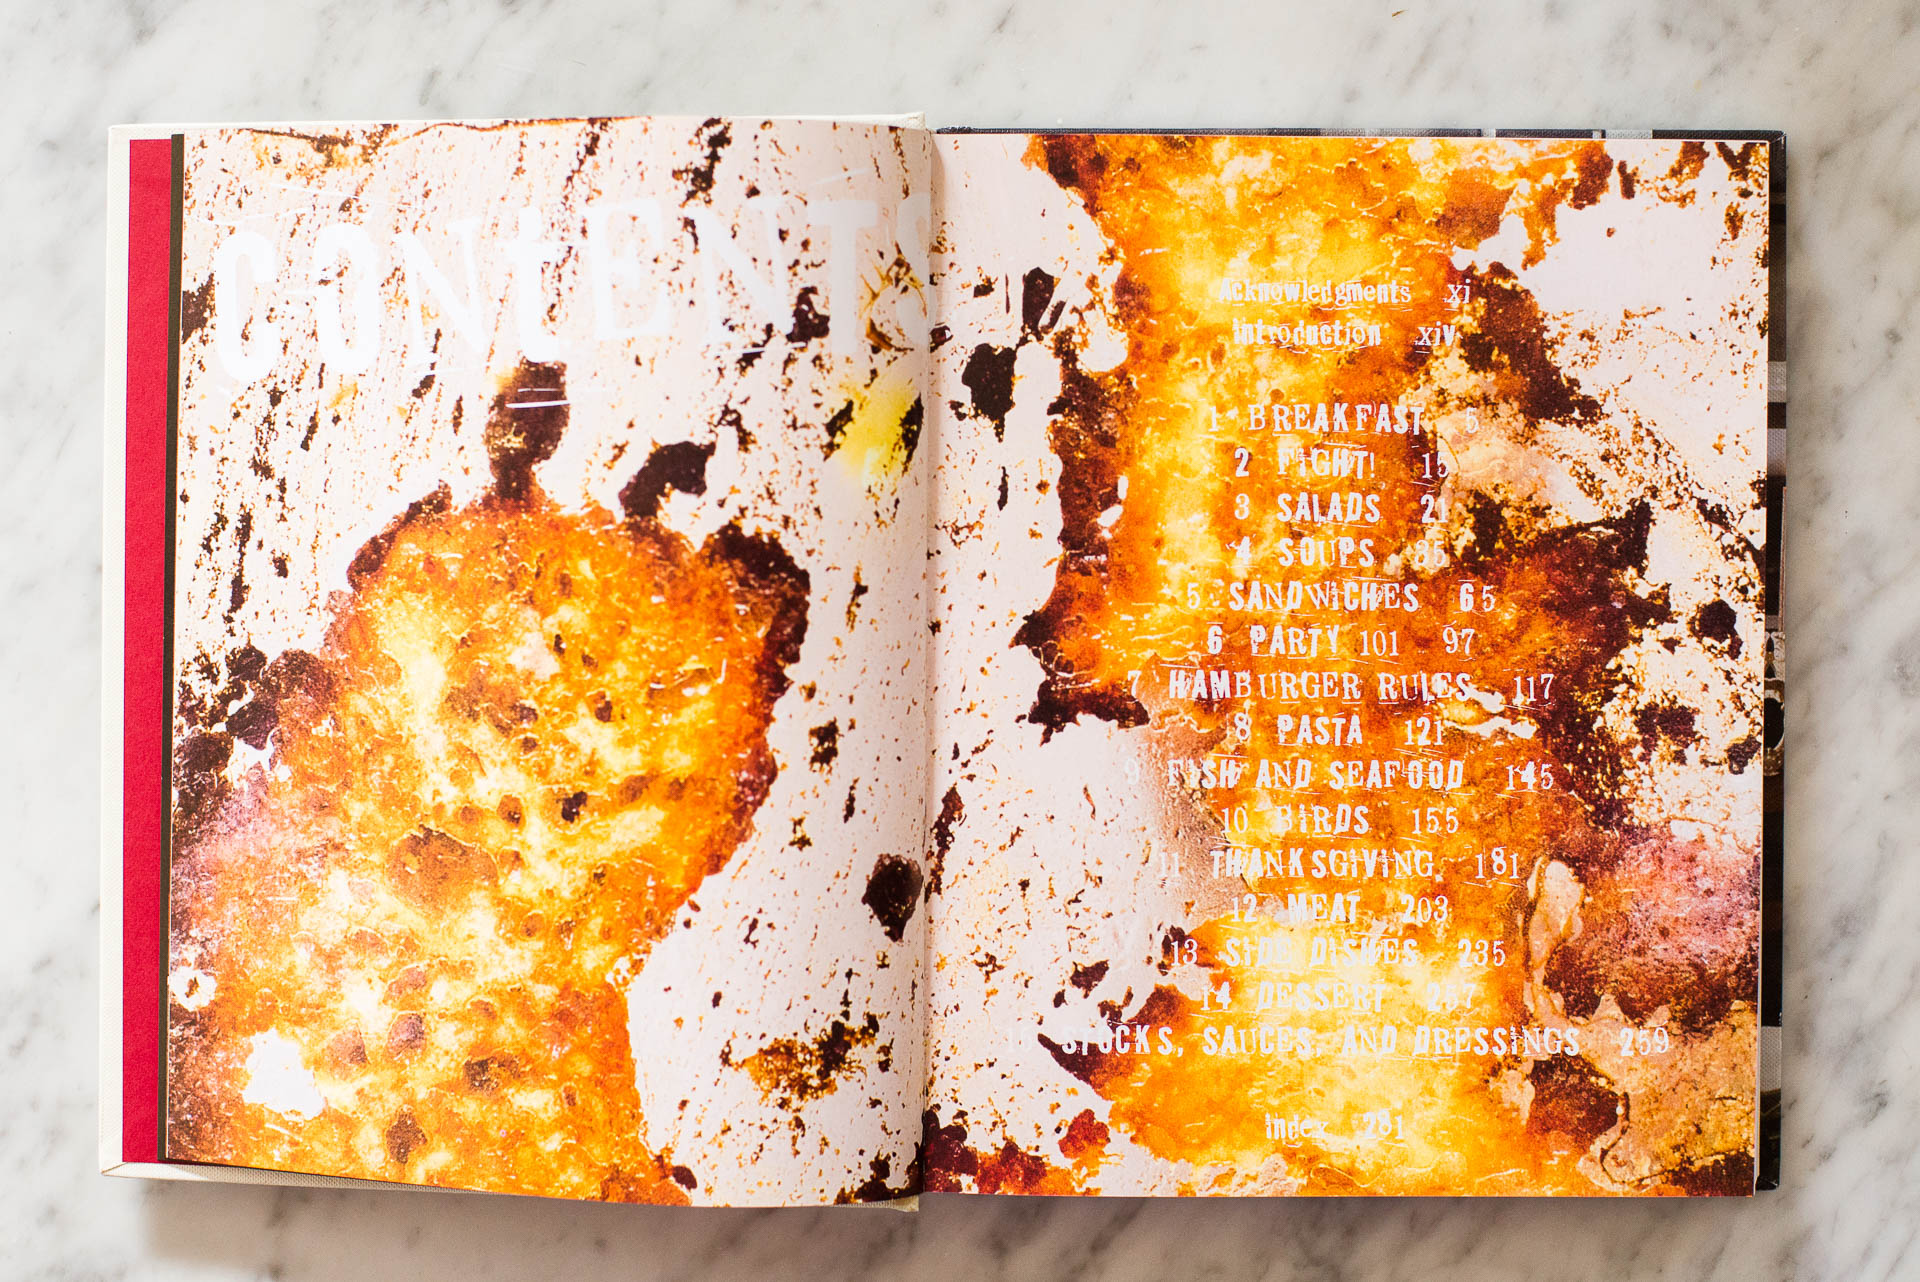
Appetites: A Cookbook

Anthony Bourdain

  • Breakfast
  • Salads
  • Sandwiches 

Time of Day

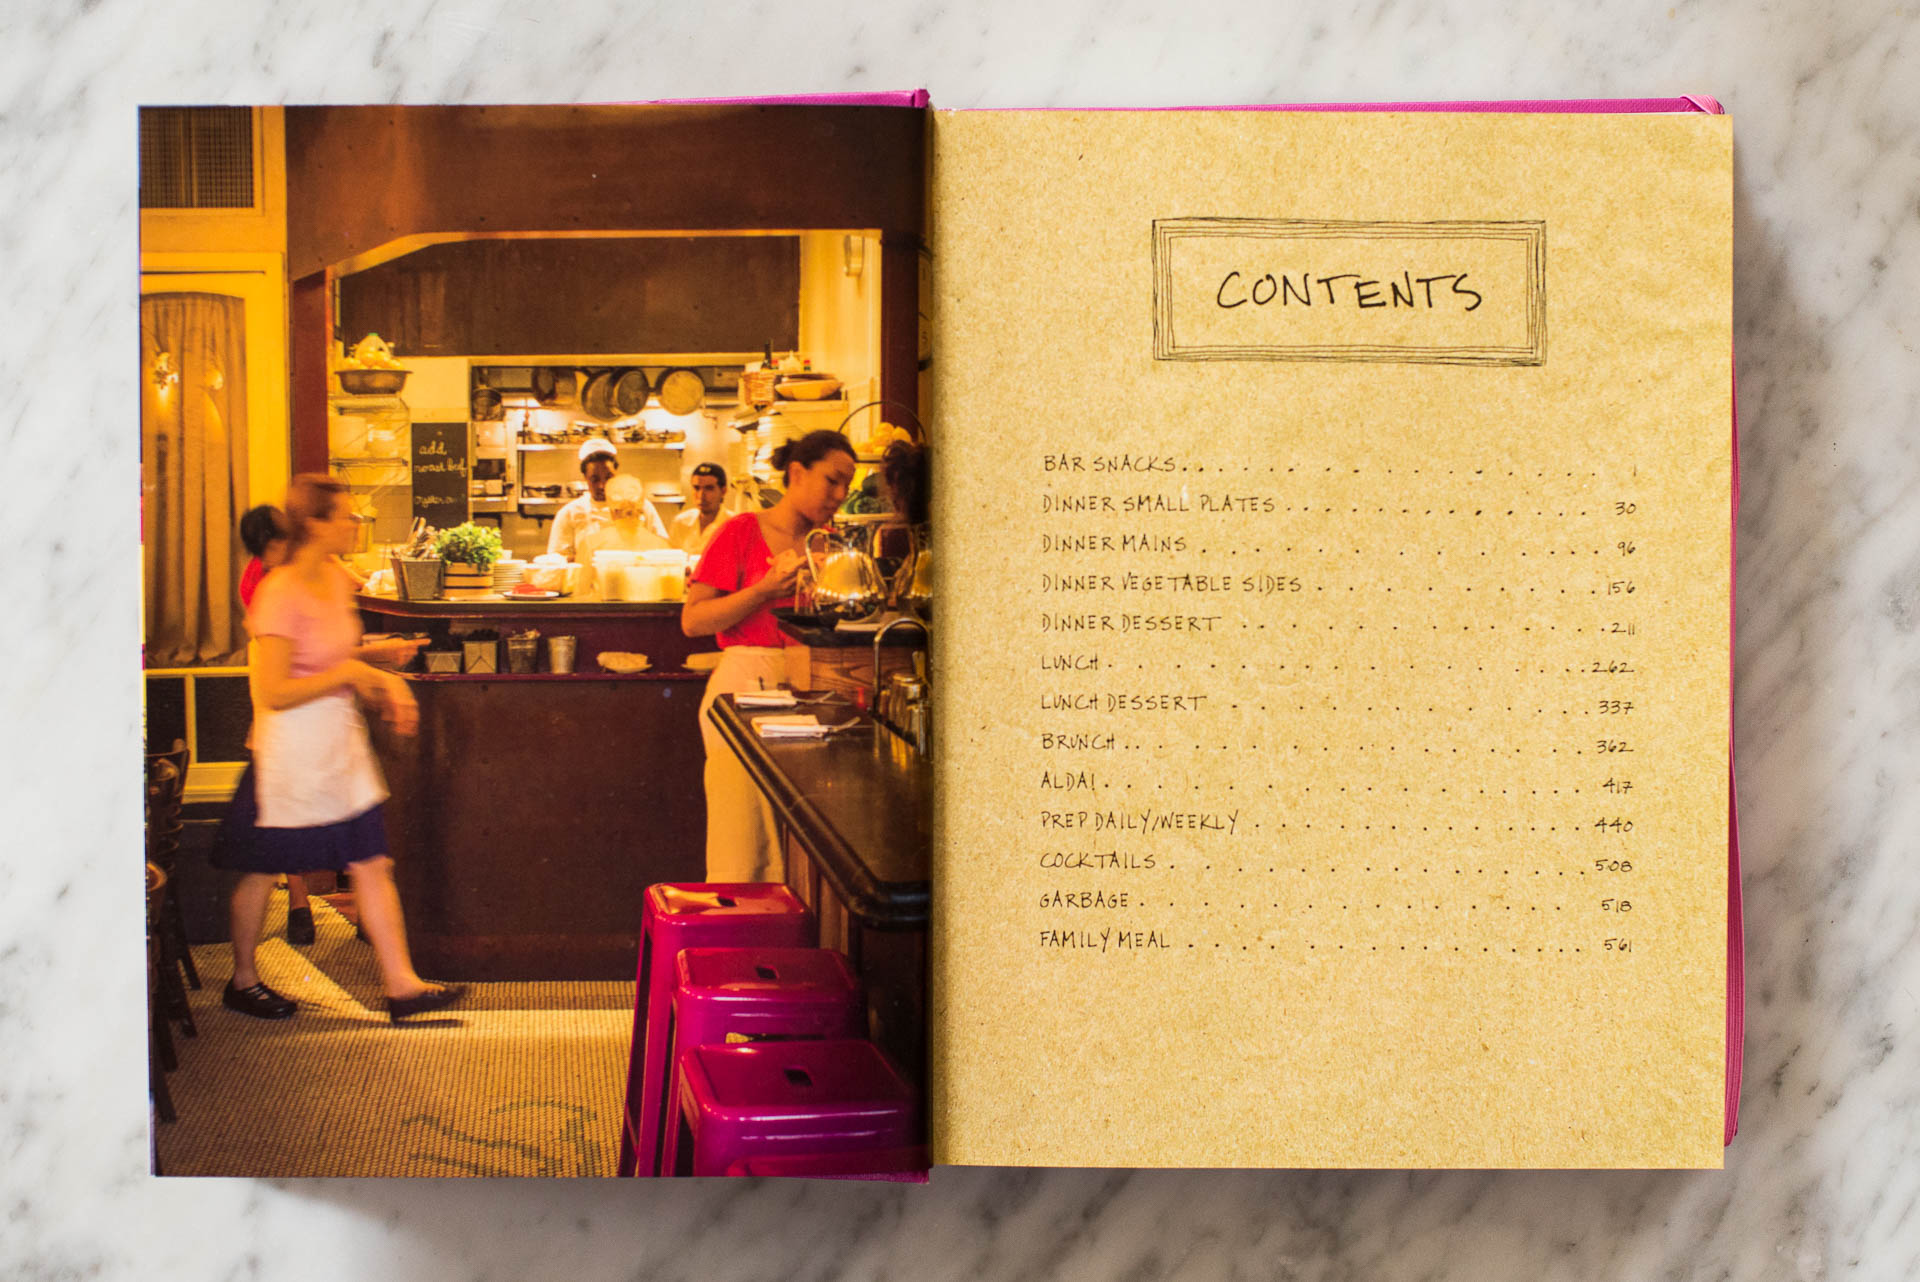
Prune

Gabrielle Hamilton


  • Lunch Dessert
  • Dinner Small Plates
  • Prep Daily/Weekly

Emotion

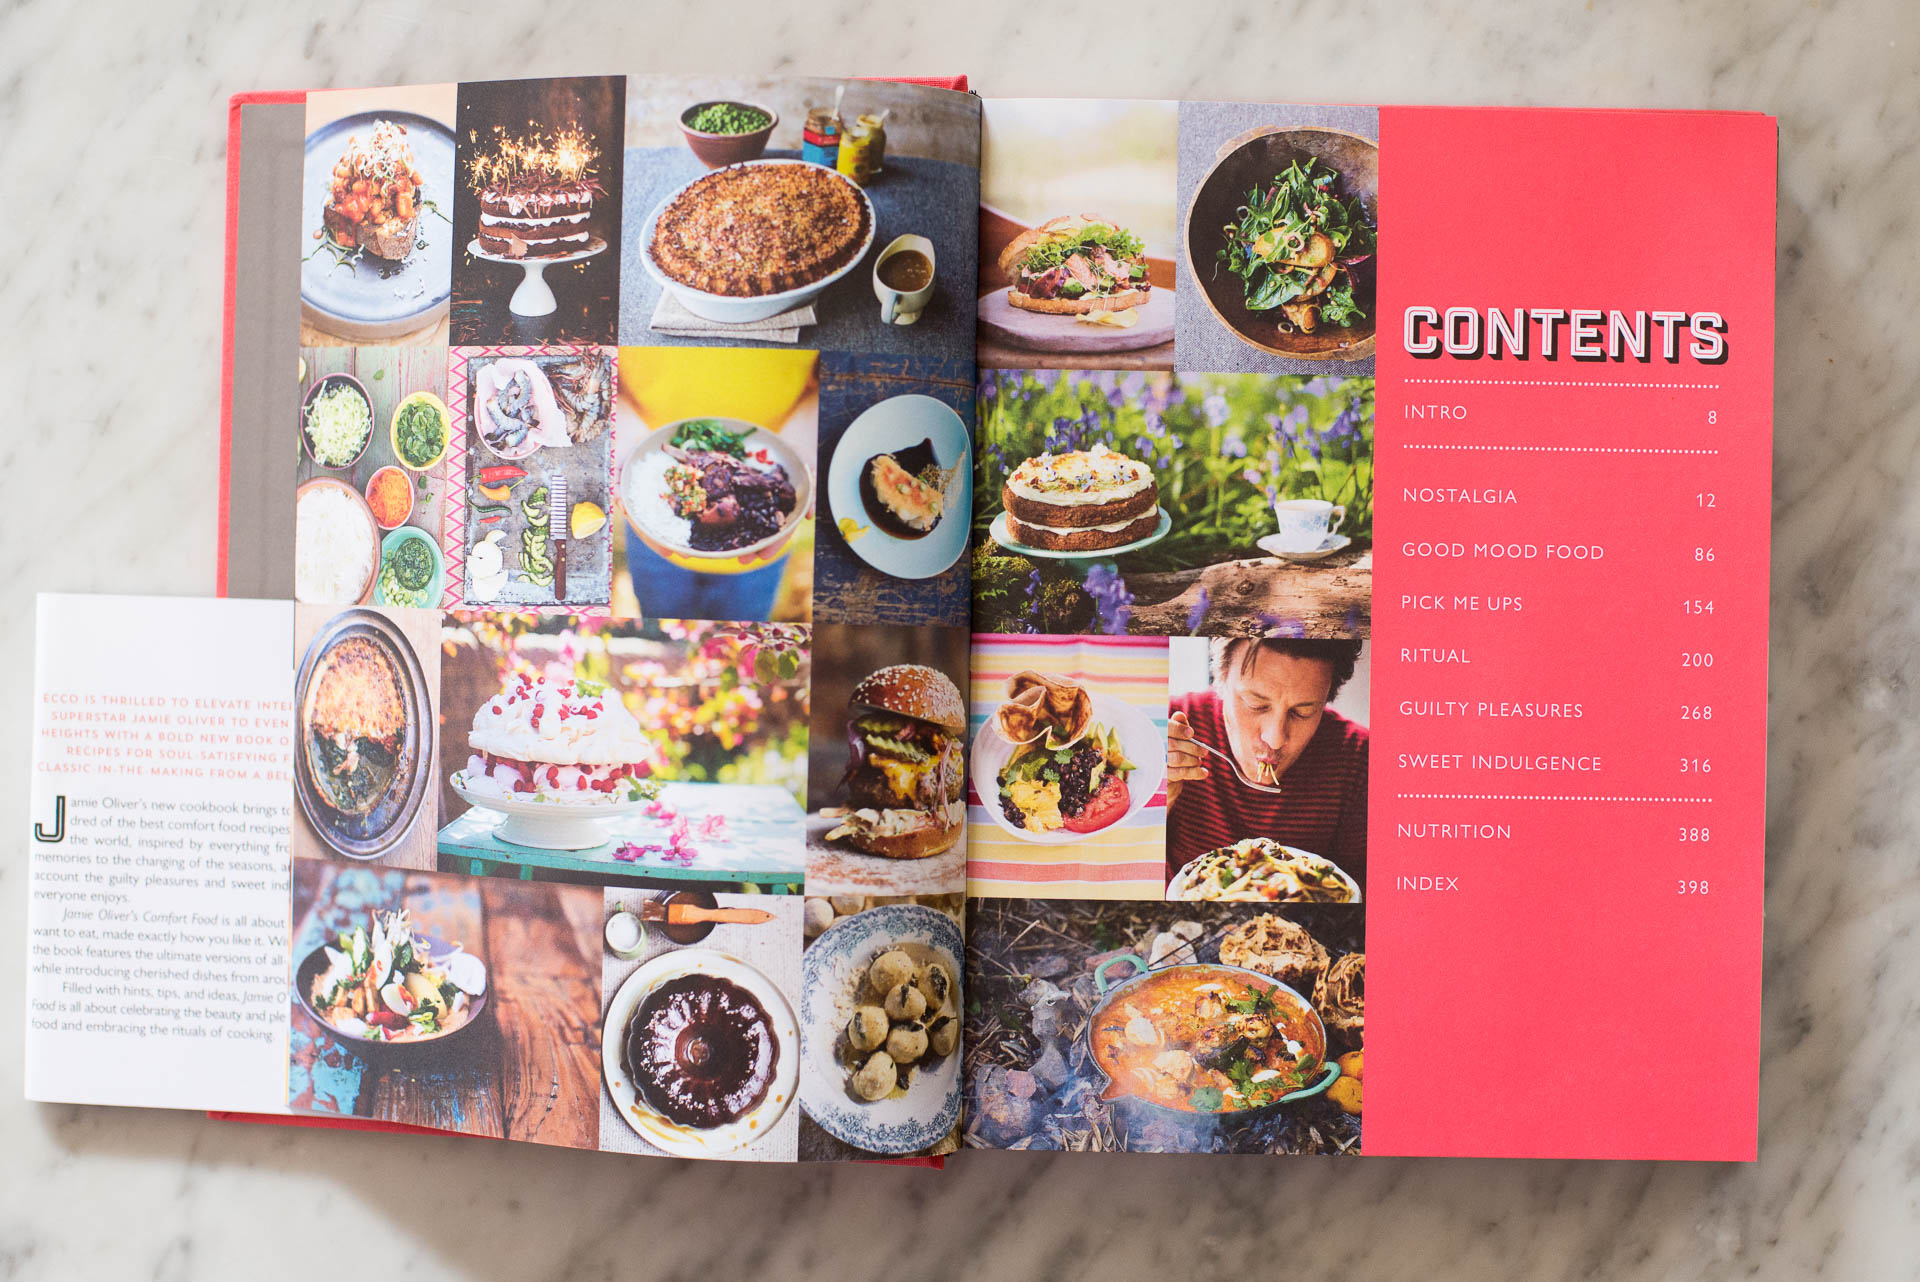
Comfort Food

Jamie Oliver


  • Nostalgia
  • Good Mood Food
  • Pick Me Ups

Cooking Method

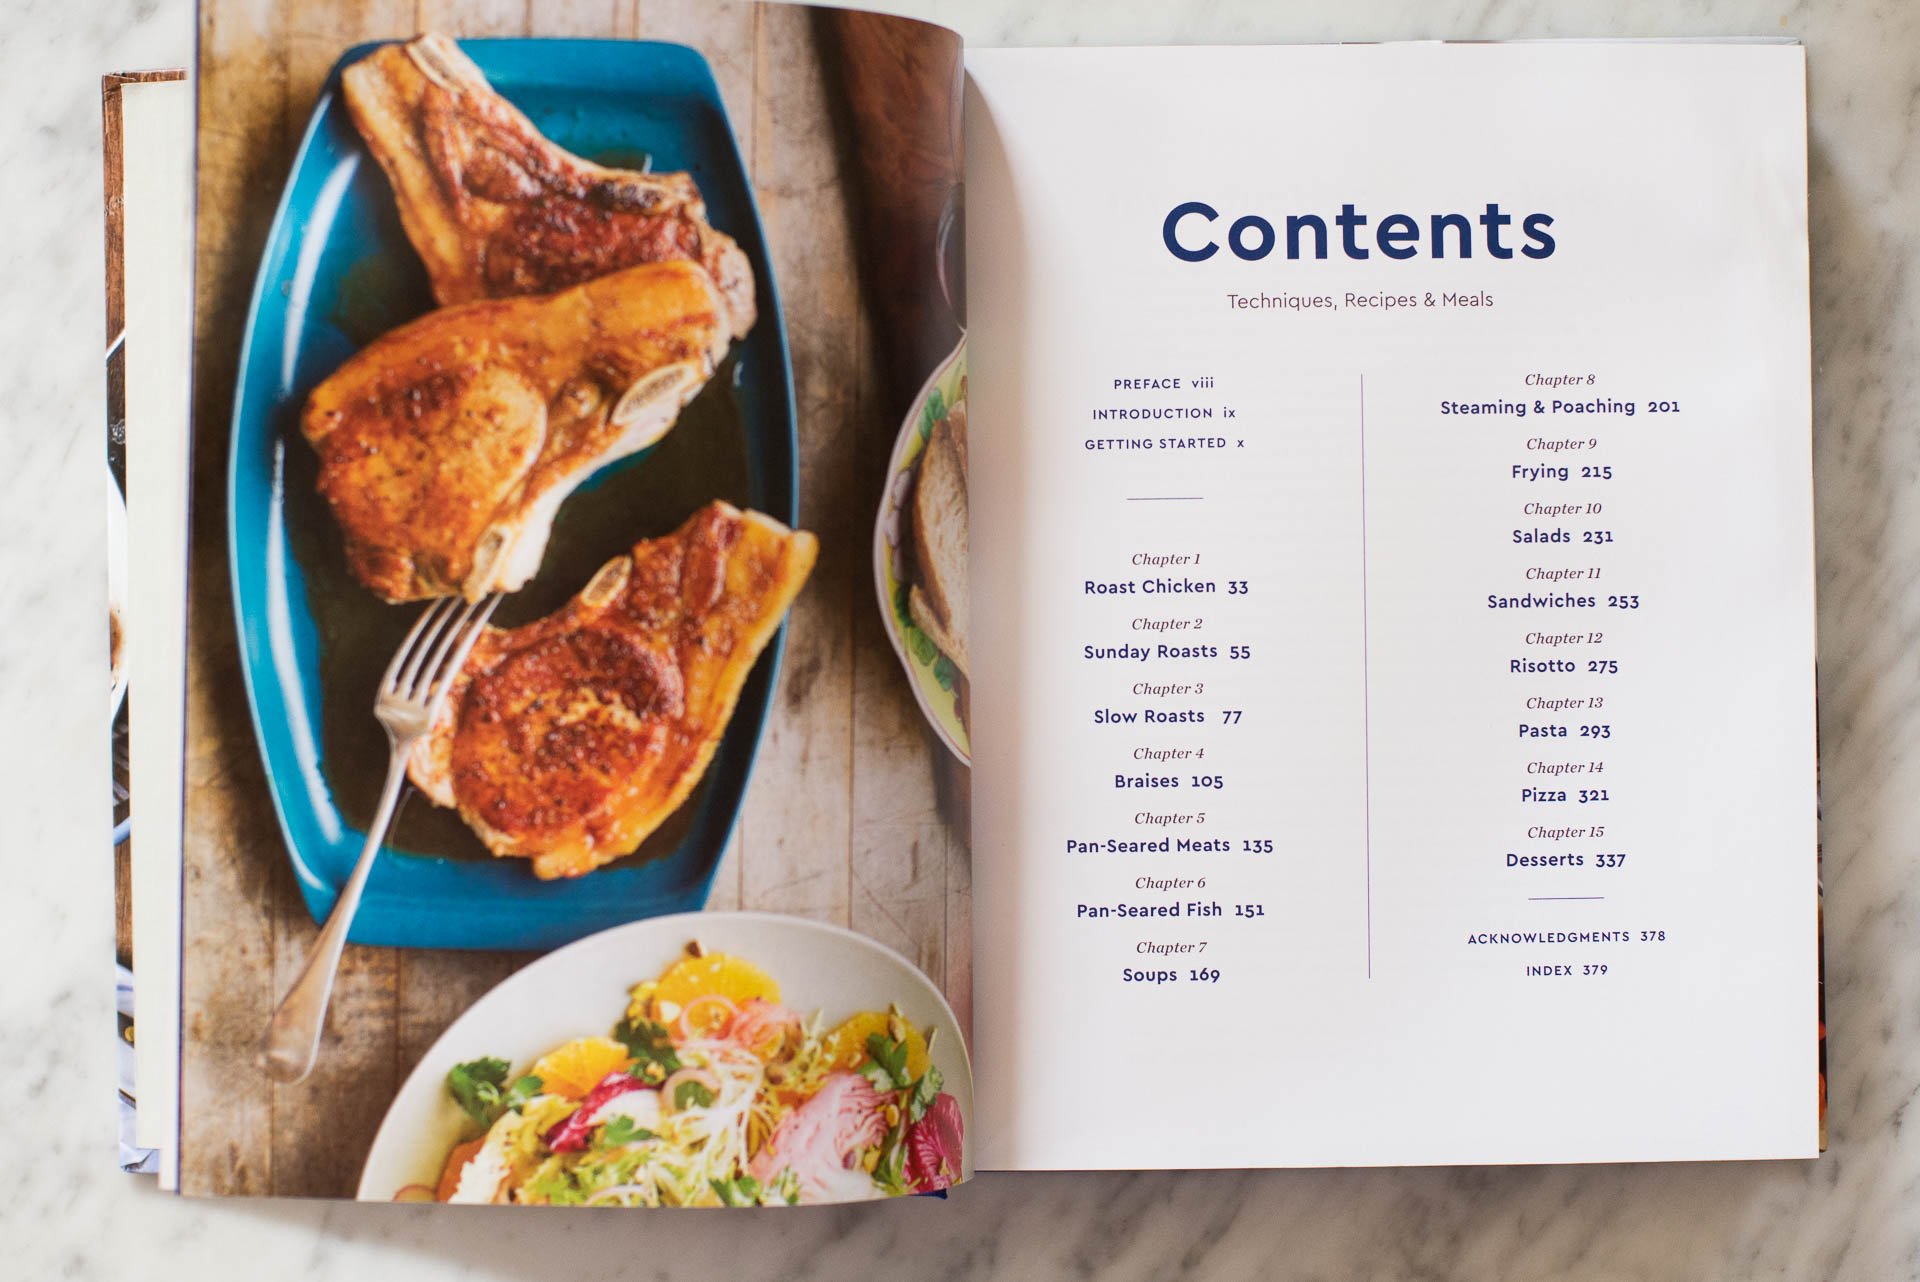
The Blue Apron Cookbook

The Blue Apron Culinary Team


  • Sunday Roasts
  • Braises
  • Pan-Seared Meats

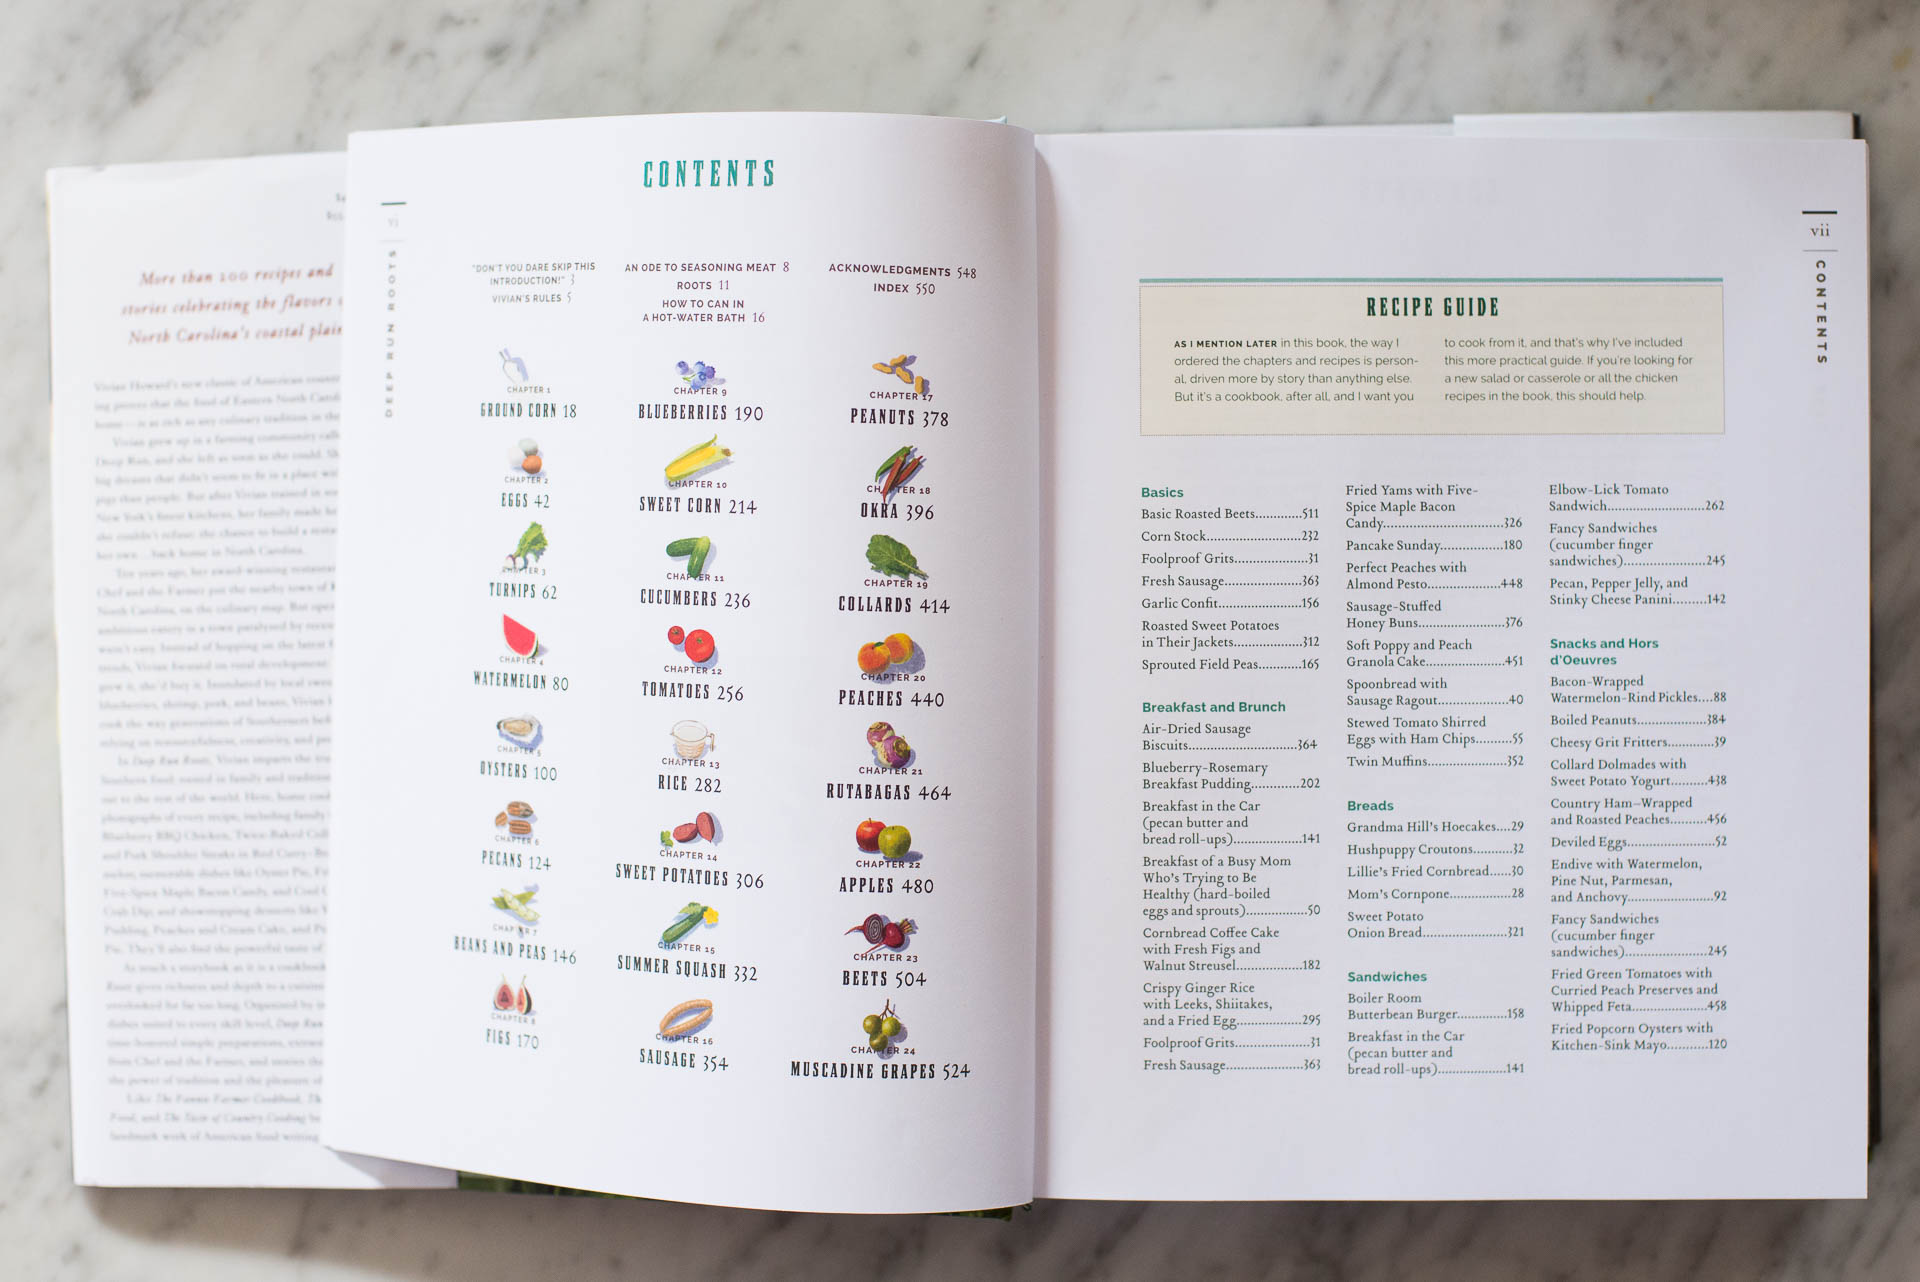
Ingredient

Deep Run Roots

Vivian Howard


  • Sweet Corn
  • Peaches
  • Eggs

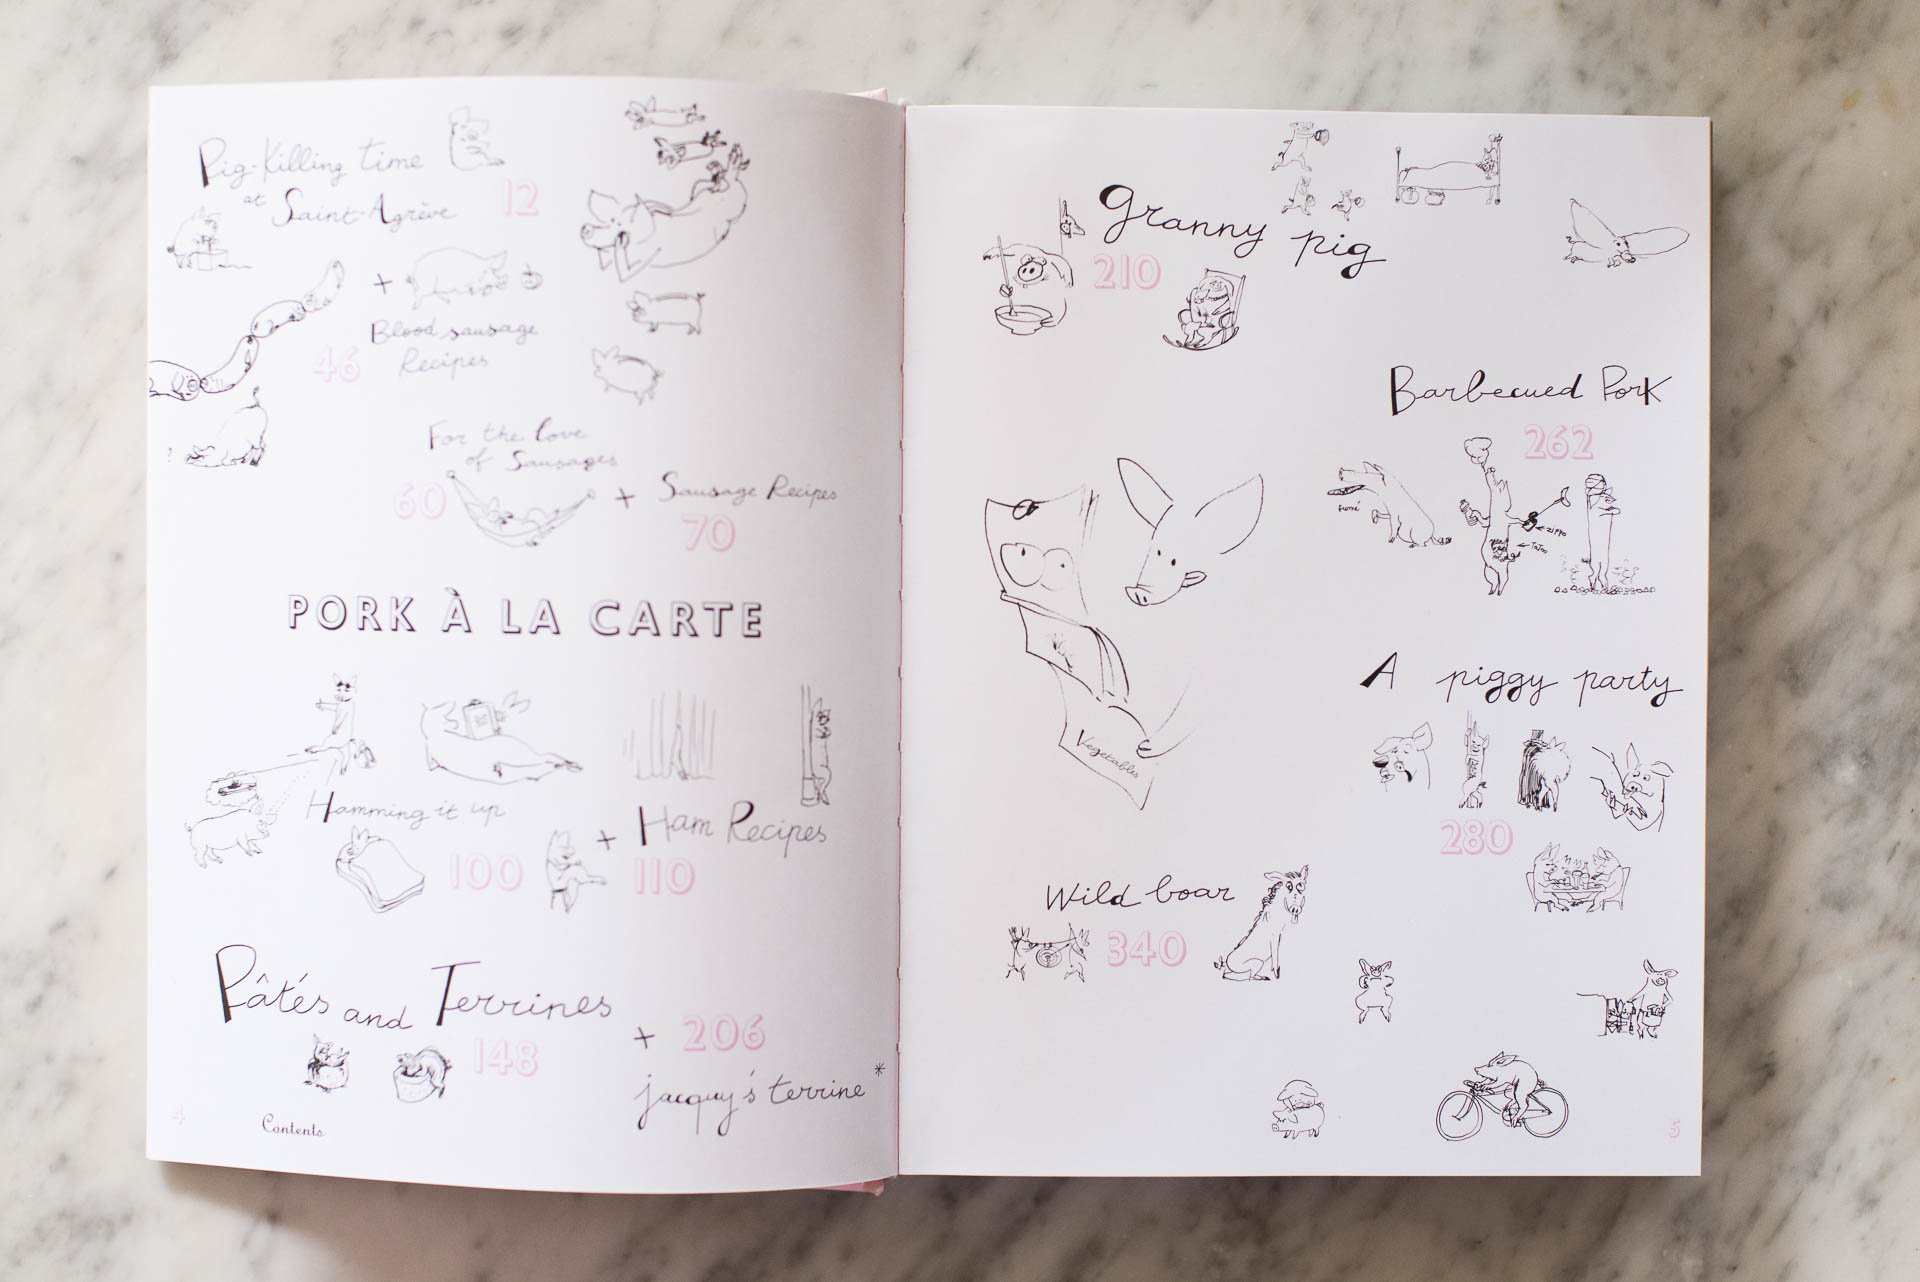
Variations on One Ingredient

Pork & Sons

Stephane Reynaud


  • For the Love of Sausages
  • Hamming It Up
  • Barbecued Pork

Defining Your Cookbook Organization

So what is right for your cookbook?

Let’s walk through a few criteria to help you figure out how you want to organize your cookbook.


Gut Reaction.

Is there one type of organization that immediately stands out for you? Do you always love when you flip through a cook book with a certain organization? If so, start with that one.

Your next step is to list out sample sections and determine how well the recipes you want to include fits into those categories. If you are getting stuck – for example, don’t know how your recipes fit into these categories – go back and adjust your list. You may want to switch out the categories or organizational structure.

To illustrate this further, if you love cookbooks organized by Time of Day but realize you have few lunch recipes you want to include, switch the categories to something more like Food Type and see if that better fits your recipes.


Simplicity.

Making a cookbook is difficult and time consuming. There are a lot of steps that you’ll have to include. Testing and typing up the recipes. Making the food and photographing the finished product. Selecting and Editing the photos. Designing the layouts.

So you don’t want to overcomplicate the structure. While you may love the idea of organizing it by Emotion, you don’t want the structure to further complicate the process. You don’t want to spend too much time deciding on the right categories and how meals will fall into them.

For example, if you’ll spend hours trying to decide if your grandmother’s potato casserole should go into a Family Heirloom Recipes section or a Comfort Food section…select another organizational structure to avoid having to make those little decisions.


What’s Missing.

Another way to determine how to organize your cookbook is to ask yourself, what do you find missing from other cookbooks you have in your collection? You have a desire to make a family cookbook; ask yourself why. Your motivation is probably because something is missing from yuor existing cookbooks. Use this reason to structure your book.  

One example, you love all of your cookbooks but are missing a collection of your family receipes. This informs you to make a cookbook solely of family receipes. Maybe you want to organize it by family members who reminds of you particular dish.


My Cookbook.


For my cookbook, I’m following a combination of all three suggestions.

Gut Reaction + Simplicity:  Time of Day or Food Type is my initial preference for a simple organizational structure.

What’s Missing: For me, what’s missing from the cookbooks I own, is a collection of our standard go-to meals and how these favorites could be arranged in meal plan format. My goal is to organize our favorite meals into weekend meals that could lead into easy-to-prepare weekday meals.

For example, I want to connect how braised short ribs on Saturday could lead to short rib tacos on Monday night. This would also help link ingredients to different recipes. If I’m using dill for a weekend meal, what are other simple meals I could make over the next few days so I’m not wasting the ingredient.

This will take a little more planning upfront but will make my cookbook more useful and relevant for our family.


Now I’d love to hear from you. Have you seen a creative way structure a cookbook that wasn’t mentioned above?


In One Hundred Pages Workshop Review

In One Hundred Pages Workshop Review

All month, we’ve been working on organizing our photo library. It started with getting them all in one location. This meant one folder or catalog for all of your photos. This includes all of your DSLR, mirrorless, film, underwater, and/or smart phone photos. Getting them in one location helps you realize your starting point.

The next step was to go through and delete your unwanted photos. The goal was at least 10% of your total library. Decluttering your library now makes it easier to go through the photos that actually matter.

Finally, it was time to show your photos some love and rate your photos. If you don’t have a rating system in place, now is the time to get one. Most programs have one – even the free ones. So discover your preferred method and start rating the photos you love. If you already have a rating system, it’s time to get caught up and rate photos you may have missed throughout the year.

If you’ve found this helpful, you’ll love my photo book design workshop: In One Hundred Pages.

In this workshop, we’ll go even deeper together to organize your library, select the right photos for a photo book and design pages faster than you’ve ever done. My exact process is broken down into clearly organized action steps to help you succeed. The results: a beautiful photo book you’ll treasure forever.

Sometimes it takes hearing from past participants to know if this workshop will work for you. I want to share a casual conversation I had with an In 100 Pages participant last year who finished her photo book according to the challenges laid out in the workshop. If you can relate to her story in anyway, I know you’ll benefit from this workshop and would love to have you join us.


If you’re ready to print your photos with ease, click here to get started.

Show your photos some love

Show your photos some love

Previously, our mission was to delete unwanted photos from our photo library. I was able to delete some photos here and there throughout the week and then spent the time during my daughter’s ballet lesson to delete 215 photos in about 45 minutes!

I shared my process on instagram stories. Make sure to follow me to see more insta stories as I work on printing my photos this fall.

After my full week of focusing on deleting the clutter, I was able to delete 595 photos from my library, exceeding my goal of 477 photos. How’d you do? Even if you didn’t quite meet your goal, any progress is progress you should celebrate.

Now that we’ve deleted the clutter, it’s time to show some love.

I want you to go back through your photo library and rate the photos you love. If you don’t yet have a system for noting your favorites, now is the time. Use stars, hearts, colors or tags to mark the photos that mean something to you.

My preferred rating system is to start by giving photos I love 3 stars. This week, I’m going to through my library and making sure the photos I’ve edited and or want to edit have this 3-star rating. And I’ll be sharing some of my faves on instagram.

Why does this matter? Rating the photos you love, makes it easier to know which photos you want to print when you’re ready.

To make this extremely actionable, my goal for you is to find 1 hour in your week and rate the photos you love.

Any progress you make in this 1 hour will help you immensely in the long run.

Cool? You’ve got this! Trust me when I tell you that these small actions will help you print the precious photos of your family.

It’s time to clear the clutter in your photo library

It’s time to clear the clutter in your photo library

Last week, I wanted you to organize your photos into one location. How’d you do?

My goal was to send out 2 rolls of film and import photos from my smart phone. Being completely honest, I didn’t import my phone photos until last night and shipped my rolls of film off about two hours ago. But you know what? This is the reason I put a date to finish my tasks. It may have been under the wire….but I did it!

Now, it’s important to see all of the photos you’ve collected in your 2017 catalog and figure out how many photos you’re starting with. My number is: 4,769 photos.

What’s yours?

This week, your challenge is to start deleting your unwanted photos.

Unless you’re incredibly diligent, chances are you have a number of easy photos to remove from your catalog. I’m sure you know the ones I’m talking about. Photos of your kids with half-closed eyes, missed focus because they occasionally move as you’re pressing the shutter or all the times you took 20 photos that all turned out to really be the same shot (yes, I’m guilty of taking plenty of those).

Let’s clear out the clutter in your photo library.

My goal for you is to delete about 10% of your 2017 photo catalog.

For me, I’m starting the week with 4,679 photos. So my goal is to delete 477 photos by the end of the week. Or 68-70 photos per day.

See how far you can get this week!

The essential first step to an organized photo library

The essential first step to an organized photo library

The last few weeks, I’ve been sharing how to move past common photo book obstacles. Most obstacles we face when it comes to starting a photo book are mental. Once you’re clear you want to make a photo book and you figure out how to fold it into your workflow, it’s time to get tactical. And that’s exactly where we are heading for the next three weeks.

If you’ve been a BTP reader for a while, you probably already know my favorite first step to organizing your library. But whether you’re familiar or not, it’s important to follow these steps year after year. The more you can make it consistent, the more likely it will become part of your process and feel less like a chore.

Your first action step is to get all of your photos from the year in one place.

It’s time to make sure you have every single photo taken in 2017 all in one photo library catalog.

The software program doesn’t matter. The point is that your photos are not scattered in multiple folders, programs, or computers.

Once you have all of your photos in one place, note the total number of photos you’ve collected so far in 2017. This is your starting point. And it will come in handy for your task next week.

While this task seems simple, it’s oh-so-important to do. And we all need simple tasks to easily complete to build momentum. 😉

My specific tasks for the week are to finally develop the two rolls of film from our summer vacation and to import my iPhone photos into my main LR catalog.

Even though I’ve been putting off these tasks for several months, it should only take about 30 minutes of effort – 20min to fill out the film development form and mail it to the developer and 10min to import my iPhone photos. I can definitely fit that into my schedule.

I’d love to hear from you in the comments below – what task do you need to put on your weekly to-do list based on this email? And how much time do you think it will take to finish this task?

I’ll see you next week with your next action step!

5 Tips to Make a Photo Book Even When Life Gets in the Way

5 Tips to Make a Photo Book Even When Life Gets in the Way

Over the past three weeks, I’ve shared some common obstacles keeping you from making a photo book. All to often, you know you want a photo book of your favorite photos….yet it seems impossible to actually make a photo book.  

You may have too many photo book ideas and not enough time. If so, you need to select one project that will be the easiest to complete or mean the most to you. Stay committed to this one goal and don’t let another enter your mind until you finish this first project.

Or, making a photo book may feel too much like a chore and not yet a habit. I suggested that you find a cue, a behavior that you are already doing (working in Lightroom), and then combine the habit you want to create (making a photo book). When you successfully combine the habit with the cue, make sure to reward yourself.

Or, you constantly have an inner voice telling you will never be able to finish a photo book. If this sounds like you, then you need to re-frame your mindset. Establish a positive voice that motivates you to finish your goal instead of preventing you. Turn the “I can’t….” or “I don’t have time….” into “I will make a photo book.” or “I want to find the time to print my photos.” This simple mindset switch is extremely powerful.

However, I also recognize that life is busy. It doesn’t just stop to let you work on something you want.

It is a constant battle for me to find small pockets of time to address my priority of printing my photos, especially among all of the other priorities competing for my time. And of course, making a photo book isn’t my only priority. It’s not even in the top five.

Yet, it’s still something that I want to get accomplished every year.  So somehow, I have to find a way to make it happen alongside all of the other interests and tasks going on in my life. Over the years, I’ve discovered how to make a quick, easy and beautiful annual photo book.

My full process is outlined in my workshop, In One Hundred Pages. It covers everything from getting organized to making a book, and yes, making sure it happens during one of the busiest times of the year.  


I want to share 5 tips on how to make a photo book even when life gets in the way.


1 – Make it a priority 


Making a photo book doesn’t have to be your top priority, however, it is important that you include it as a priority. I want you to think of making a photo book in a similar way to taking the photos. You pressed the shutter for a reason. You imported the photos into Lightroom (or whatever program you use) for a reason. You go through and edit or post to social media your favorite photos for a reason.


Don’t let that be the last step.


Print your photos! When you print your favorite photos in a photo book, you are making them accessible to your husband. To your kids. For the future. There is something special in seeing your photos curated together in a photo book.


2 – Get clear on the why


Once you’ve made it a priority, it’s important to understand the why behind making a photo book. Imagine what it will be like to have your kids go through your photo book when it comes in the mail. Now imagine your kids flipping through the pages ten years from now. What emotions are connected to that thought? How will it feel to see your kids going through your photos in a book. Hold on to that emotion and use it as motivation to keep you focused.


3 – Get clear on the how


The next step in keeping your photo book goal even when life gets in the way is to have a clear action plan for how you are going to achieve this goal. My workshop, In One Hundred Pages, outlines a clear map for you to follow to organize your photos and print them in a book. However, even if you don’t purchase the workshop, it’s important that you develop your own plan. Break down the steps you need to accomplish in order to reach this goal. Saying you want to make a photo book is too broad. Go deep and get specific. Once you understand how you are going to accomplish something, it’s more likely that you’ll actually see through the task.


4 – Establish your workflow


As you are defining how you will make a photo book, find ways to incorporate these tasks into an already existing workflow. Don’t think you have a workflow? I’m betting you do. If you take photos, import photos, edit photos, or share photos, you have a workflow.


Find out how you can insert printing your photos into the workflow you’ve already created. Go back to the Cue – Habit – Reward system and figure out what you can task you can add to your existing process to make it easier for you in the end. If you export a photo to share on Instagram, immediately export it again with the setting needed to print the photo. It can be as simple as that.


5 – Find an initial win – to build momentum


Finally, create a small, easy-to-accomplish task to have an initial win and build momentum. This first win is crucial in establishing the habit you want to create. It helps you realize that it’s possible to print your photos and it doesn’t have to be hard, stressful or overwhelming. 


Not sure what this looks like. Let me give you some examples:


Create a folder on your desktop with the name: “2020 Photos to Print.”


That’s easy, right? I’m serious when I say making a photo book doesn’t have to be hard. This first step is crucial and yet so, so easy. 


Ready to keep going? 


If you use Lightroom, create a preset to export photos you want to print directly to this folder at 300ppi and the long edge set to 12 inches. 


That is how simple I want you to keep these tasks to build momentum.


You can do this!


And if you want even more guidance, make sure to sign-up to In One Hundred Pages workshop!


Now is the time to get organized and make a photo book with your favorite photos from the year. Trust me, it doesn't have to be overwhelming or stressful. With my workshop In One Hundred Pages, I describe my entire streamlined process so you can make a photo book in less time and with less stress.

Photo Book Obstacle: Overcome Negative Thinking

Photo Book Obstacle: Overcome Negative Thinking

When you’re organizing your photos or making a photo book, do you ever have a small voice in your head playing negative thoughts? Something like: You’re never going to be able to go through all of these photos? Or you’re never going to finish this project? Or this is hopeless?

This is your mindset around printing your photos in a photo book. I want to spend time today addressing and adjusting your current mindset to make sure it’s helping you achieve your goals.

Now, maybe you are familiar with mindset…but if you’re not, here’s a story to illustrate. It’s been several years since we’ve gone through potty training in our house. However, we still go through times where we have to consistently work with our kids to be……well…..regular.

Recently, we were going through a dry spell 😉 and after several days of my daughter telling me she couldn’t go, I told her that she needs to change what she’s saying and to say “I can” instead of “I can’t”. I reinforced that she needed the confidence to believe in words “I can”. Sure enough the next day, she was able to go!

She was so excited to realize that changing her attitude could help her accomplish something. Simply by approaching the situation with a different mindset led to her success.

It’s this exact shift in thinking that you need if you keep talking yourself out of making a photo book.

Start paying attention to what you think about your ability to print your photos in a photo book.

Do you tell yourself that you have too many photos to ever get organized to print them?

Do you make excuses about why can’t finish a photo book project?

Do you immediately tell yourself you don’t have the time it will take?

Once you notice the thoughts you have, I want you to shift the language to be positive; to reinforce that you can make a photo book. Finally, I want you to have the confidence in the words. This voice should stay with you throughout the entire process. You can do this!

As I’m sure you already know, it’s not enough to simply say you can do something. You have to have the action to back it up.

If you need help with the action or implementation, I developed a workshop, In One Hundred Pages, to help. This workshop covers what you need to easily and simply start -and finish- a photo book. 

Now is the time to get organized and make a photo book with your favorite photos from the year. Trust me, it doesn't have to be overwhelming or stressful. With my workshop In One Hundred Pages, I describe my entire streamlined process so you can make a photo book in less time and with less stress.

Creating a Photo Book Habit

Creating a Photo Book Habit

Consistently making a photo book comes down to creating and reinforcing habits. For those who can never seem to make a photo book, it’s because it hasn’t become habitual for you yet. So in today’s email, I want to help you figure out how to make printing your photos a habit.

One method I learned from Charles Duhigg’s book, The Power of Habit, is to pair a habit you want to create with a habit or action that already exists. Then you need a reward for whenever you successfully complete the behavior you want. This is summed up as:

To illustrate how this works, I want to focus on a habit I’ve recently created in my life: consistently working out. Even with the best of intentions, it’s always a challenge for me to incorporate working out into my daily routine. So….I thought I would test out the Cue – Habit – Reward process.

Every morning, I look forward to my cappuccino. And every morning, we have the craziness of getting the kids ready and out the door for school. Right away, I have a reward (cappuccino) and something that is already being done (getting the kids ready for school). So I sandwiched the habit I wanted to create (working out) in between.

Once my kids are out the door, I start strength training exercises I can easily do from home. After I’ve gotten my heart rate up and finished a few push-ups and lunges, I drink a tall glass of water. Now, I’m ready for my cappuccino! The best part is, I’ve finished the action I’m most likely to put off, before 8am.


Now let’s look at how this could work for making a photo book. As you know the trick to a faster photo book is to keep your library organized with photos tagged (or rated) and edited. So for this habit, I’m focusing on organizing my photo library.


 Cue:

Select a time or existing habit already present in your life. Try to pick an activity that is consistent (recurs weekly or monthly) and has some flex time associated with it (either before, during or after).

One example in my life at the moment: my daughter’s ballet class on late Saturday morning. While she’s in her lesson, I have about 75 minutes of free time. In this example the cue is when my daughter heads into her ballet practice room.

Habit:

Organize your photos with the purpose of printing in mind – tagging/rating/editing.

While my daughter is working on her positions, I open up Lightroom and go through my library. I delete, rate, and/or tag photos in the Library module. Then I filter the photos I want to print in the Develop module and go through my quick edit process.

Reward:

Once you’ve spent time organizing your library, make sure to reward yourself. The key is to make sure this happens right after you finish the habit.

After ballet class, I take my daughter out to a girls’ lunch to celebrate.

Here are some other examples of creating a Cue-Habit-Reward process for organizing your photos. 

Cue: The opening screen of Lightroom (or your preferred photo organizing/editing program of choice).

Habit: Spend at least the first 5 minutes tagging/rating/editing the photos that you want to print.

Reward: Once you finish working on the photos you want to print, then you can go back to the reason you opened Lightroom.


Cue: Inserting and importing photos from your camera.

Habit: Immediately delete unwanted photos. Tag/Rate photos you want to print. Edit only those photos.

Reward: A small piece of dark chocolate. (Or pick any other treat you keep around the house.) A good  trick is to only have this reward when you import photos and immediately prep them for printing.

The key is to find something that will fit into your routine, your lifestyle. Use this example as inspiration to brainstorm potential cues and rewards that you can use to create a photo organizing habit.

To make this habit work, you need to really focus on the cue – habit – reward for at least the first 30 days. I know….it takes mental effort; however, the more you can pay attention to it in the beginning, the more likely you’ll create a habit that will stick for the long term.

Now I’d like to hear from you! What Cue-Habit-Reward are you planning to try for at least 30 days? 

Now is the time to get organized and make a photo book with your favorite photos from the year. Trust me, it doesn't have to be overwhelming or stressful. With my workshop In One Hundred Pages, I describe my entire streamlined process so you can make a photo book in less time and with less stress.

Selecting a Font to Match your Photo Book Vision

Selecting a Font to Match your Photo Book Vision

Last week was the season premiere of Game of Thrones on HBO. Whenever I heard people talk about the show, I was not that interested in it. Didn’t seem like my type of show. But….last year when my husband and I had watched all of our shows in our queue and looking for something new, we thought we’d give it a try. I wasn’t expecting much. Just a show to have on while I worked in the evening.

Turned out, I got sucked in. While I don’t follow all of the details, I’ve been surprisingly gripped by the storylines and beyond gorgeous scenery. To celebrate the start of Season 6, I wanted to examine how this show, and others on HBO, align the font characteristics in the title to the vision and style of the show.

Let’s look at the following shows:

  1. Game of Thrones
  2. This Week with John Oliver
  3. Veep
  4. Girls
  5. Togetherness
  6. The Jinx

They all have a very different style and way of showing the title at the beginning of the show.

1) The Game of Thrones title appears after the long initial sequence. The font itself is a relatively simple serif font. The “G” and “T” are slightly larger and the “T” is asymmetrical top bar, as the right side extends the entire length of the word. The “O” adds the uniqueness to the font style and gives the font a more historical feel.

2) Last Week Tonight with John Oliver is a perfect example of a clean and modern font. The sans serif, centered font has all of the letters in black against a white background except for his name which is in a muted yet bright red color. To make the title a little more interesting, “Week” is written backwards to express a little bit of attitude and the desire to flip the news stories of the week by telling it from a different perspective – with humor from a Brit.

3) The hilarious show Veep uses a traditional serif font very similar to Times New Roman. The designer used a star instead of the space in the middle of the “P” to provide a nod to the political nature of the show without it being too bombastic.

4) With the show Girls, the title always appears after a couple of scenes in the beginning and then full screen a black background with the title all in caps and displaying a different color every week. I love the typeface of the title. It has a early to mid-century modern feel to it. The fact that it’s all caps, a bold color and takes up most of the screen mimics the show’s ability to unabashedly portray twenty-somethings in New York City as they sort through employment, relationships, and trying to find themselves.

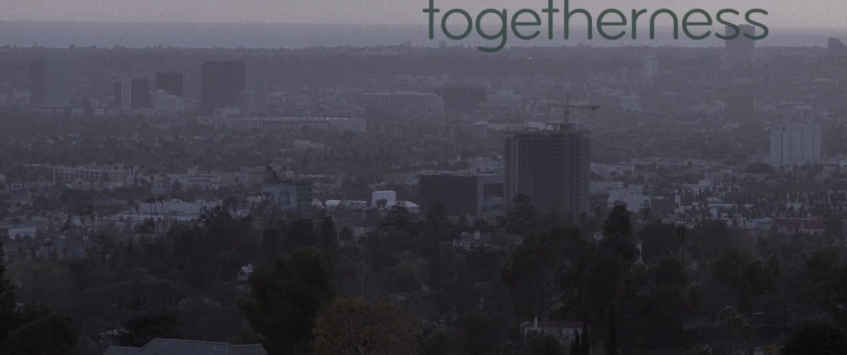
5) The vibe of Togetherness is more understated than a lot of other dramatic shows which is evident by how the title is displayed over a scene. In this particular example, the color of the font is so similar to those in the scene there is complete unity. Here’s another example of a sans serif font but the letters are more rounded than the letters found in “Last Week” or “Girls”.

6) Oh, The Jinx! What a show. As seen in this electrifying still, the title of the show is featured prominently over a scene in the opening sequence. The title design features a common element to make “The” smaller and set in from the main word of the title. Also, the two words appear to have a slight transparency to them. This design tweak adds to the sense of confusion ever present throughout this documentary.

Now, how does this translate to your photo book design? Well, as you probably already know, defining your vision is super important for me and a huge first step in making a photo book. It helps you stay focused in your photo selection and gives you a direction for establishing design parameters for your book. This is also true of the graphics, color and fonts you decide to implement. In this blog post, I’m sharing how to select a font style to match your design vision.

First, you should already have a clearly articulated vision. To help keep you focused, decide on three essential words to define your vision.

Second, find examples on pinterest or in magazines the align your vision. Make sure you pay attention to the particular font style used. You are looking for examples where the font matches the overall feel or vibe of the image/graphic. Ask yourself, why?

  • Is it a traditional or modern typeface? 
  • Is it bold or understated?
  • Does it involve color? 
  • What about the text makes it feel cohesive?

Third, search through your font directory (for example, on apple computers use the Font Book application) and use the arrow keys to find a style that suits your vision.

If none of the font styles seem to fit, try looking at font directory sites like font squirrel or dafont for more ideas. They usually have categories that make it easier to narrow your selection.

Finally, determine if there is a small element or graphic twist you can use in your text. This can either be assigning a color to a specific letter or word in your text, adding a glyph (special character), or inserting your text in an unusual way.

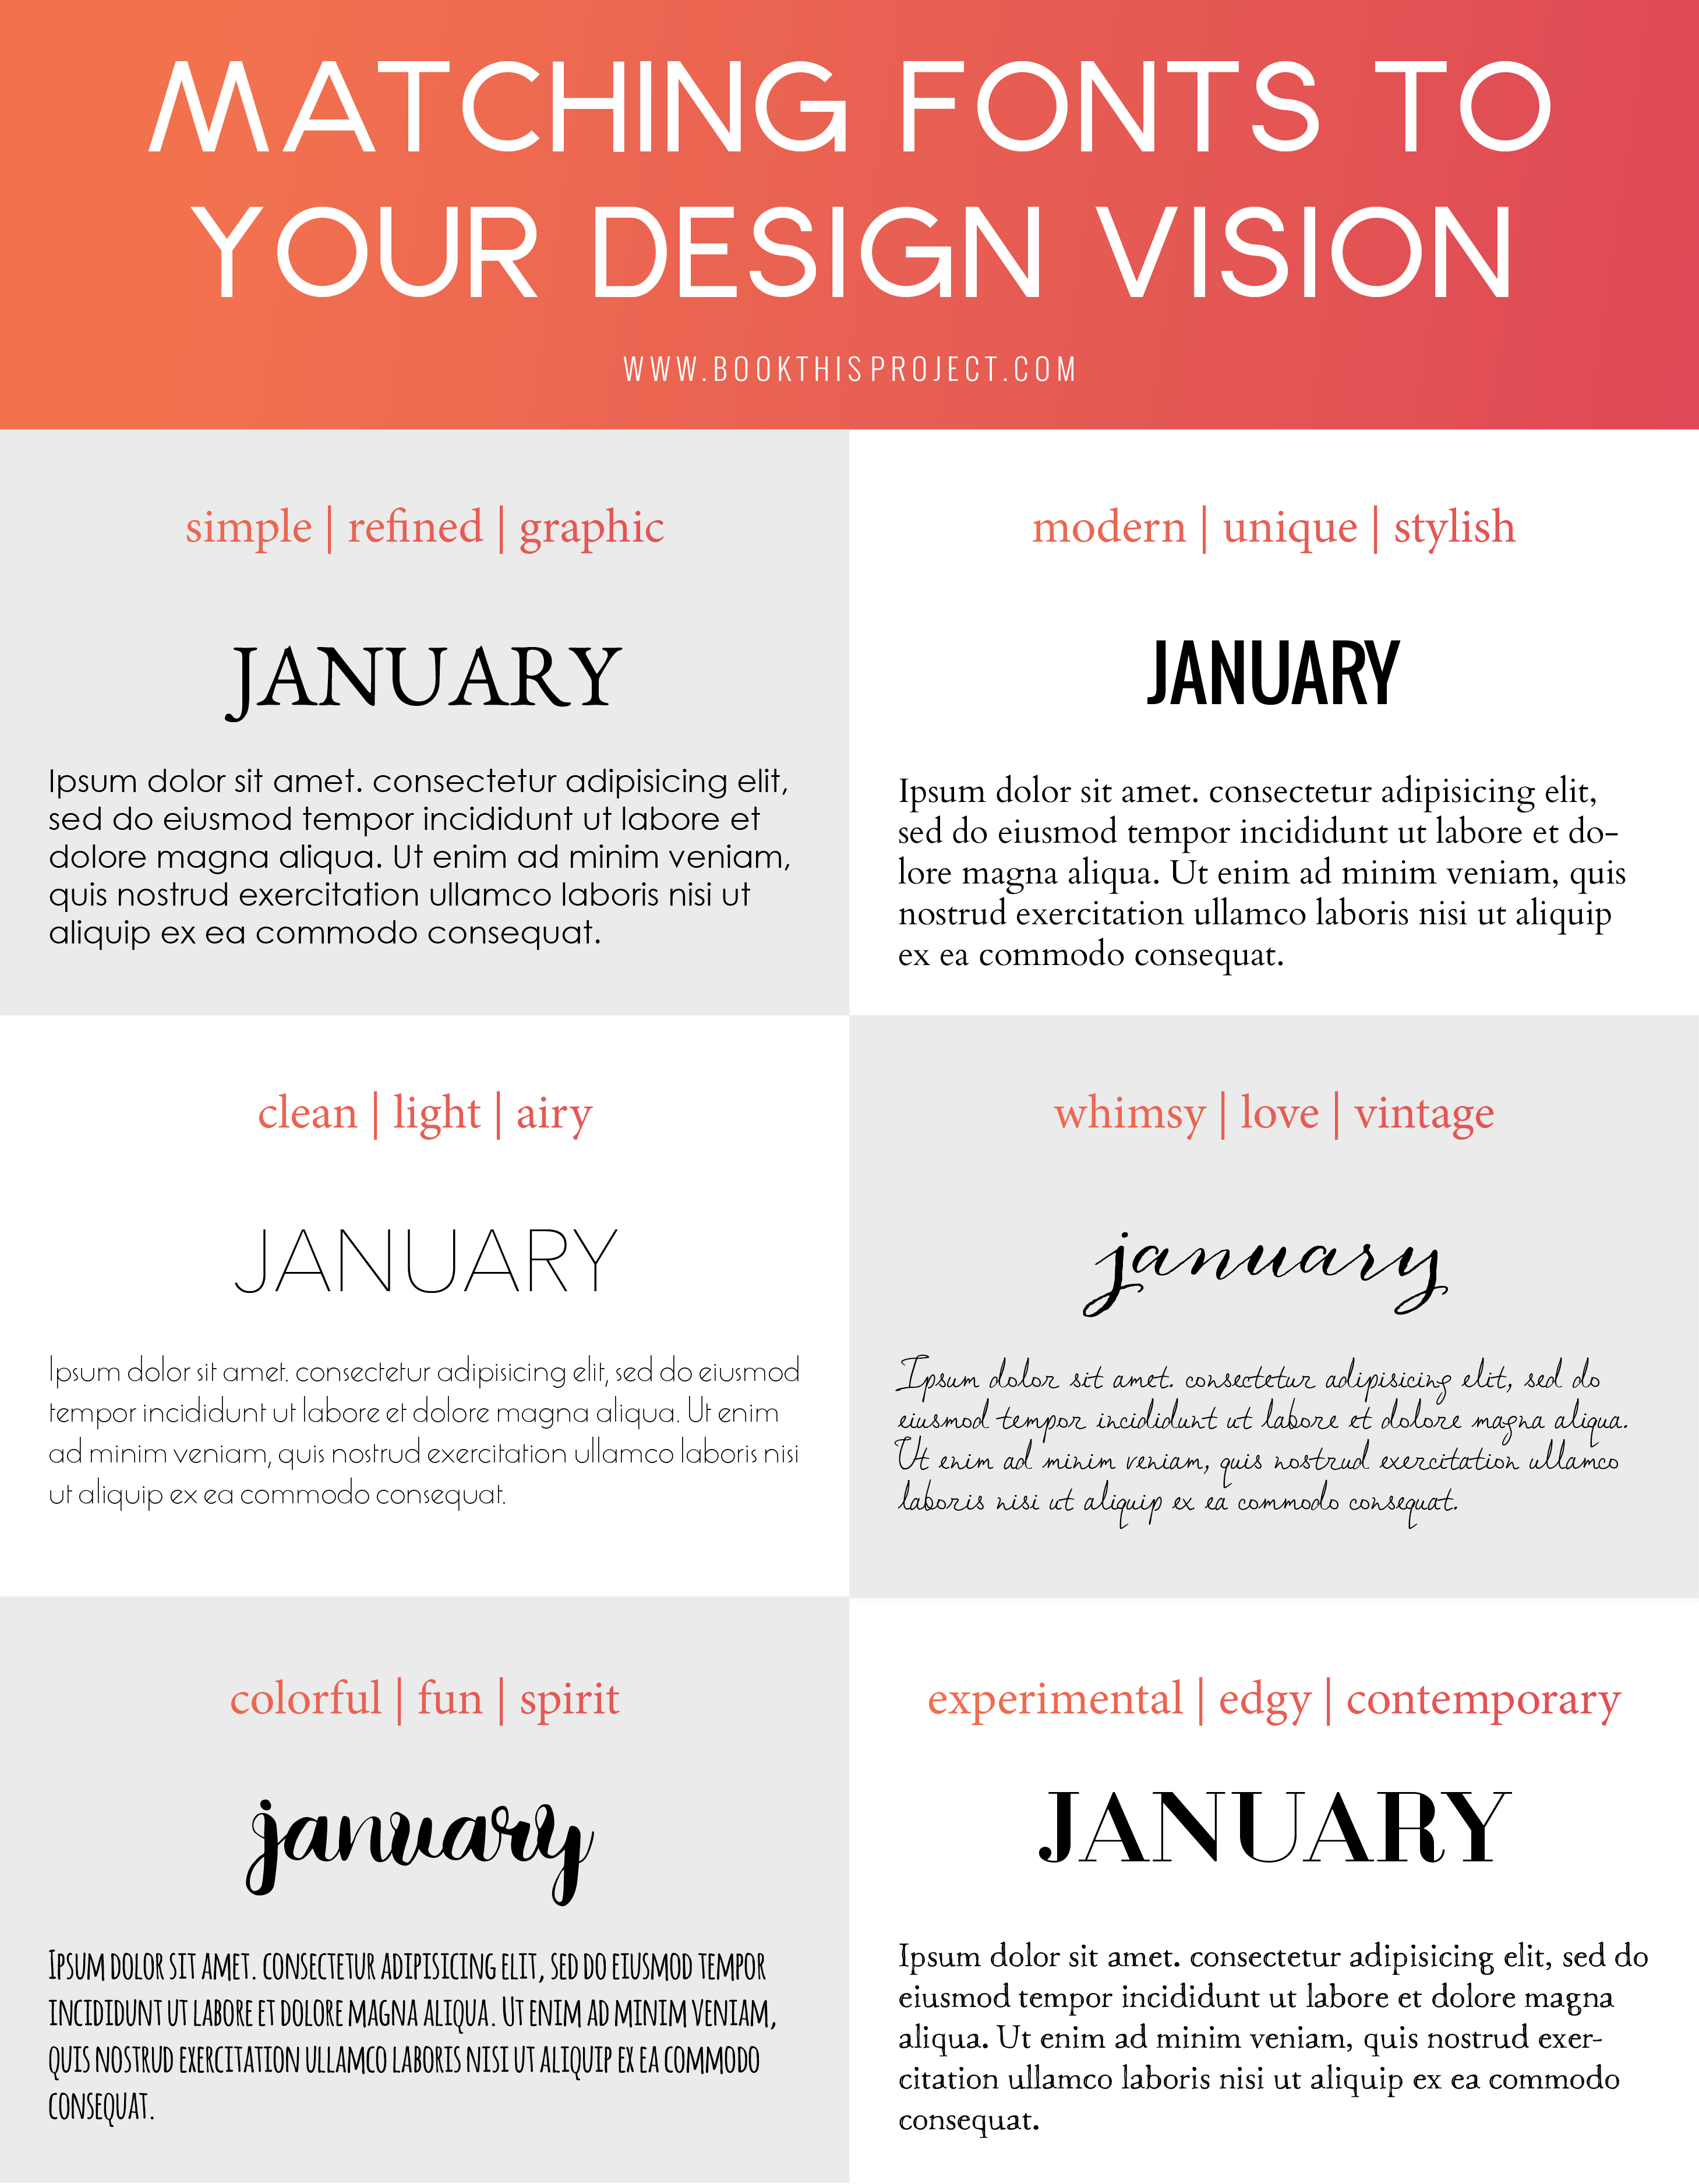
To get you started, I’ve assemble some common photo book design themes and paired a title and body font style to match. Of course, there are many different directions you could go, but hopefully this helps you see how I begin to pair fonts with a particular vision.


Get a PDF download with the links to the fonts shown above + find out my go-to favorite serif, sans serif and handwritten fonts: Simply add your name and email here:

And of course, I’d love to hear from you! What three words define your vision for a recent book design and what is the font style you selected? Leave a comment below.