fbq('track', 'PageView');
The Easiest Way to Make a Vacation Photo Book

The Easiest Way to Make a Vacation Photo Book

Let’s say, you want to make a photo book of all of your favorite photos. But…..you’ve never had great luck at finishing a photo book.

You start off really excited. Select some of the favorite photos from your vacation. Open up the design software but then you quickly become exhausted with creating the layouts for each spread. Or you get tired of using the typical layouts. It makes your photo book look more scattered than you want.

So you give up.

Which is so sad because these photos are documenting your vacation. And in my family, our summer vacation is the highlight of our year!

Your photos deserve to be printed. Once printed in a photo book, you’ll always have this document to refer back to, year after year. Imagine looking at all of your vacation photo books, ten years from now. It will be a blast to look back through the memories you had as a family every summer.

I want to show you that there is an easier way to compile your favorite vacation photos into a beautiful streamlined photo book. It starts with a template.

In particular, I want to show you how you can adapt one of my annual photo book templates to become a smaller, more focused vacation photo book. Take a look!

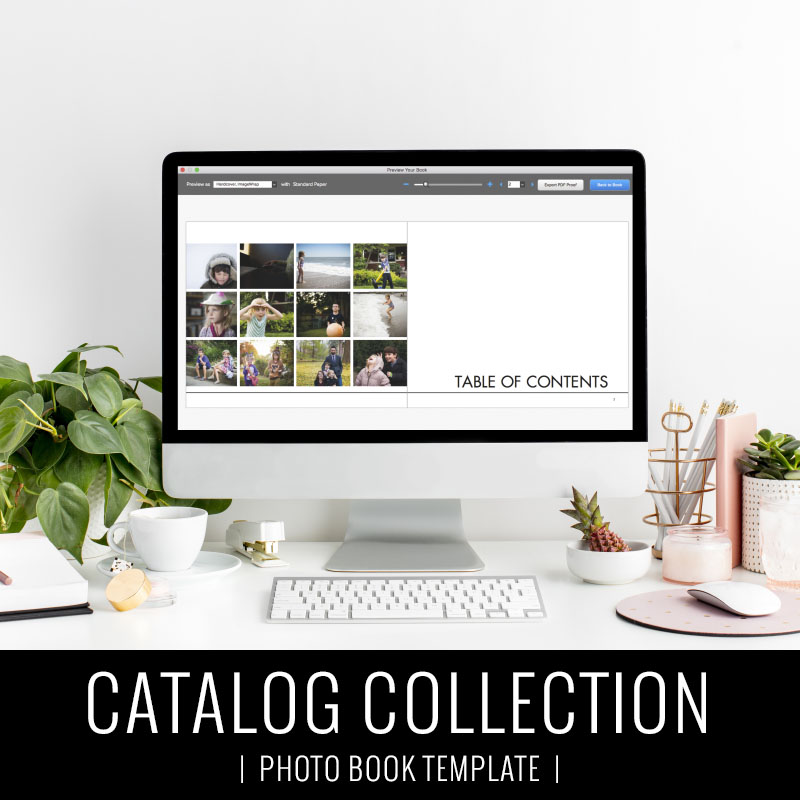
Ready to get started!?!? Export your favorite vacation photos to a folder on your desktop and purchase my annual photo book template here.

Using Textflow in BookWright

Using Textflow in BookWright

Usually, if I’m going to add text to my photo book, it’s going to be as a title on the page or a caption to a photo. But that doesn’t work for everyone. Some people want to incorporate longer pieces of text – such as long-form journal entries – combined with photos into a photo book. Recently, a reader reached out to me asking how to accomplish this using BookWright. While it can definitely be finicky, BookWright does have an autoflow text feature. 

What exactly is autoflow text?

 It means that there is one text that can be sub-divided into various text boxes throughout your entire photo book. And this isn’t accomplished by copying/pasting different sentences into each box. Instead, if you want to edit the text, you’re editing one text file – even though it appears in several boxes and pages, throughout your book. 

This allows you to consistently edit the features of your text at once yet customize how much of the text you want to appear on a particular page. 

So let me walk through how to incorporate a larger piece of text into your photo book. 

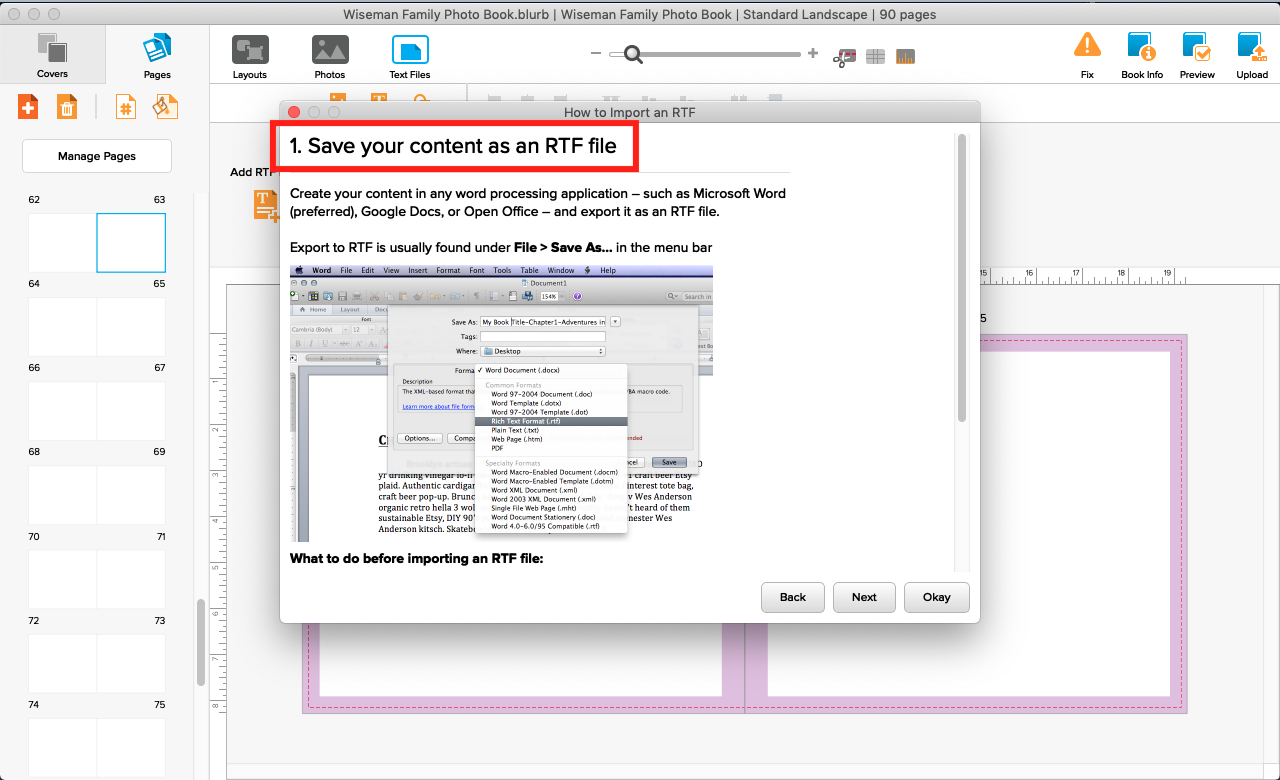
STEP 01: SAVE YOUR TEXT AS AN RTF FILE.

The first step is to convert your text file into an RTF file that can be read / used within BookWright.

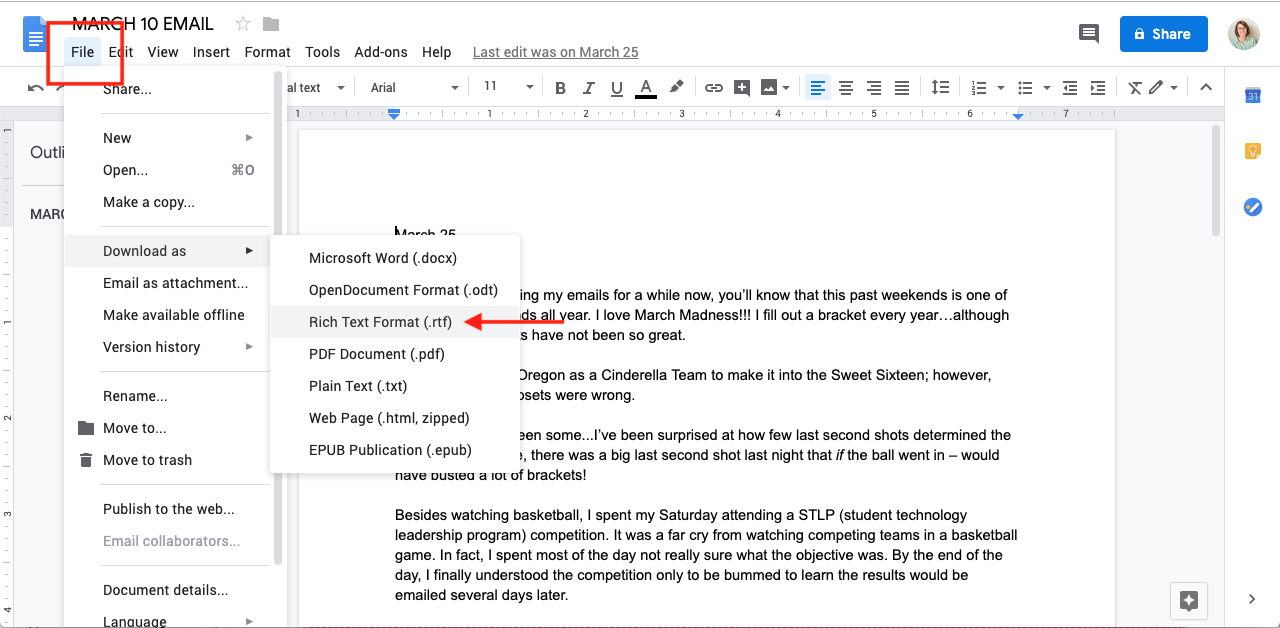
For this example, I’m using a text file I created for one of my recent emails, which is a Google Doc file. 

To transform this google doc file into something BookWright can use, simply head to the File menu and select “Download As” then select “Rich Text Format (.rtf).” This will automatically download your text into your Downloads folder. 

Follow a similar process if you are using Microsoft Word or Apple Pages. 

Important Tip: 

I recommend writing, reviewing and editing your entire text before converting it into an .rtf file. It will be so much easier to edit your text in the word software program you are using, rather than trying to edit in BookWright. 


STEP 02: IMPORT YOUR TEXT INTO BOOKWRIGHT

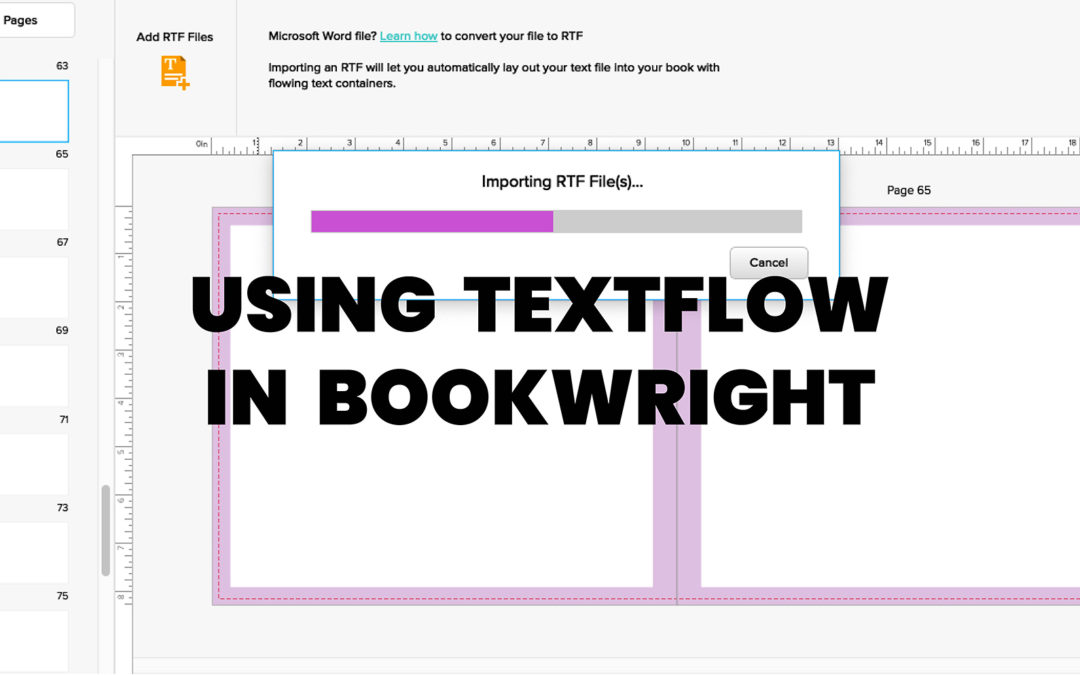
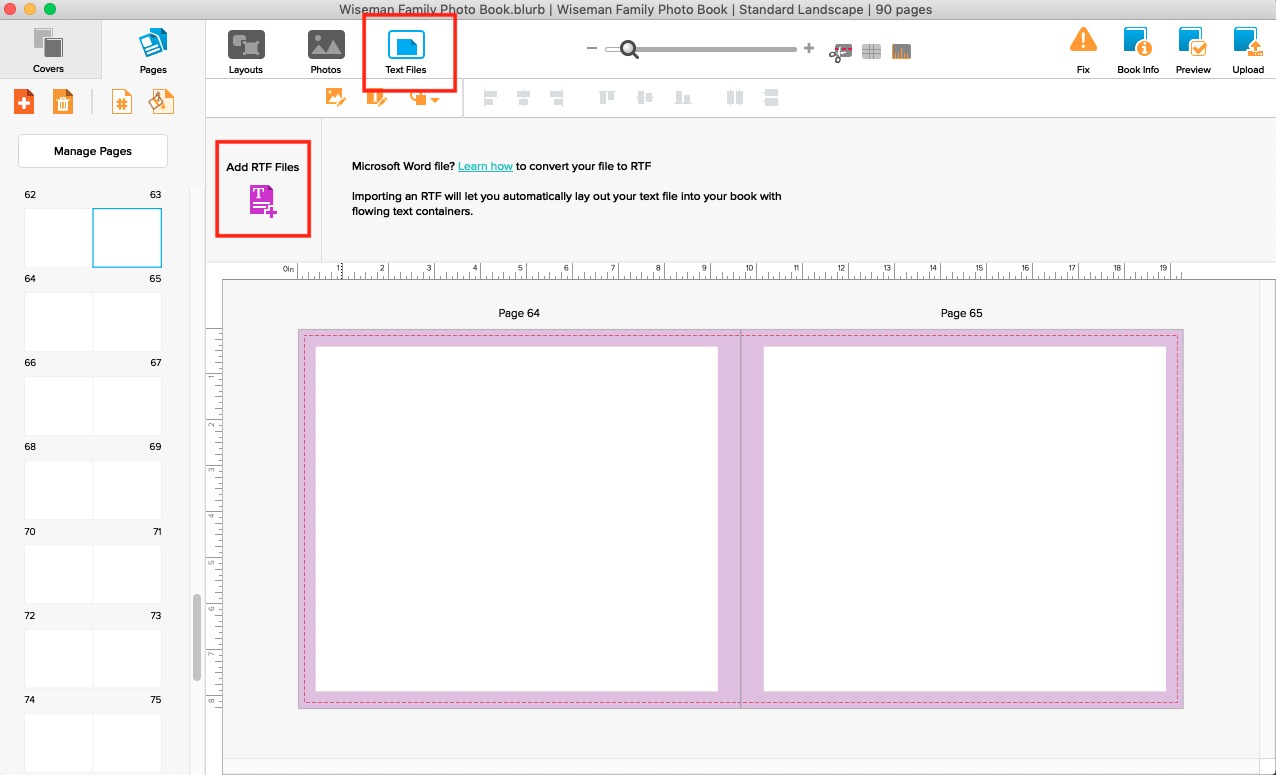
The next step is to import this text file into BookWright. You’ll want to make sure that you are in the Text Files tab of the program. 

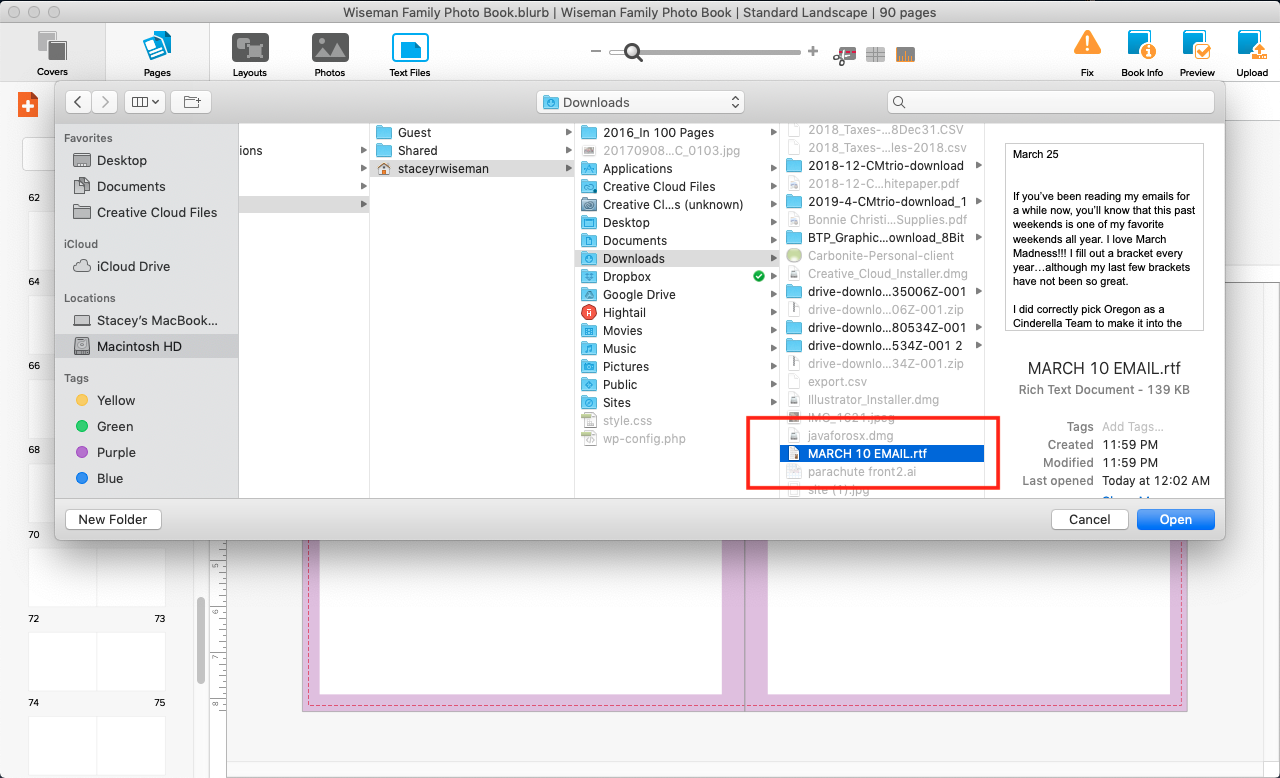
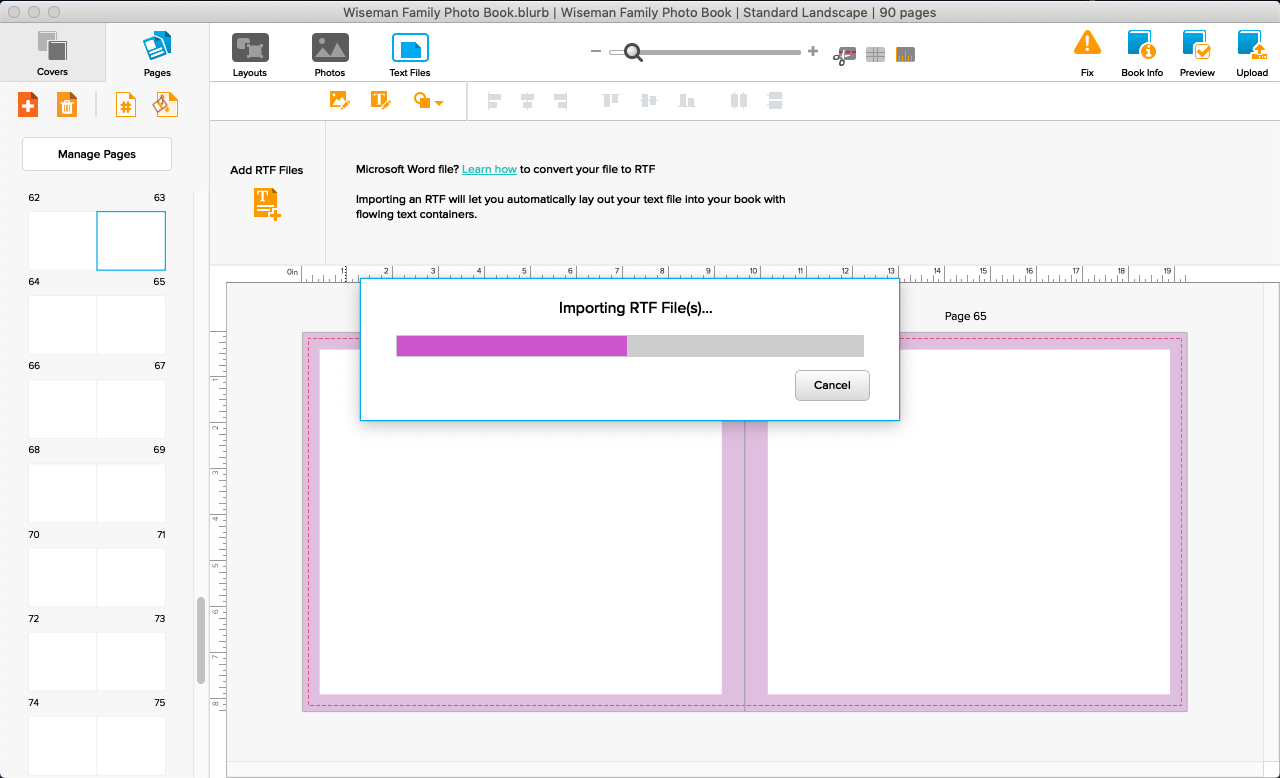
Once you’re here, select “Import RTF Files” and then locate the file in your Downloads folder, or wherever you saved your text file. 

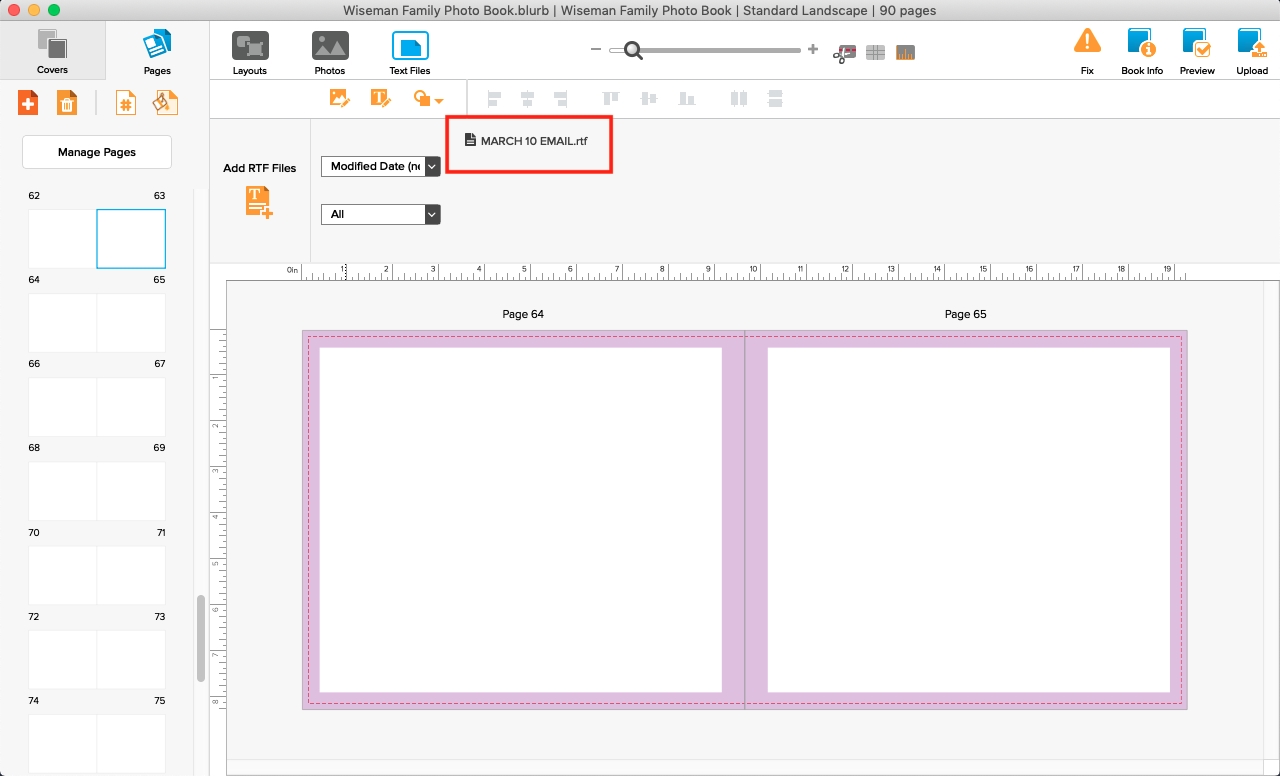
Once the file has been imported, you’ll see the text file here (rectangle), just as you would with photos (in the photos tab). 

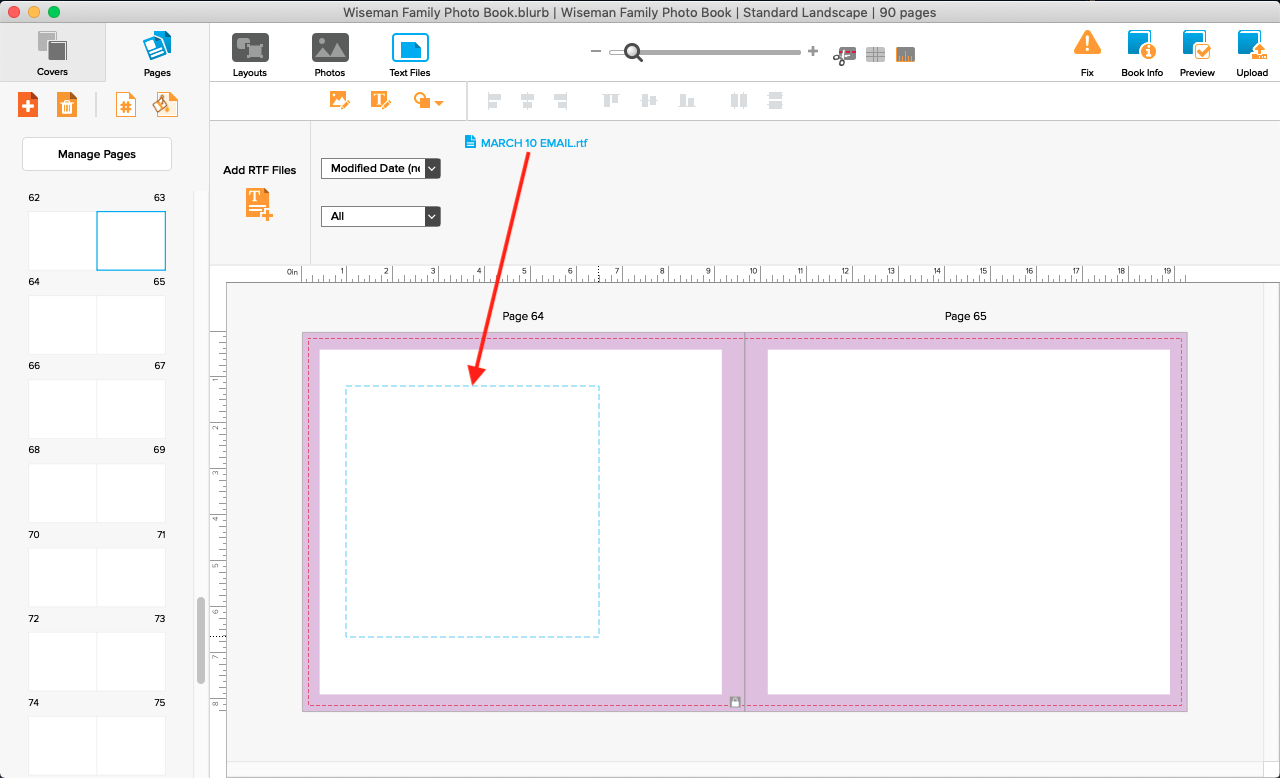
To insert the text into a text box on the page, all you have to do is drag and drop the file onto the page you want. 

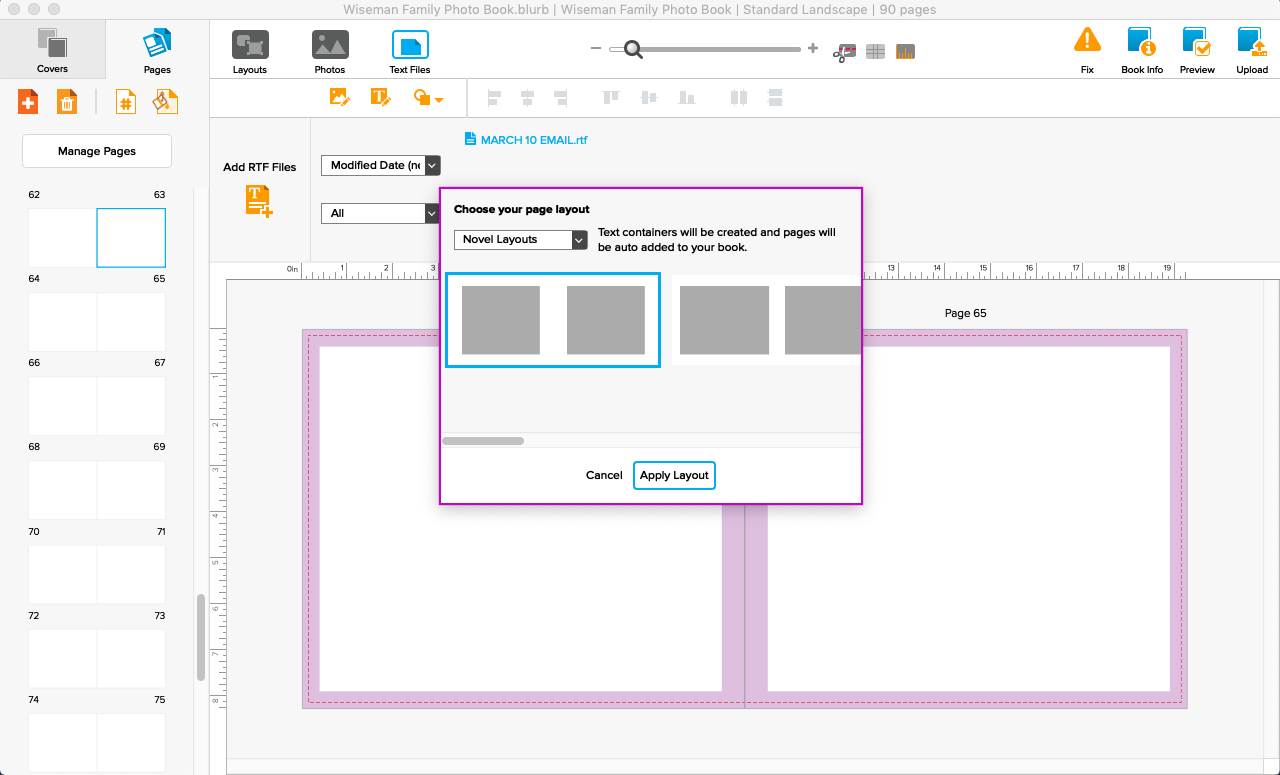
A dialogue box will appear asking what type of layout to insert the text file into. I select the standard one text box per page. 

Once the text is placed, you can always adjust the size and location of the text box. This initial layout is just to get you started on the page. 

Important Tip: 

Since each file you import shows up as a separate entity, one thing you can do is create multiple files for the text you want to include in your photo book. This allows you to finish a text completely and add it to your book before the full text is finished. For example, if you wanted to include a journal entry (2-4 pages of text) for each month, treat each of the entries as separate rtf file. 


STEP 03: ADJUST THE TEXT BOXES.

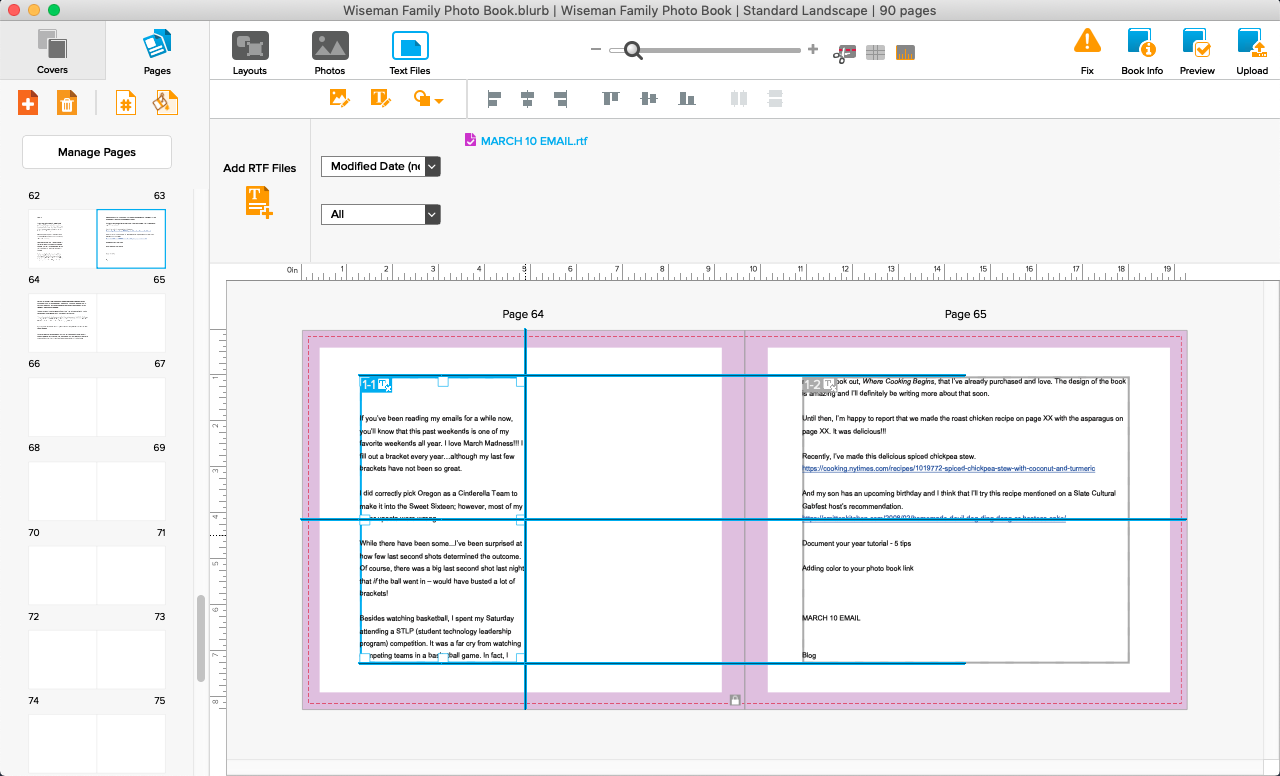
The text is initially placed as two large photo boxes on the page. Usually, my first step is to delete the text box on the right page (unless I know I want two full pages of text). Once that text box is deleted, I have more control about how and where I want my text to flow. 

Now, deleting text boxes can be finicky in this program. If you click on the text box, even around the border, it will open up the text styles/editing box….which is not what you want.

To delete a text box, you have to move you cursor outside of the text box boundary, click and hold down on the mouse, and then drag to the opposite corner of the text box. This will select the text box without bringing up the text window.

Then hit the delete key.

This removes the text from the box but will keep the actual text box. In order to delete the box, you have to click delete a second time or you can click on the trashcan icon of the text box (lower right corner). 

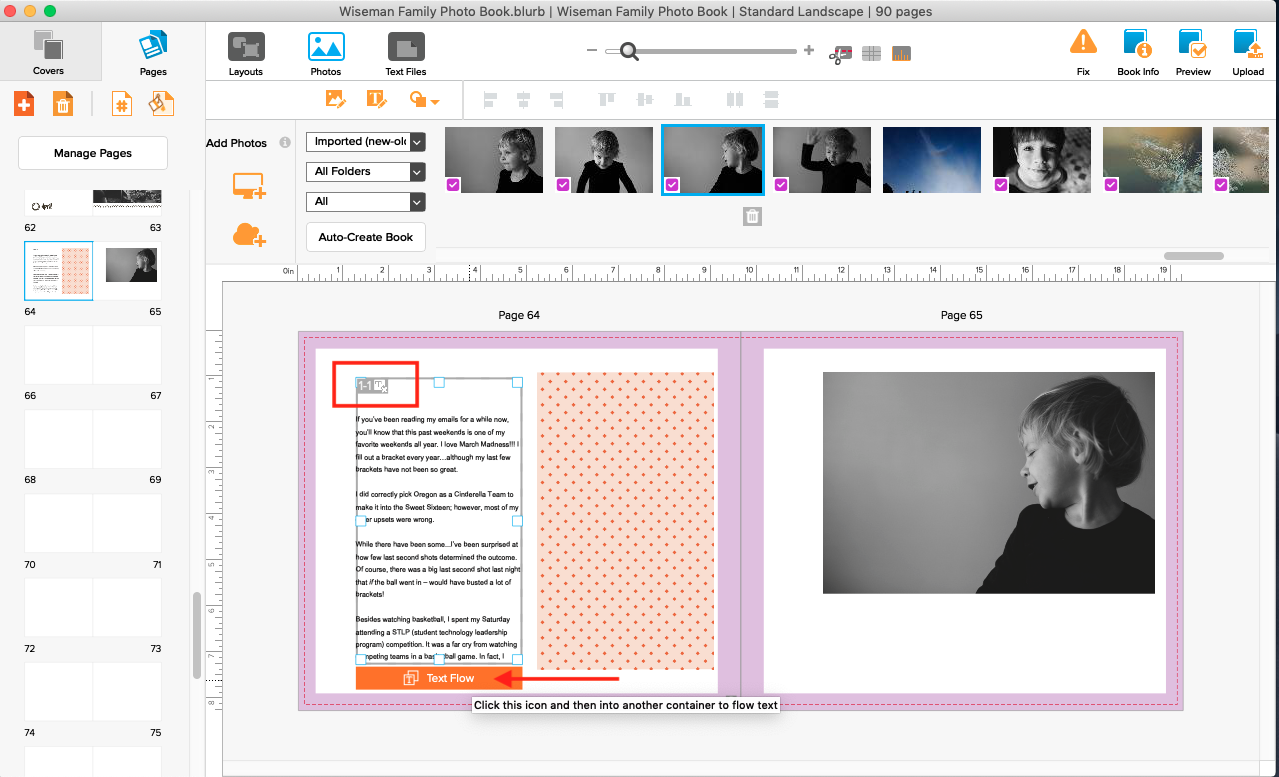
When you are ready to continue your text into another text box, even if it’s on another page, you’ll select the text box and at the bottom there is an orange “Text Flow” button.

Click it and your cursor will change – allowing you to create a new text box. At this point, find the location you want for the text to continue and drag your cursor to form the approximate shape of the box you want. You can always adjust this later. 

You’ll notice in the upper left-hand corner of any text flow box, it tells you where the text fits in the overall number of text boxes. For example, if you’ve placed 4 text boxes for a particular journal entry, you can click on a box to discover that a particular box is 2 (second) of the total 4 text boxes. This comes in handy in you have multiple boxes forming your text. 


Important Tip: 

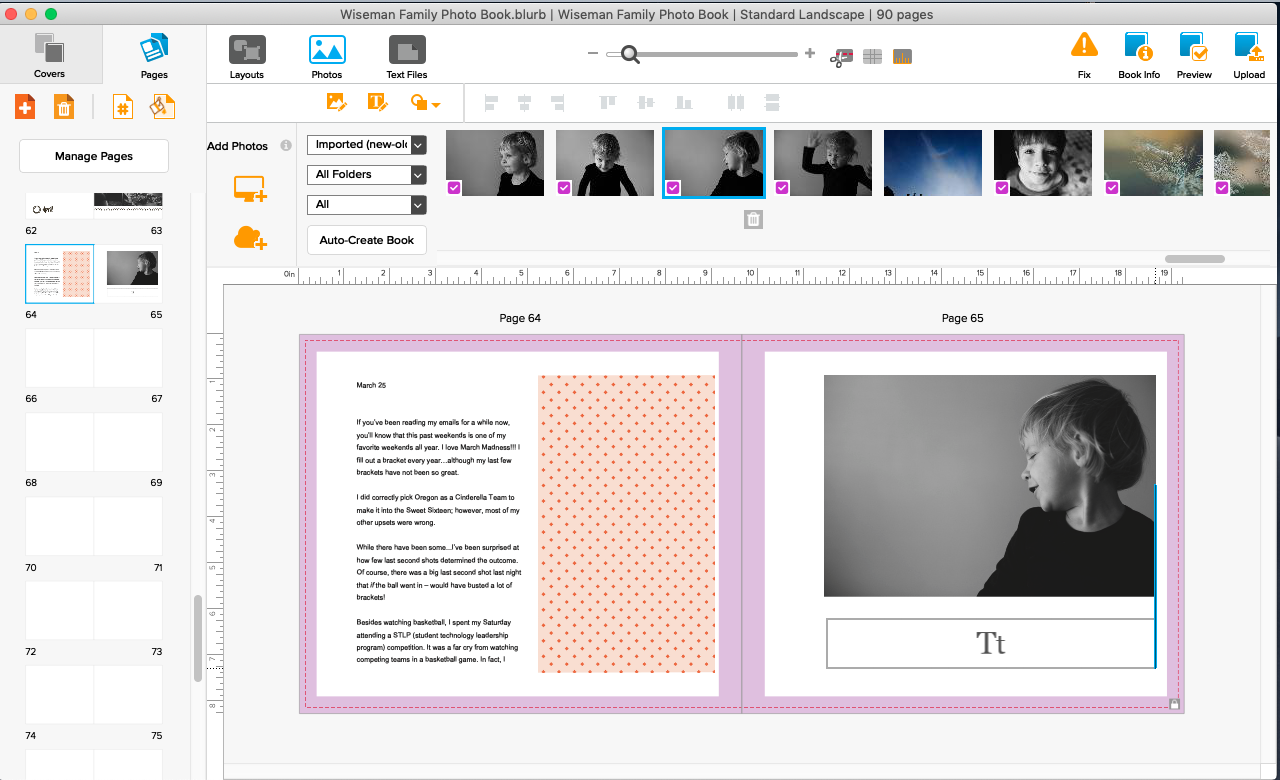
Form text boxes that align with the photos on the page. Don’t forget to use the align tools that come with BookWright to make everything on the page look intentional.


STEP 04: ADJUST TEXT STYLES. 

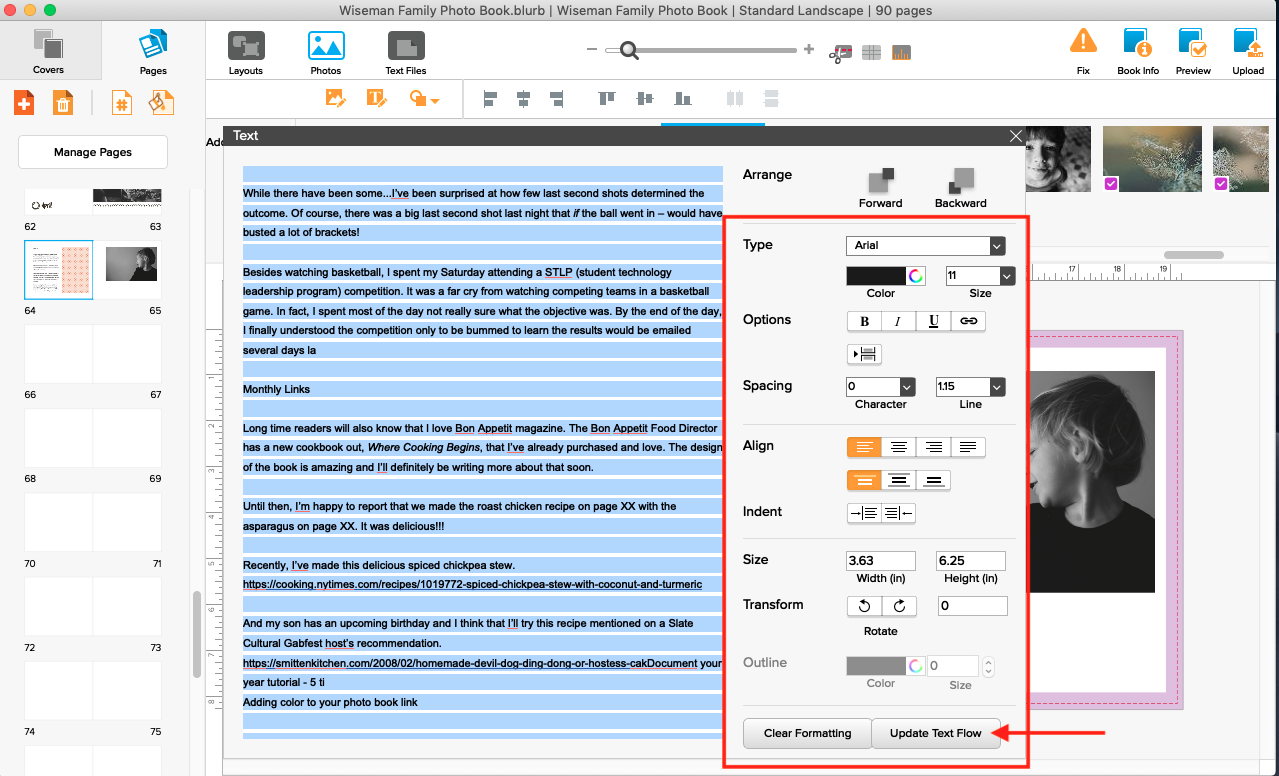
One benefit to using the autoflow feature is that you can can adjust the text – from any text box – in the one text style/editing dialogue box. If you decide you want to delete a sentence or change a word, it is done through this window. In other words, text edits are never made on the actual page.

You can adjust the style of the text from this window as well. To change the font style, size, alignment, etc., click on the actual text (left side of the box) then hit control (or open apple) + A to select all of the text. Once selected, make the adjustments you want.

Then click “Update Text Flow” for the changes to appear in your layouts. Keep in mind, this may affect how much of the text is visible within the text box. I recommend you make any major style changes at the beginning, before you spend too much time adjusting the actual shape and location of the text box. 

Important Tip: 

Since all of the text is edited through this one dialogue box, I recommend you keep the actual text used in multiple boxes (autoflow text) as primarily the body copy of your text. You can always make certain words/phrases bold or italic, if needed. However, you’ll want to minimize the special features you define within this text style/editing box. With that in mind, I also recommend that you remove titles and photo captions from this file and make them separate stand-alone text boxes (not autoflow text) within your photo book. 


I hope that helped to see how to incorporate a larger amount of text into your photo book. If you want to go deeper and learn how to fully use Blurb’s free software program, BookWright, check out my do-it-yourself workshop – Document Your Year.

WORKSHOP

DOCUMENT YOUR YEAR

Two Methods to Add Color to Your Photo Book

Two Methods to Add Color to Your Photo Book

One quick and easy way to make your photo book look more intentional is to have custom designed divider pages. If you’re including these pages in your photo book, I recommend having them stand out from your other pages with design elements, text and/or color. However, I also understand – you don’t have a lot of time to customize these pages.

It’s one of the reasons I’m creating my Graphic Design Packs every month. These design packs will quickly introduce color or patterns on your pages, particularly the divider pages in your photo book.

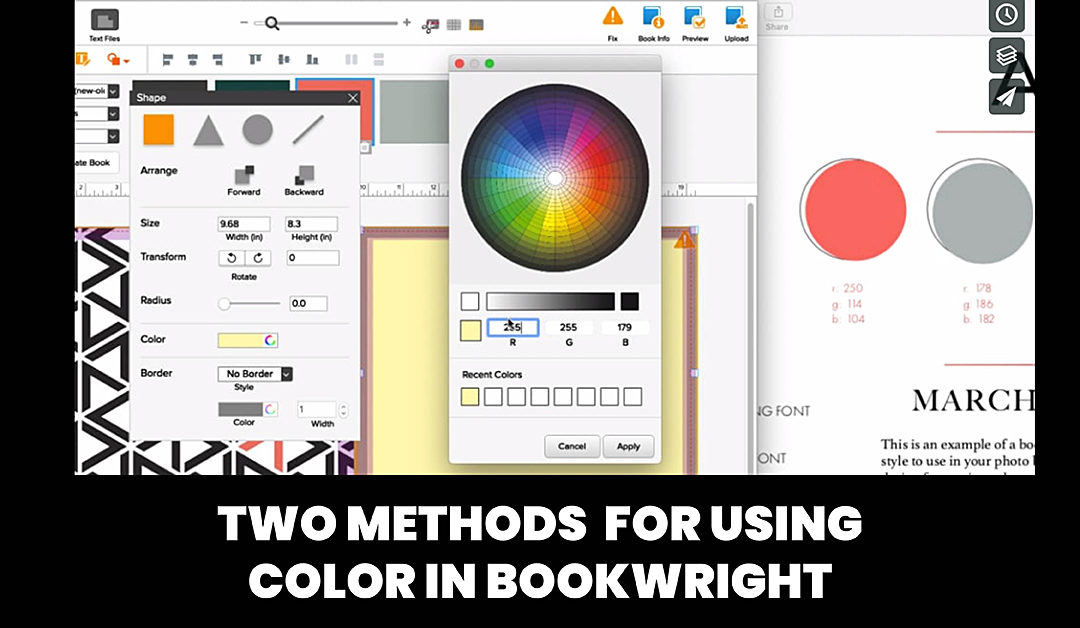
There are two ways to add color if you are using Blurb’s free software program, BookWright. Whether you are using colors from my BTP Graphic Design Pack – or – creating a color profile on your own, this video tutorial shares the two methods to achieve add color to your photo book.


Want to learn even more tools in BookWright?

Check out my free email series sharing 5 design lessons to make your photo book more stylish without overwhelm. 

Which Photos Spark Joy?

Which Photos Spark Joy?

Over and over again, I hear from people that what makes designing a photo book so difficult, is selecting photos. Even if I design a custom photo book for you, you still have to select the photos, right?!?! So it’s important to get over this hurdle and find a way to make selecting photos less of a chore and maybe even {gasp!} enjoyable!
When I first heard that Marie Kondo was translating her very popular book, The Life-Changing Magic of Tidying Up, into a Netflix show I was excited. I read her book when it first came out but tidying up always comes in waves for me. I’ll make progress over several weekends, then get derailed with life’s other demands.

This is what makes her show so enticing to me. Once I started watching the first few episodes, I realized how much it helps to see her and the families in action to get me back in gear. And whenever I fall off the tidying-up wagon, I can just watch another episode (or one I’ve already seen) to get re-inspired and make progress in my own home.

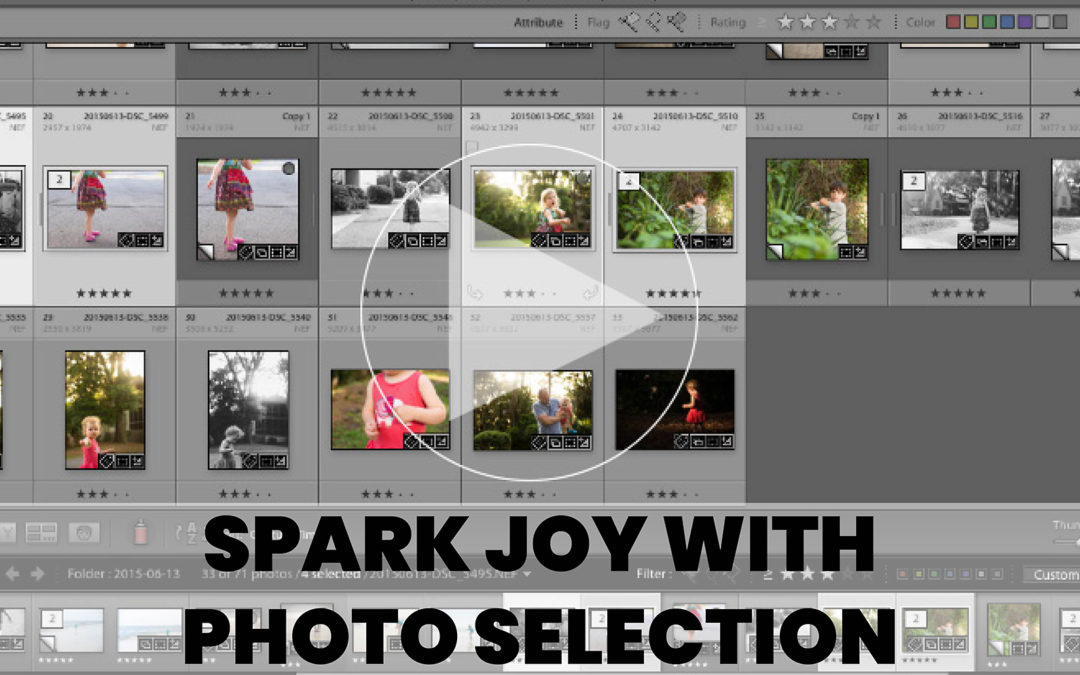
And this led me to photo selection. Kondo’s main mantra on clearing out the clutter can actually help you select photos for a photo book. As you are going through your photos, ask yourself, “Does this photo spark joy?” If so, it should definitely be flagged as a photo to print (either in a book or on your walls).

However, you also have to realize, multiple photos of the same event or moment, is just like clothes in your closet. While you may initially have a desire (joy) to keep 10 black dresses, at some point you have to ask, do I really need all of these? Or are there a few that spark the most joy for me. And that helps to narrow your selection….and all of the clutter.

I’m sure you would say most of your photos spark joy but you have to dig a little deeper. Are you holding on to similar photos just because you have the storage space? If pressed, could you actually select the pose/photo that provide you with the most joy?

Now, I would add one more question to help with your photo selection process.

How do I intend to use this photo?

Particularly when working on a photo book, it’s helpful to know if a photo is part of a series or a grouping – or – if you want it to be a stand-out photo on the page. Asking this question will help you determine if you can select a couple or if you need to be really strict and only select one.


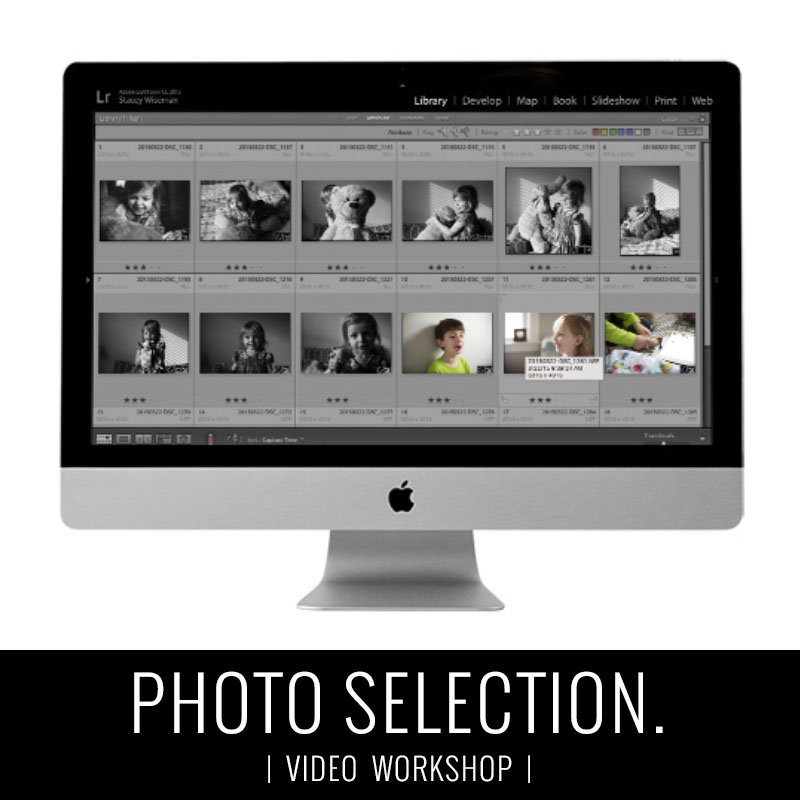
As I mentioned earlier, actually watching someone else go through the decluttering process, helps motivate me to take action. If that sounds like you, I have a Photo Selection Guide ($5) that shows you how I selected photos from 4 different moments in my life. You’ll get access to videos walking you through my thought process while selecting photos plus examples showing how the photos ended up in a photo book layout. 

My Photo Back-Up Process

My Photo Back-Up Process

My computer is a tech dinosaur. Toward the end of 2017, it was taking entirely too long to do anything so I decided to move my photos completely off of my computer and onto an external hard drive.

Fast forward to the end of 2018, one evening I set my laptop down a little too quickly. The next morning, my external hard drive was not turning on. Immediate panic set in.

Of course, I have a back-up system. Several years ago, I had a similar mishap and set up multiple back-up systems. In fact, I now have files in so many places it’s hard to know if it’s duplicated or quadruplicated. 

Yet, my little external hard drive containing my 2018 photos, somehow missed my back-up system. Yep, it felt as though my memories from 2018 vanished in an instant. Several weeks and hundreds of dollars later, I got my photos back.

After all of this happened, I knew it was time to update my back-up system and I wanted to share with you my process for backing up my computer….primarily my photos. 

My 5 Step Method to Backing up my Photos

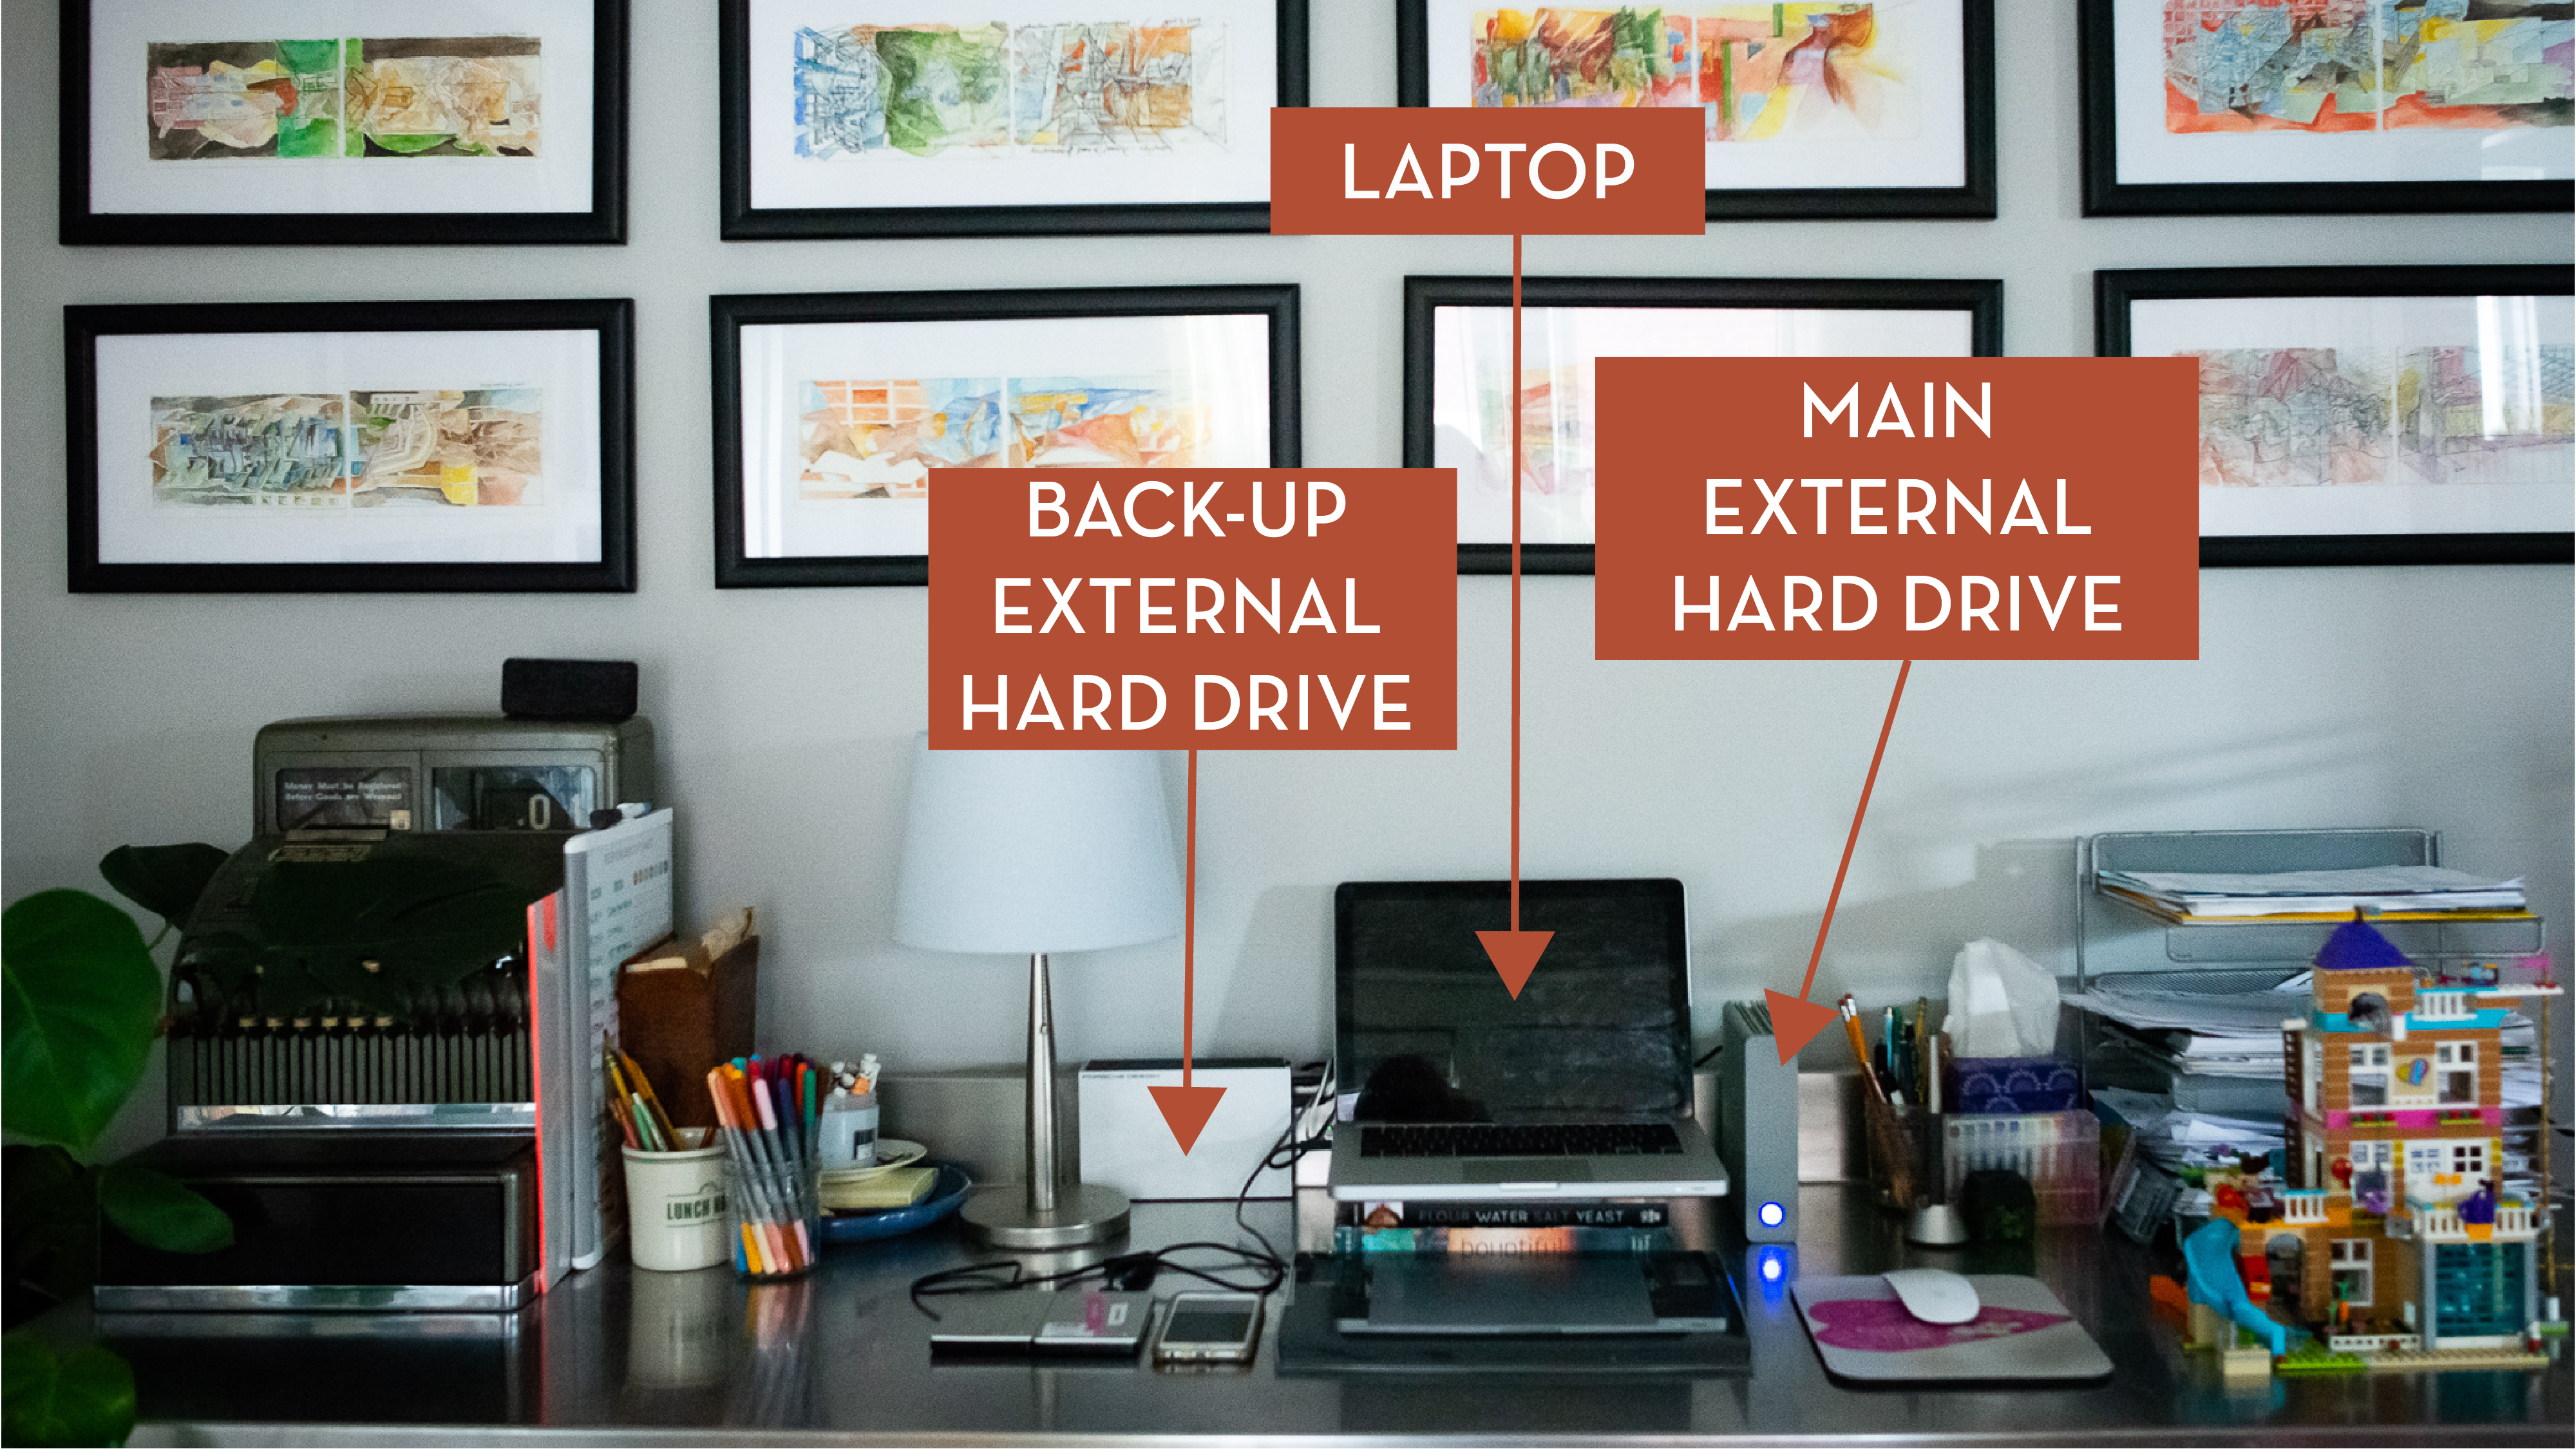
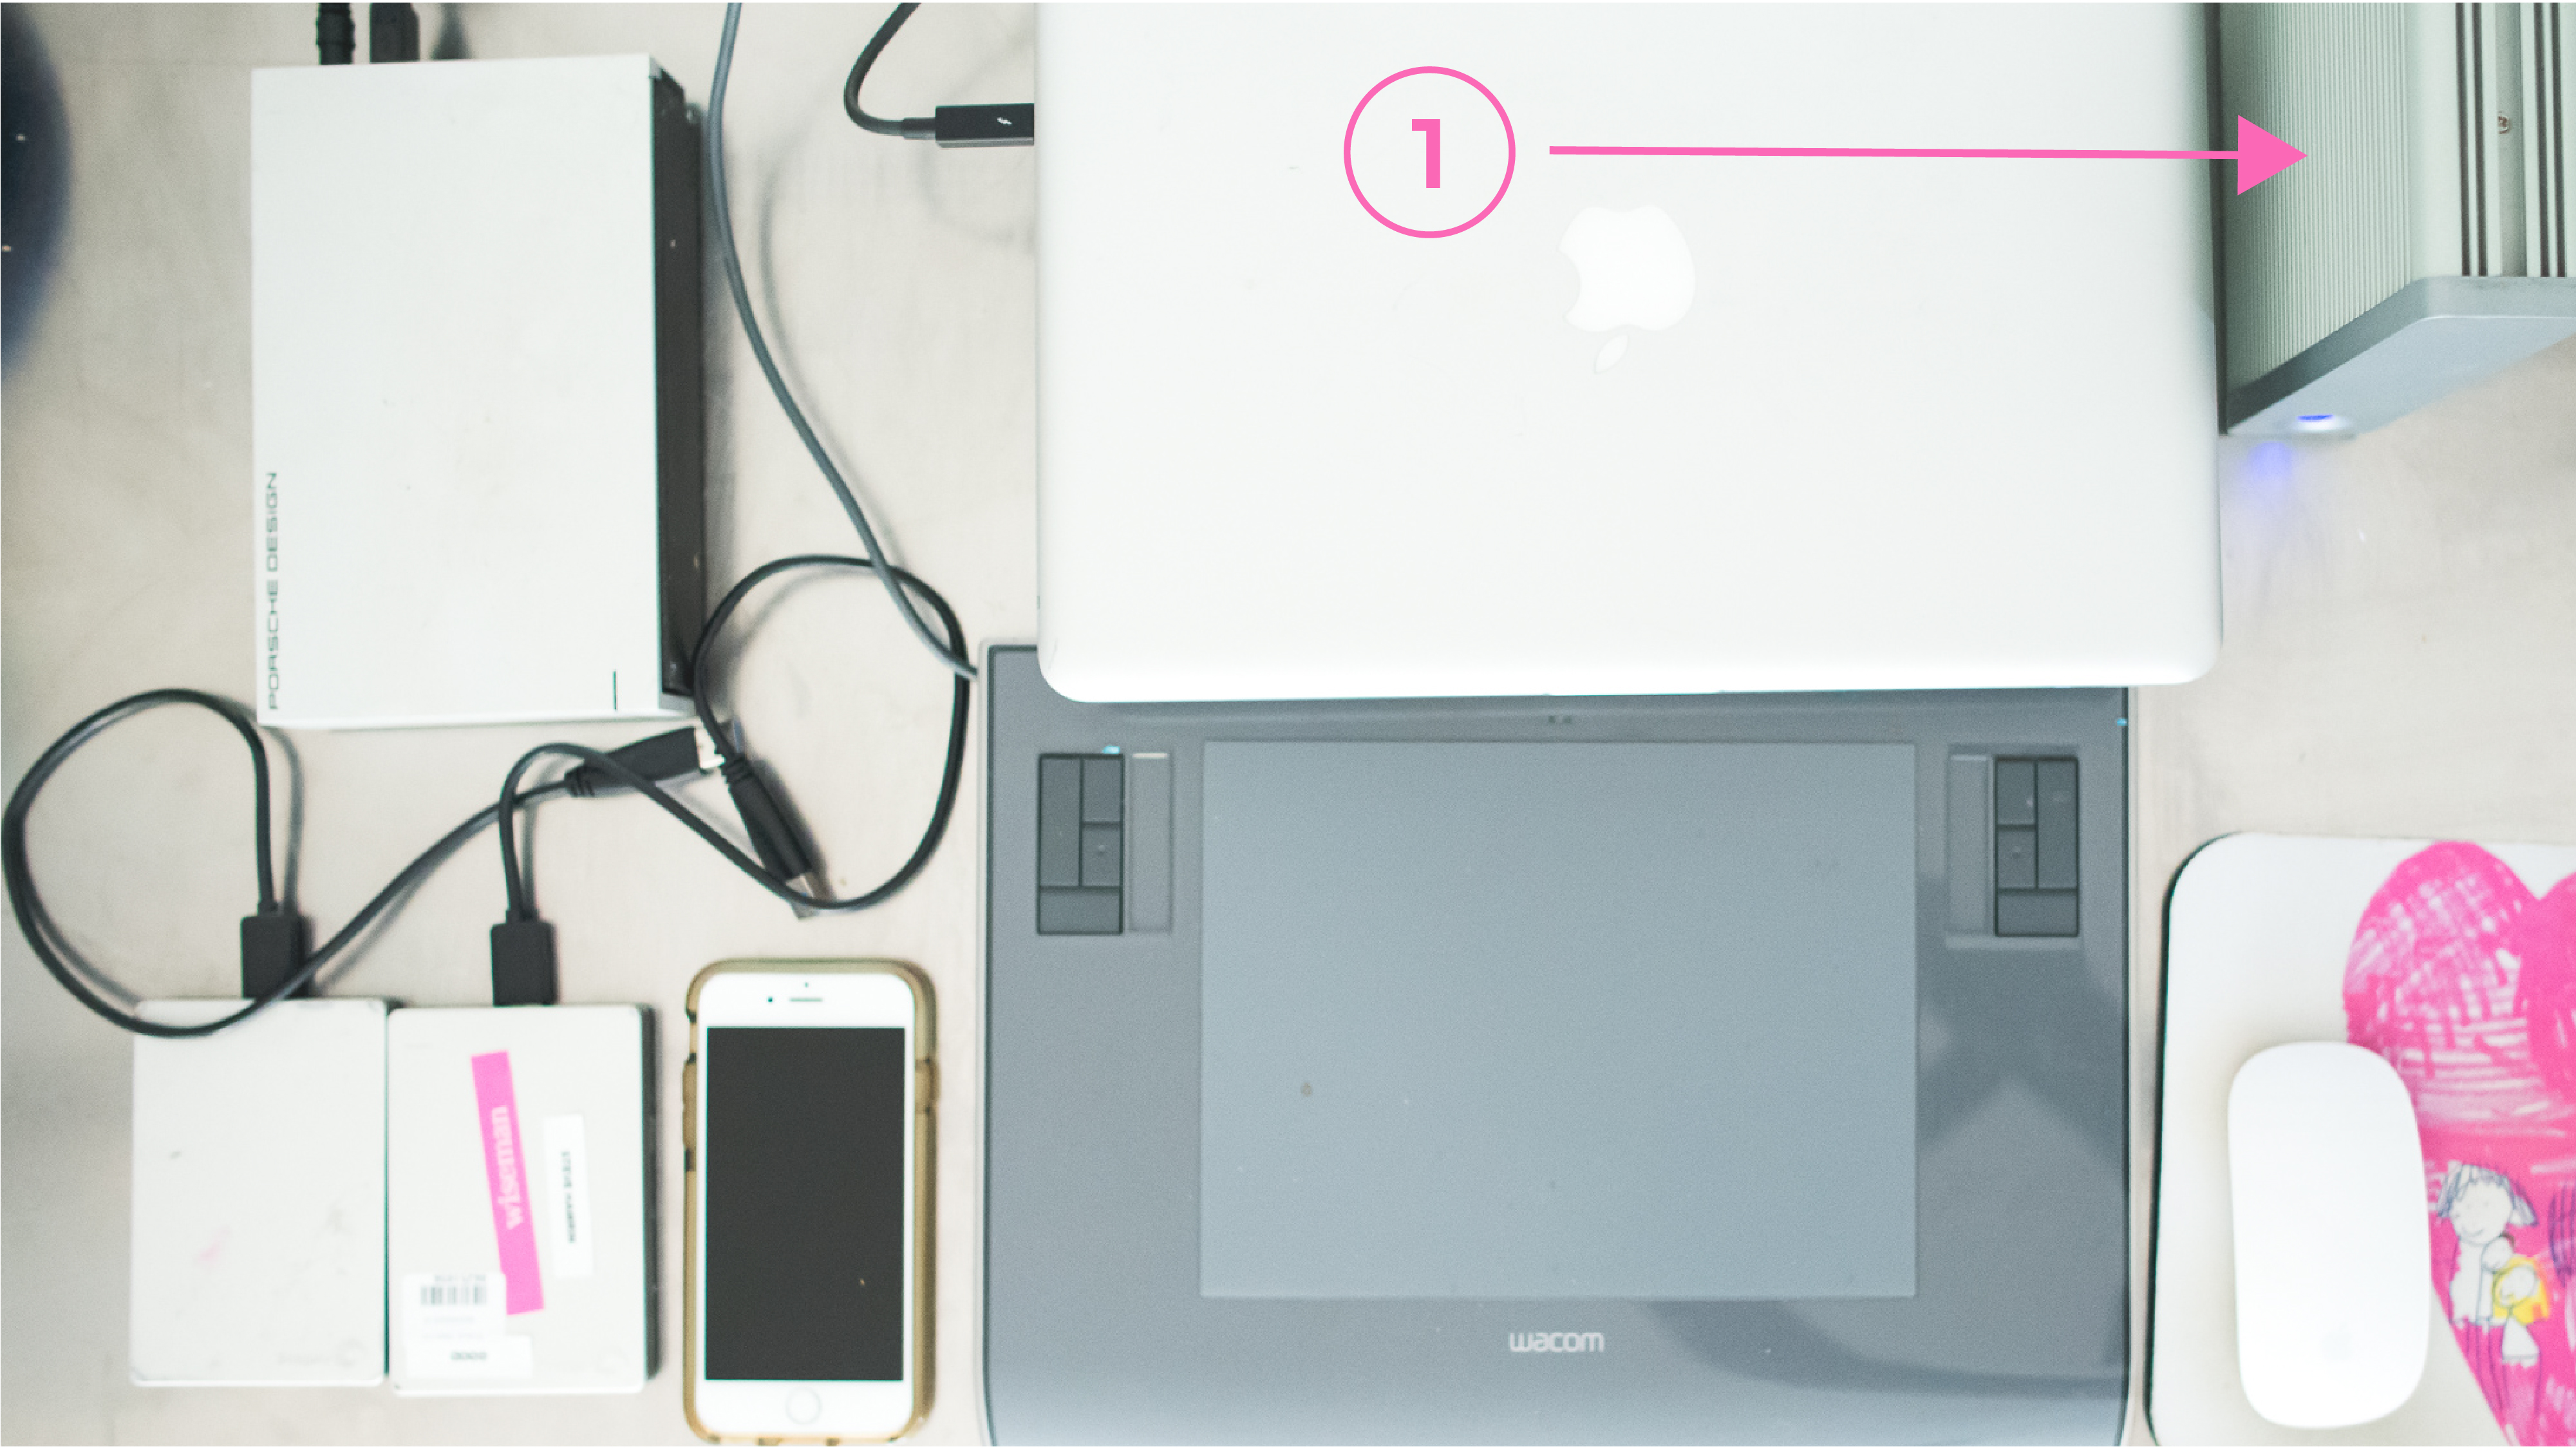
1. Back-Up my Laptop using Apple Time Machine to my Main External Hard Drive, at least once a week.

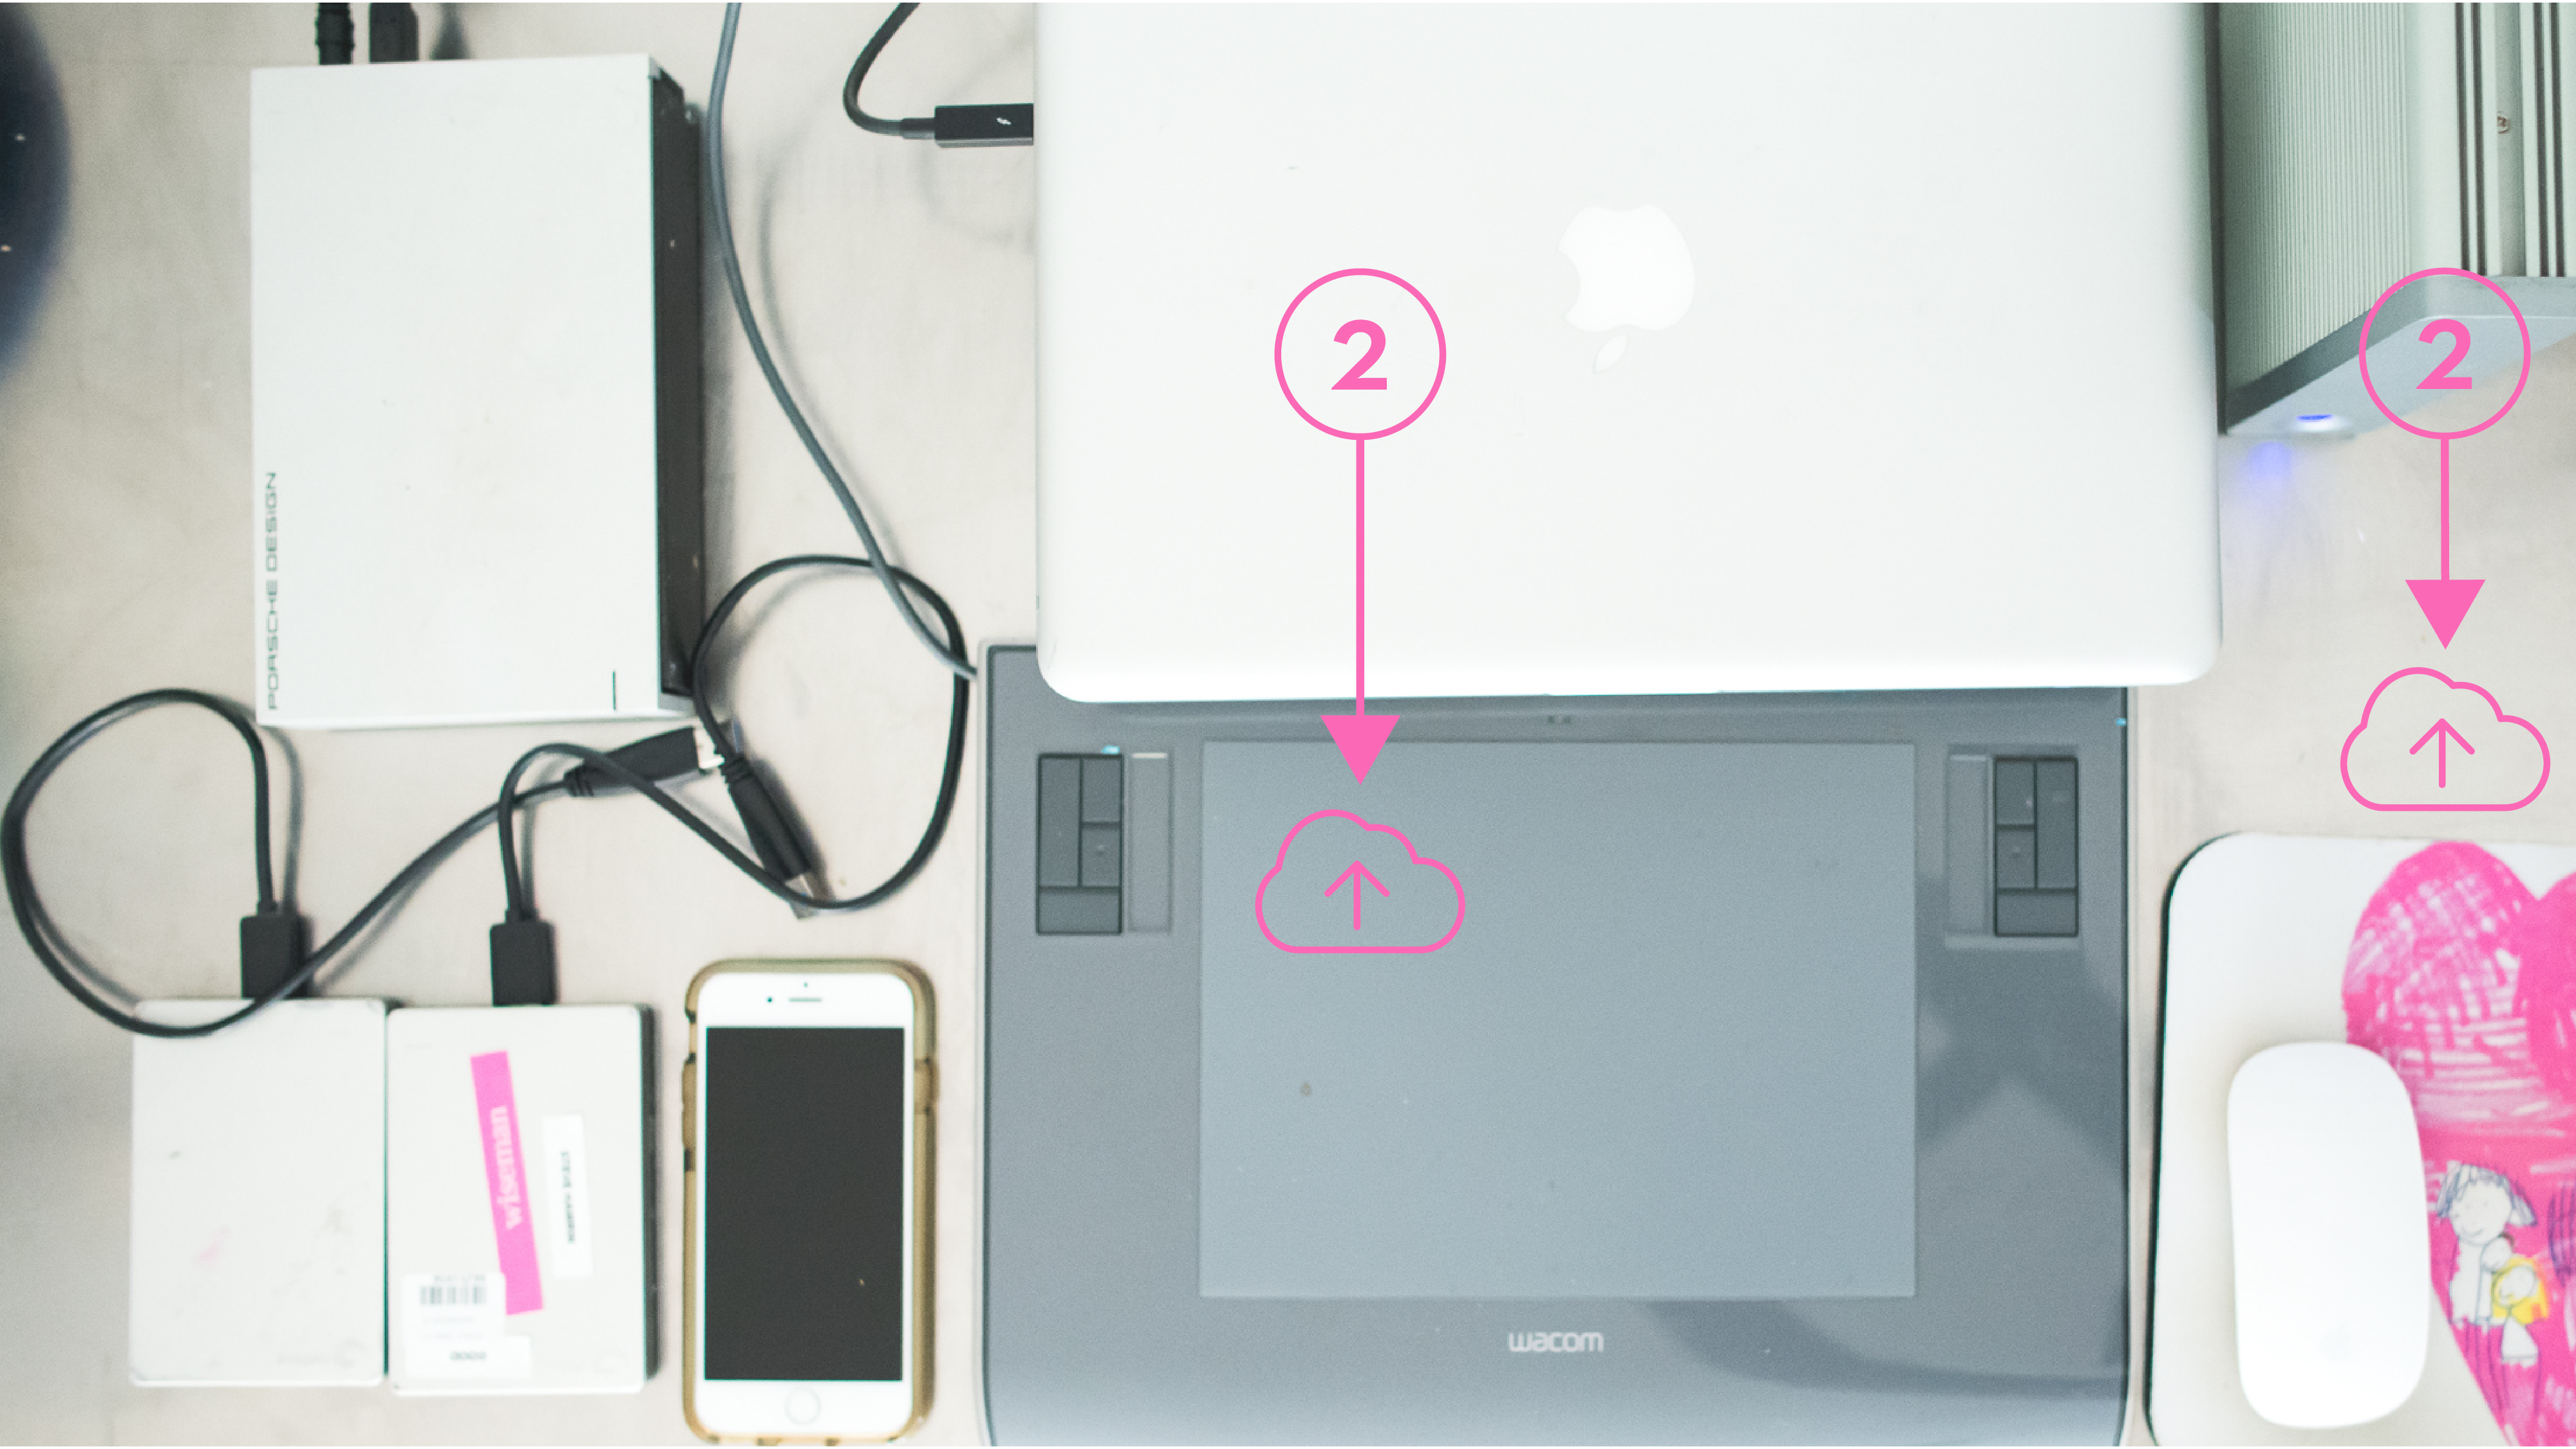
2. Back-Up my Laptop + my Main External Hard Drive using a cloud-based system such as Carbonite. I’ve set it to consistently back-up but will check it monthly. 

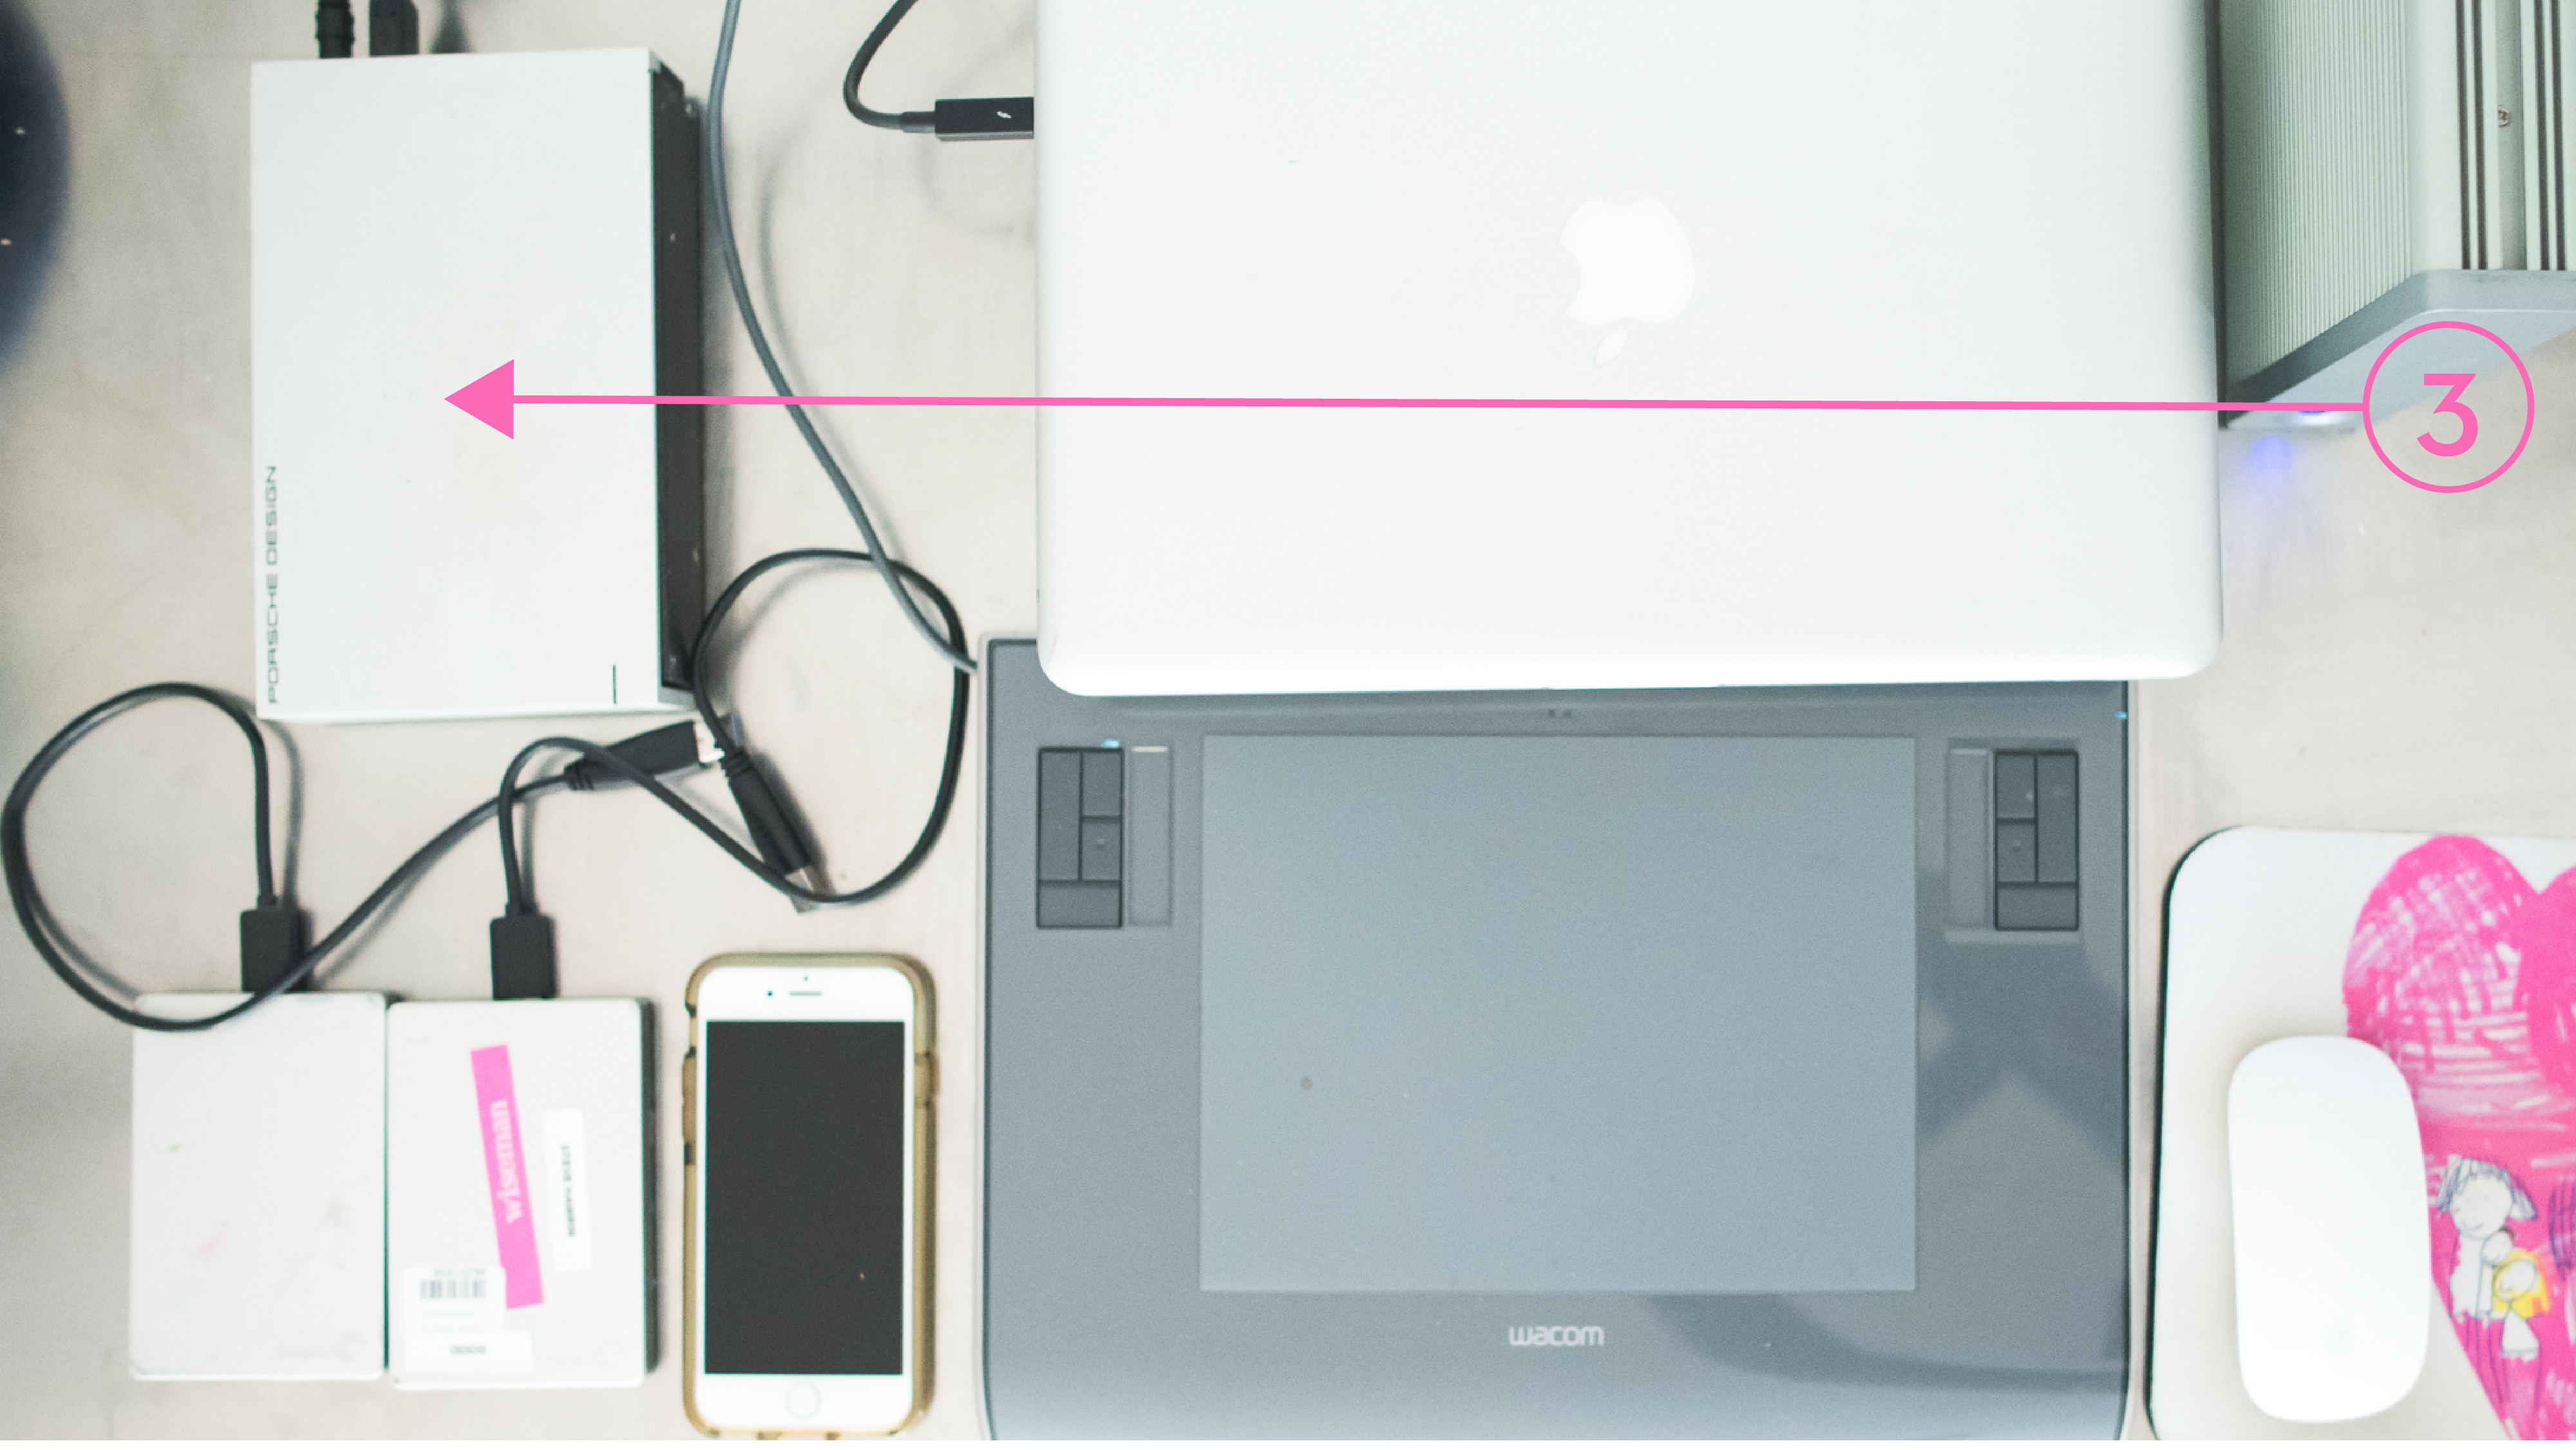
3. Back-Up my photos and videos to a separate external hard drive. Add new content every month. 

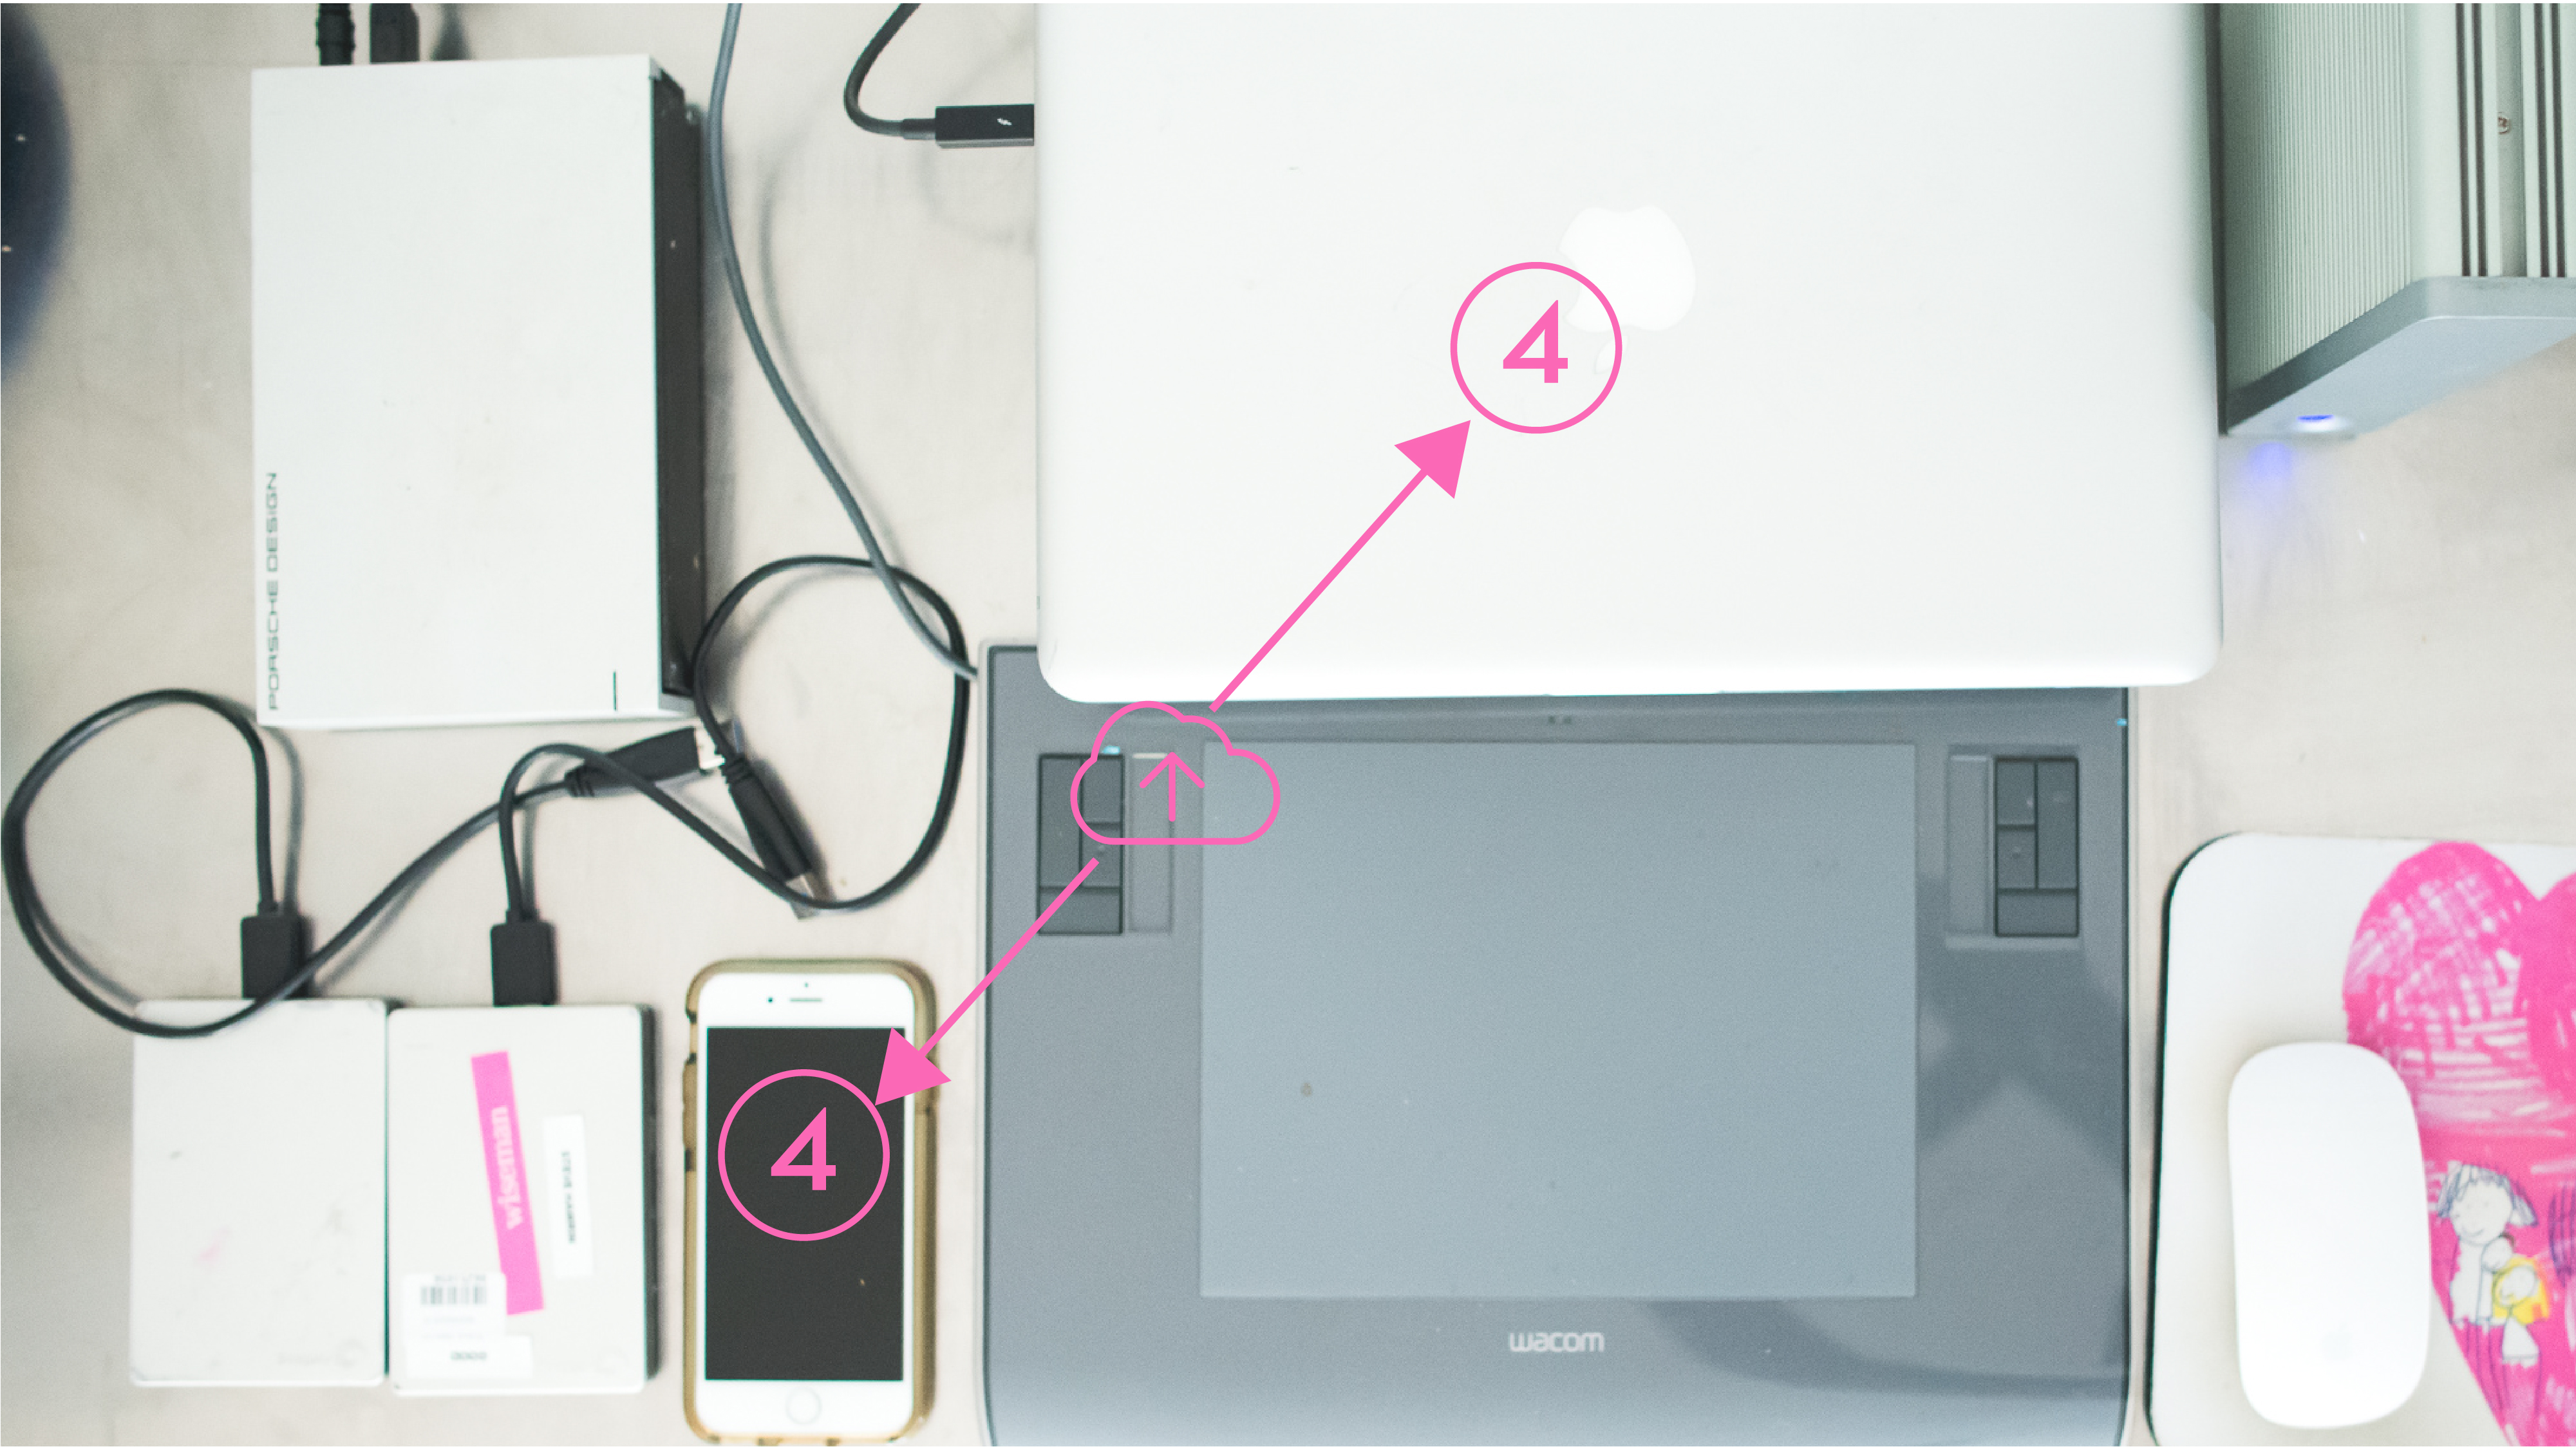
4. Use a cloud-based system, such as dropbox, google drive and adobe creative cloud to store files and photos that I want to access anywhere. 

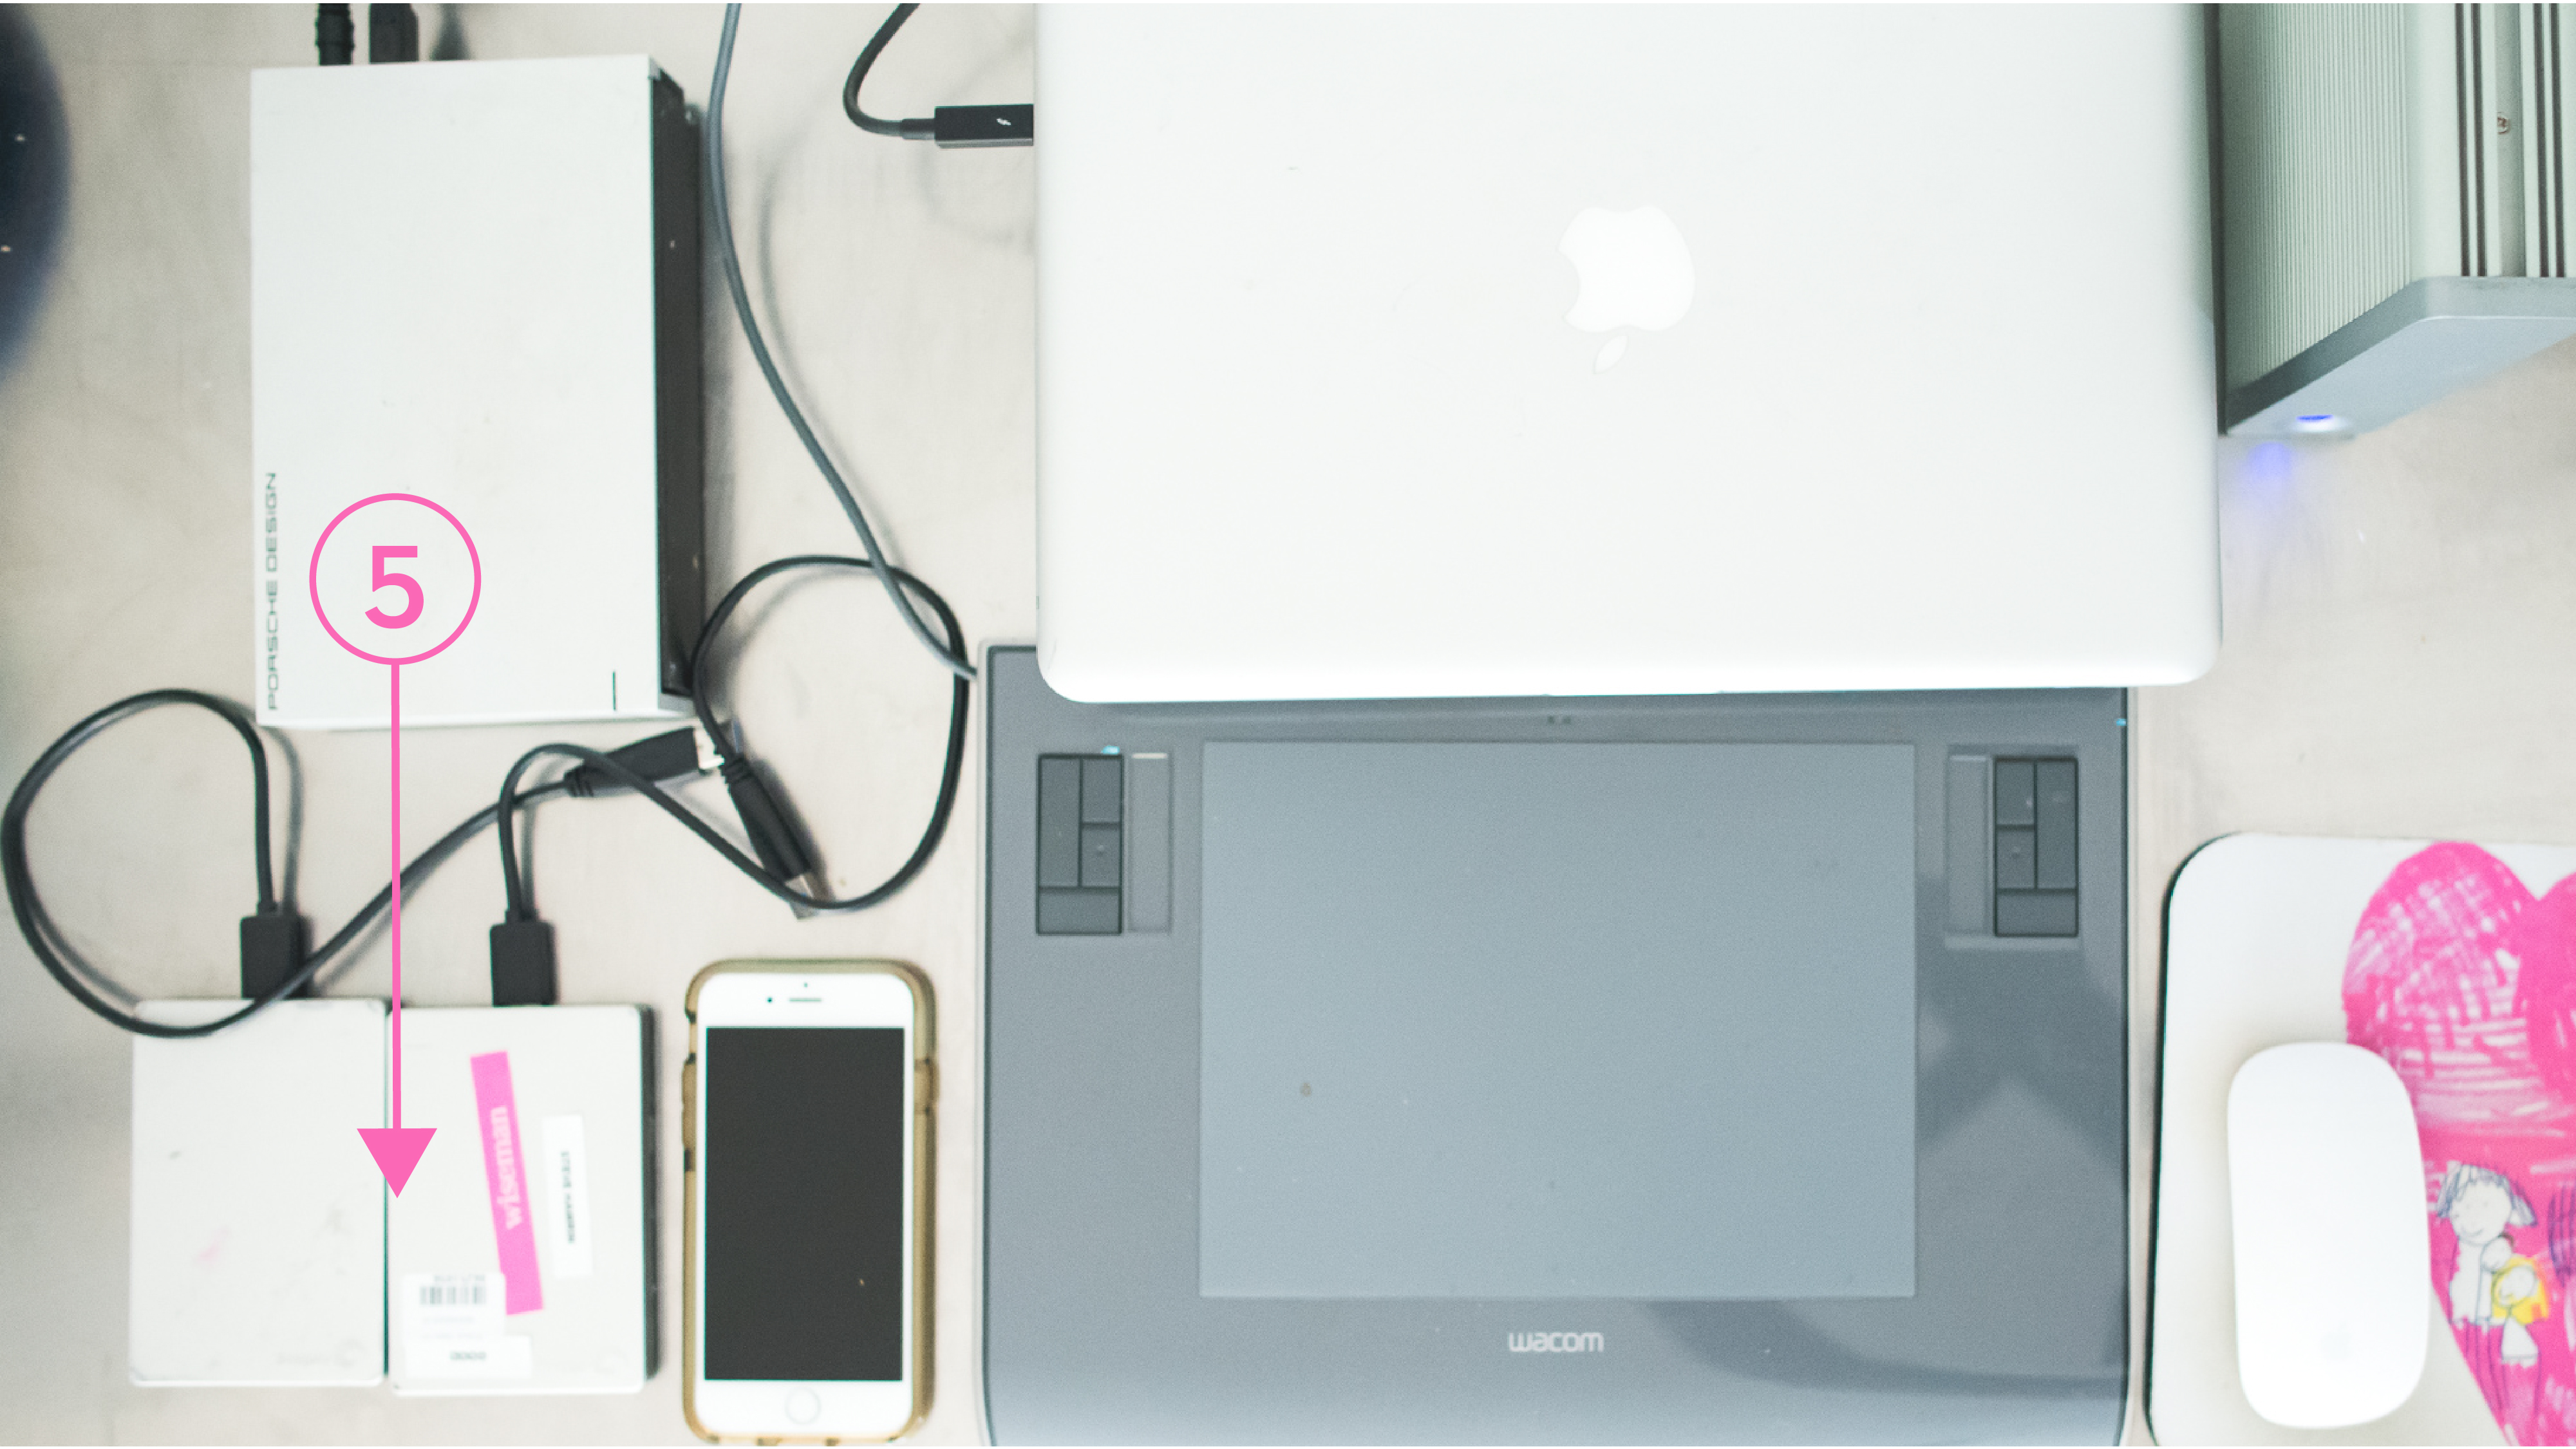
5. No longer use my smaller 1TB external hard drive for long-term storage or important files. Only used for triplicate file storage. 

Now, all of my photos from the current year are imported to my laptop, saved on my main external hard drive, saved to the cloud back-up and triple backed up on my photos/videos external hard drive.

I’d love to hear from you. What is your back-up system? Do you do something that is not on my list? If so, leave a comment below.

Photo Books are a Memory Preserver

Photo Books are a Memory Preserver

Recently I listened to a Revisionist History Podcast with Malcolm Gladwell titled “Free Brian Williams”. While the podcast starts off describing the moment in 2013 when David Letterman asked Brian Williams about the helicopter convoy he was on in Iraq ten years earlier. During his answer, he claimed that he was on a helicopter that was shot down….but it turns out, he was actually on a different helicopter that arrived on the scene of the ambush an hour later.

This lead to him eventually being fired from the host of NBC Nightly News and he was excoriated in the media for lying. However, Gladwell’s point in using this as an example, is not that he was lying but illustrates an example of how memory can be contorted over time.

{

We are memory fundamentalists. We think our memory is a camera recording our life in real time with a video time-stamped for later retrieval…[But] everytime we retrieve a memory, there’s a chance it can get contaminated. We hear a new detail somewhere about the event and without realizing it, we just add it in. Memory researchers talk a lot about what they call time slice errors. A couple of things happen in the general timeframe and we get the sequence all jumbled up. 

Malcom Gladwell, Revisionist History, Free Brian Williams

Memory is fallible. Mutable. Imperfect. 

It’s why I take photos and make photo books. Not to capture every single detail; but to capture the essence of my life, year after year.

I take photos to help me remember a moment and while I’m not always successful, I attempt to take photos that remind me of not just what is happening but the emotion surrounding the event.

When I look at photos months or years later, I want to remember the moment and what it felt like to experience it.

And the only way I look back at old photos is through my photo books.

I can’t remember the last time I went back into my photo archives. Due to the sheer number of photos I take, this usually involves an effort to pull out the hard drive, load the digital catalog and sift through the thousands of photos I took that year.

But a photo book transports me immediately.

I just pull the year I want from the shelf, open it up and remember what life was like that year. It’s a collection of my favorite photos, creativity arranged to reflect my artistic voice – similar to my photographic vision.

Take this example a month before my youngest daughter was born.


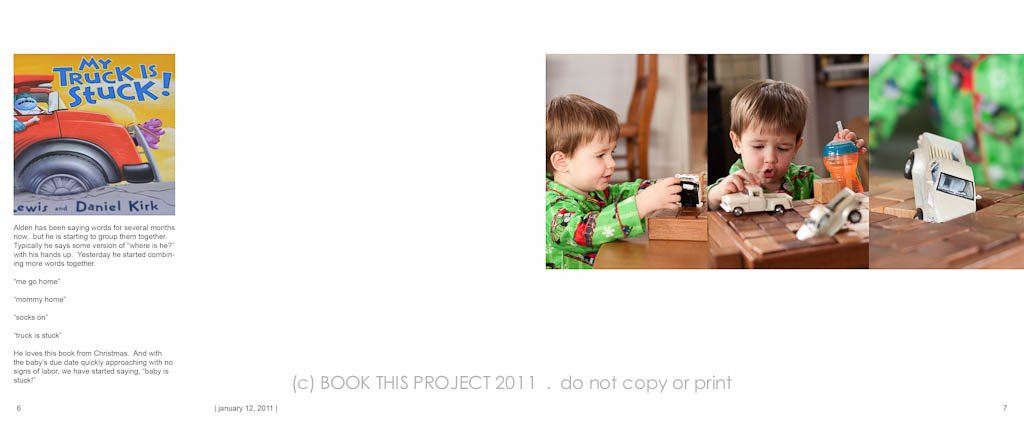
I don’t have to rely on my memory because it is documented in my photo book. When I was nine months pregnant with my daughter, we were preparing for my son to be a big brother. One day we asked him when his little sister was going to get here and he said she was stuck in mommy – because we were reading the picture book, My Truck is Stuck, a lot. It was one of those classic family stories that have been memorialized in a photo book.

Everything about this layout is specific and intentional. Where I placed the photo, the amount of negative space I included, and the font style, size, and color. All of these small decisions led to a cohesive, sophisticated photo book.

A share my entire thought process, gameplan and inspirational layout and book examples in my workshop, Document Your Year. This e-course walks you through how to define your own vision, use the free Blurb design program to its greatest advantage and design a photo book to show off to your family and friends. 

Ready to make your own photo book this fall?

Sign up for my free video training sharing 5 tips to make a better photo book. In this 40 minute training, you’ll learn the best first step to make, my favorite 3 tools in BookWright and how to change a layout with one word. 

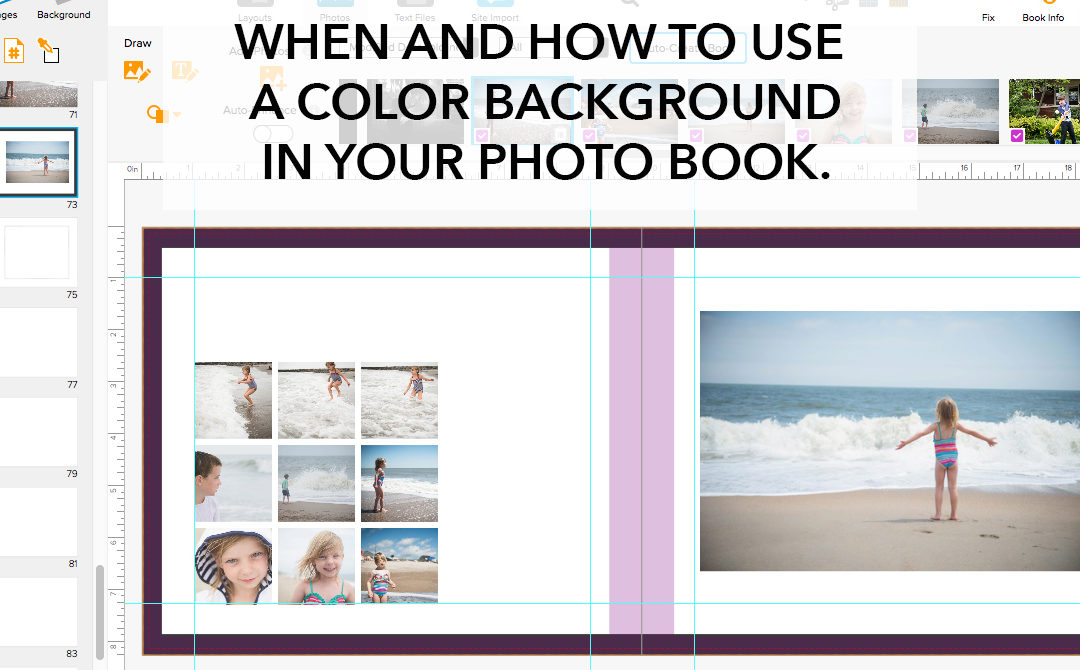
When and how to use a color background in your photo book

When and how to use a color background in your photo book

I want to start from the beginning of this post with the acknowledgement that adding color to your photo book can be a tricky and ultimately, it is a personal preference. There is no right or wrong answer. But I also understand it’s common to seek advice or suggestions on possible ways to attempt color. So when a Photo Book Club member asked me this question, I thought it would be a perfect time to address my thoughts in a blog post.

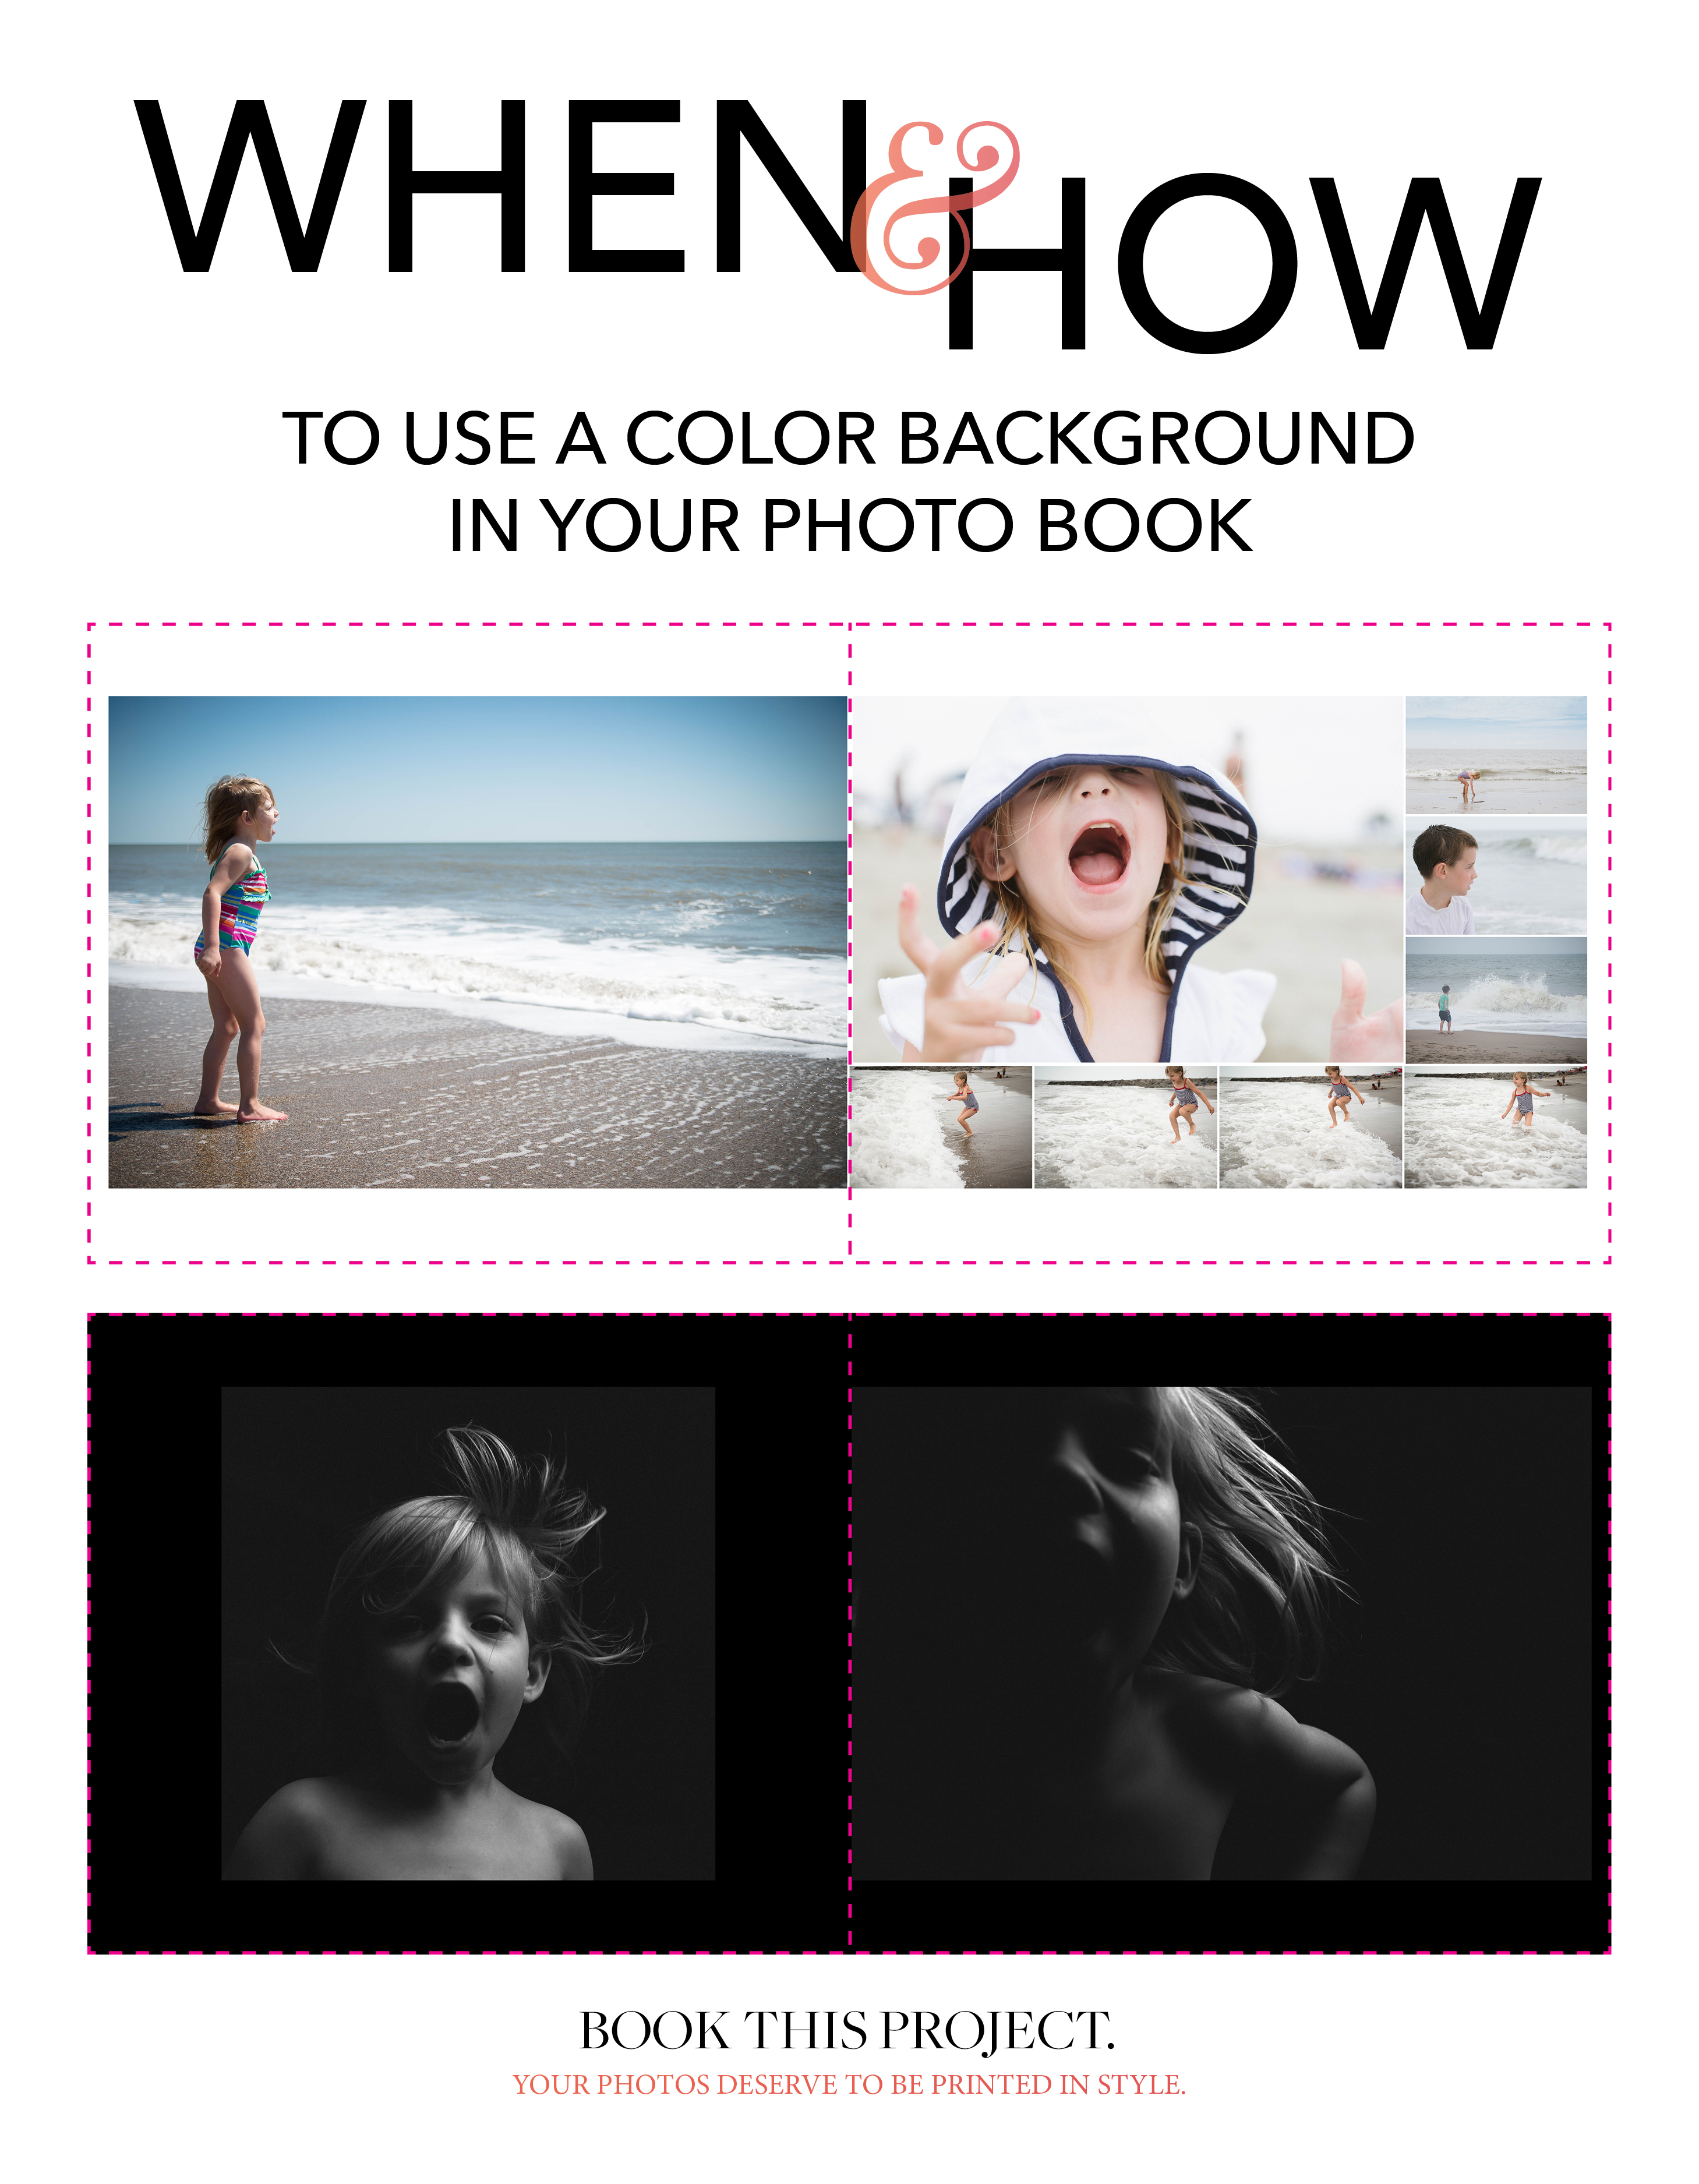
White Background versus Black Background

My personal preference is for a plain white background because it conveys a clean, fresh, modern look to my photo books. Because I frequently incorporate a mix of color and black/white photographs, the white background appears more neutral.

When I’ve seen successful photo books with a black background, it’s typically for books containing a majority of black and white photos with high contrast – or – to create photo books a dramatic, enveloping mood. With a black background, it is easier to establish a high level of contrast or striking difference between the photos and the page.

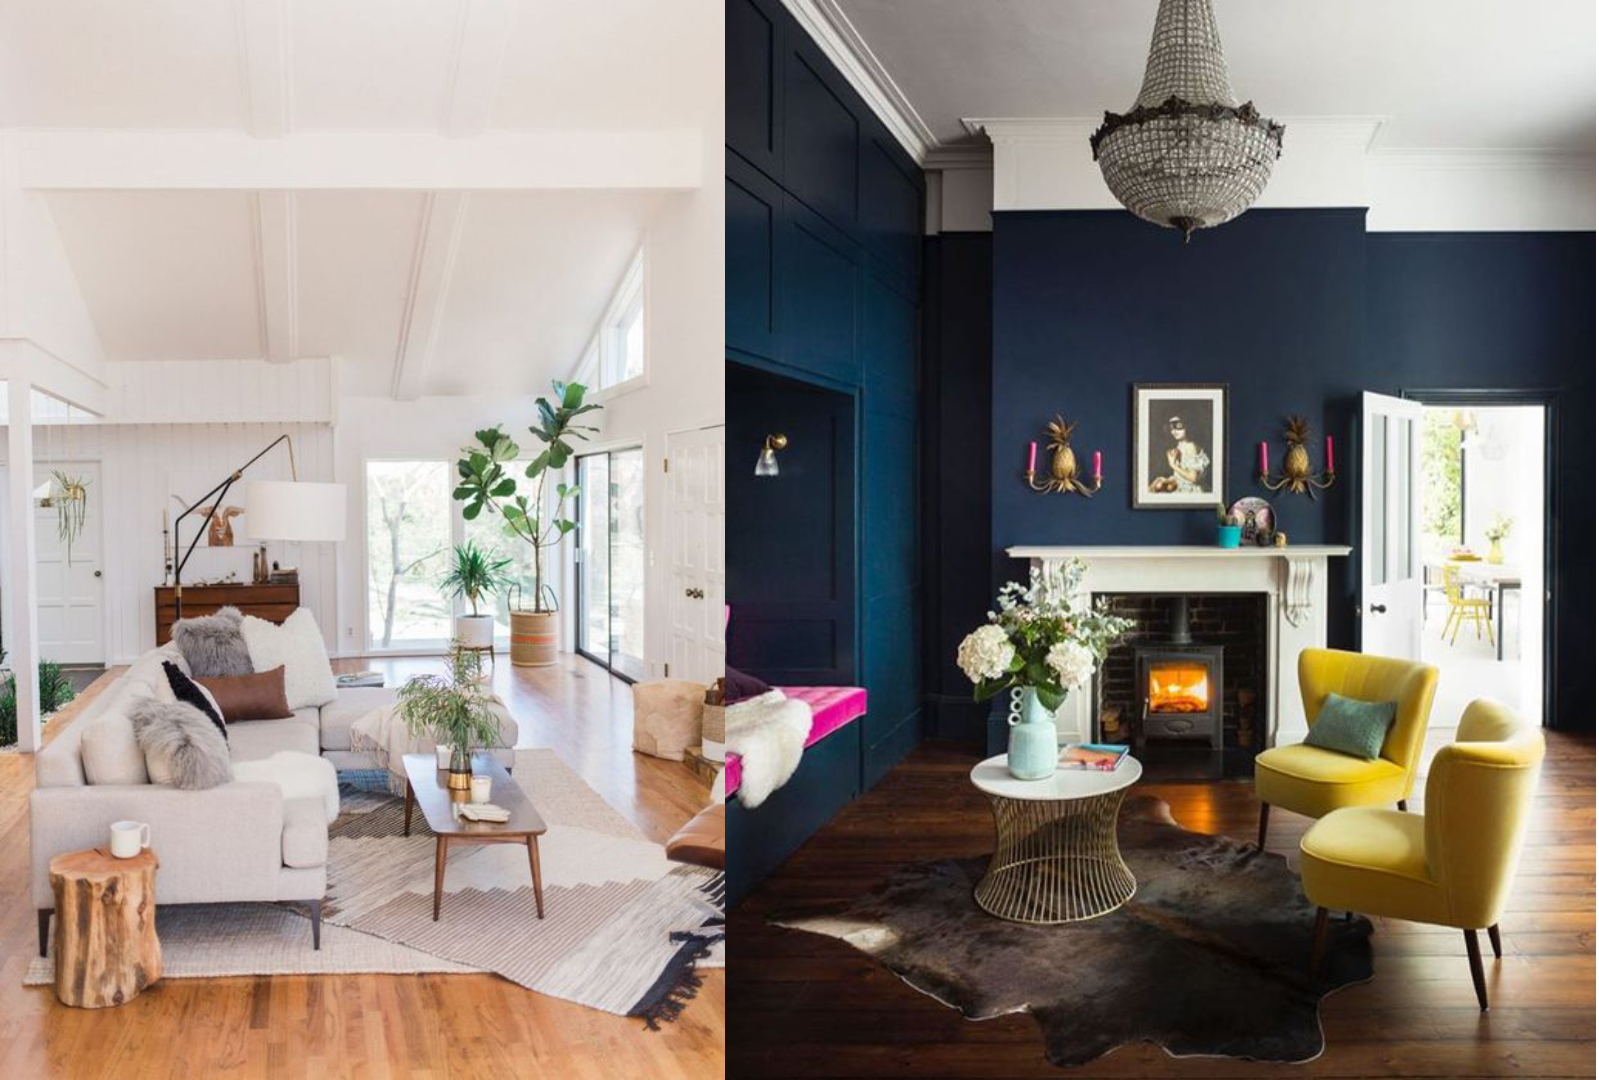
An easy way to think about this is with interior spaces. I’m sure if you’ve been around pinterest, picked up an interior design magazine or watched HGTV at all, you’ve seen light and airy living rooms with clean white walls and maybe you’ve come across a more dramatic living room with dark walls. (And of course, all of the varying shades of paint color in between….but for this example, I want to stick with the extreme ends of the spectrum.)

Look at these two examples below found on pinterest. Are you immediately drawn to one example? What do you like about it? What feeling or emotion does it invoke? Or if you are indecisive like me and feel drawn to both – what are the characteristics of each that you like and how does that start to shape your vision?

As you’ll notice, both examples work yet they illustrate a different vision. And this is what is great about photo books because you can create different moods or visions based on the content or photographs.

For example, if you’ve returned from a tropical vacation and wanted to make a travel book of your photos, chances are you’d have a lot of colorful, vibrant photos. The colors in the photos may pop more against a white background. A black background may overwhelm the photos.

On the other hand, if you wanted to make a photo book of your street photography, those photos may have a high degree of contrast and stark divisions between the bright whites and deep blacks. A black background will help ground and immerse the photos and almost create a more intimate experience in which to view photos.

Comparing White and Black Backgrounds

However, things are not always immediately black and white. In my Photo Book Club, I have a video sharing three photo book examples that flip the advice in the previous section on it’s head. Just because something may be the norm does not mean it’s the absolute.

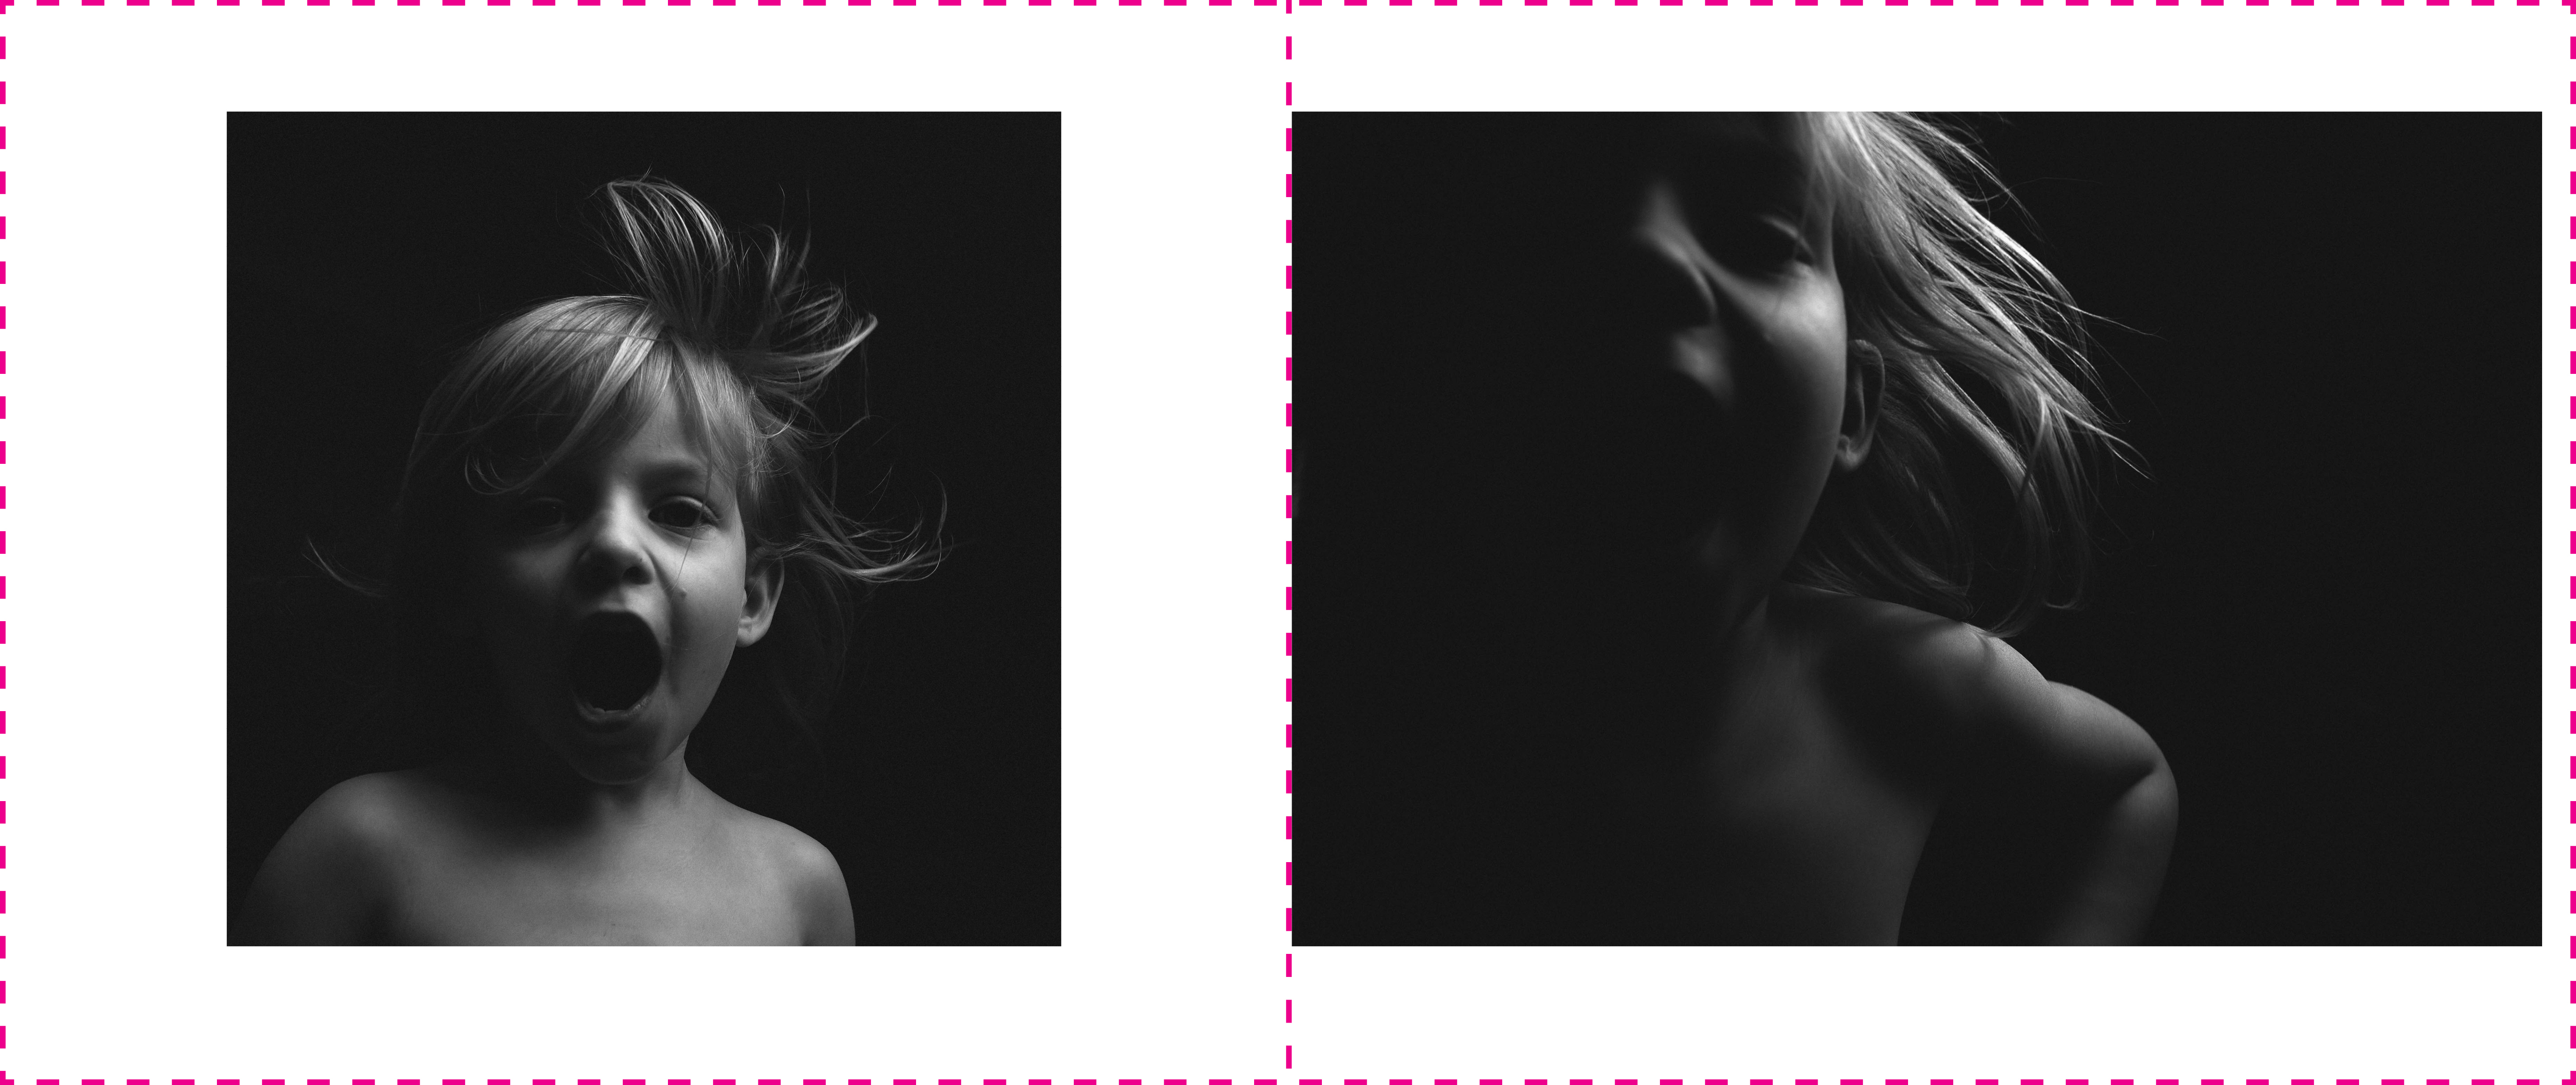
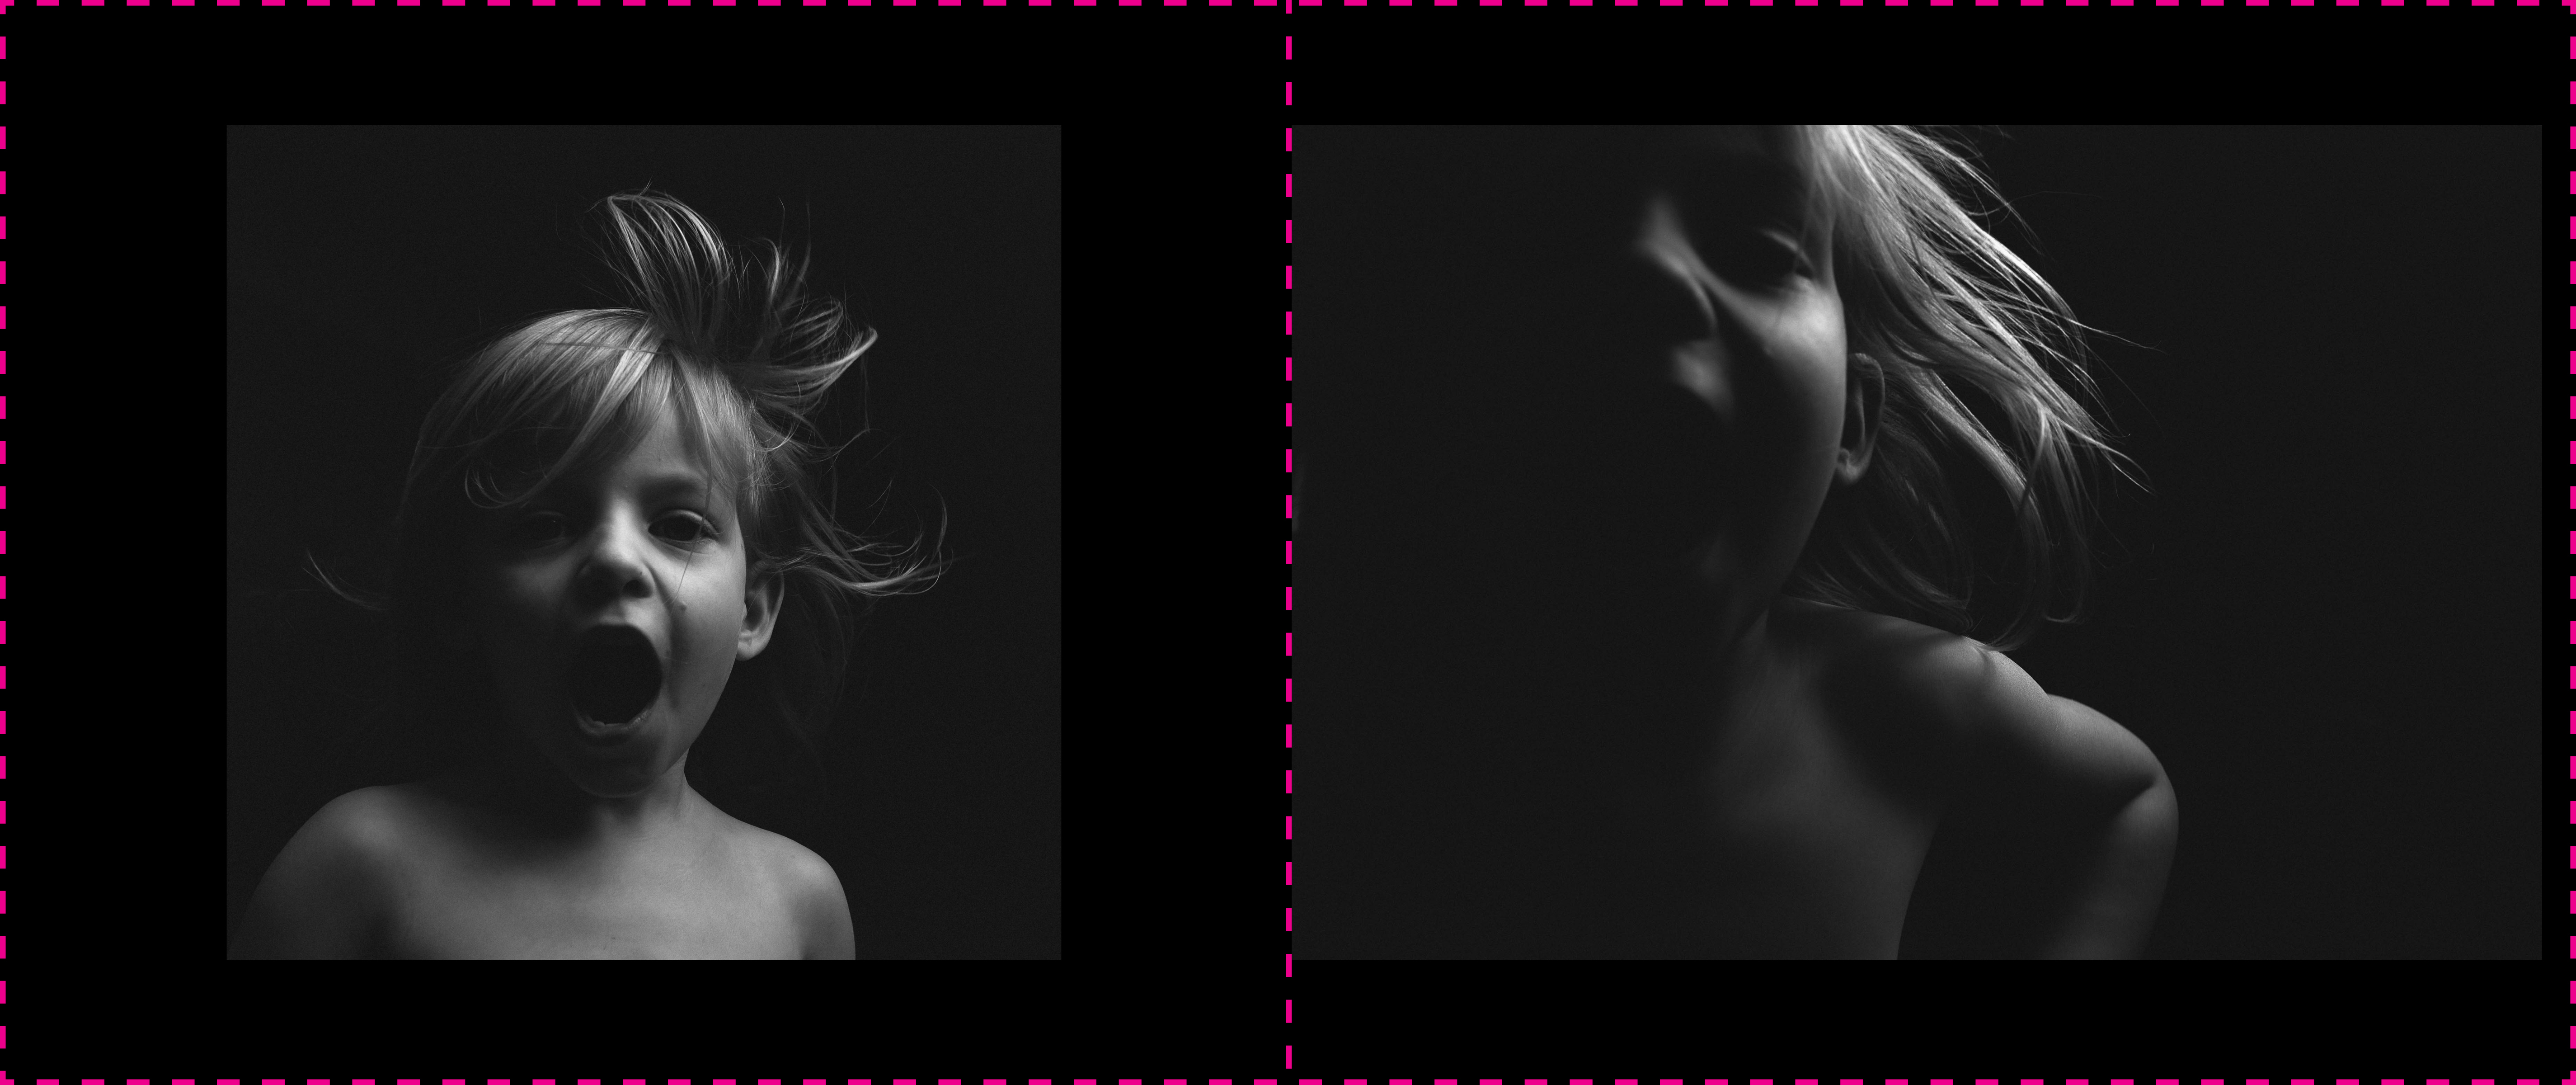
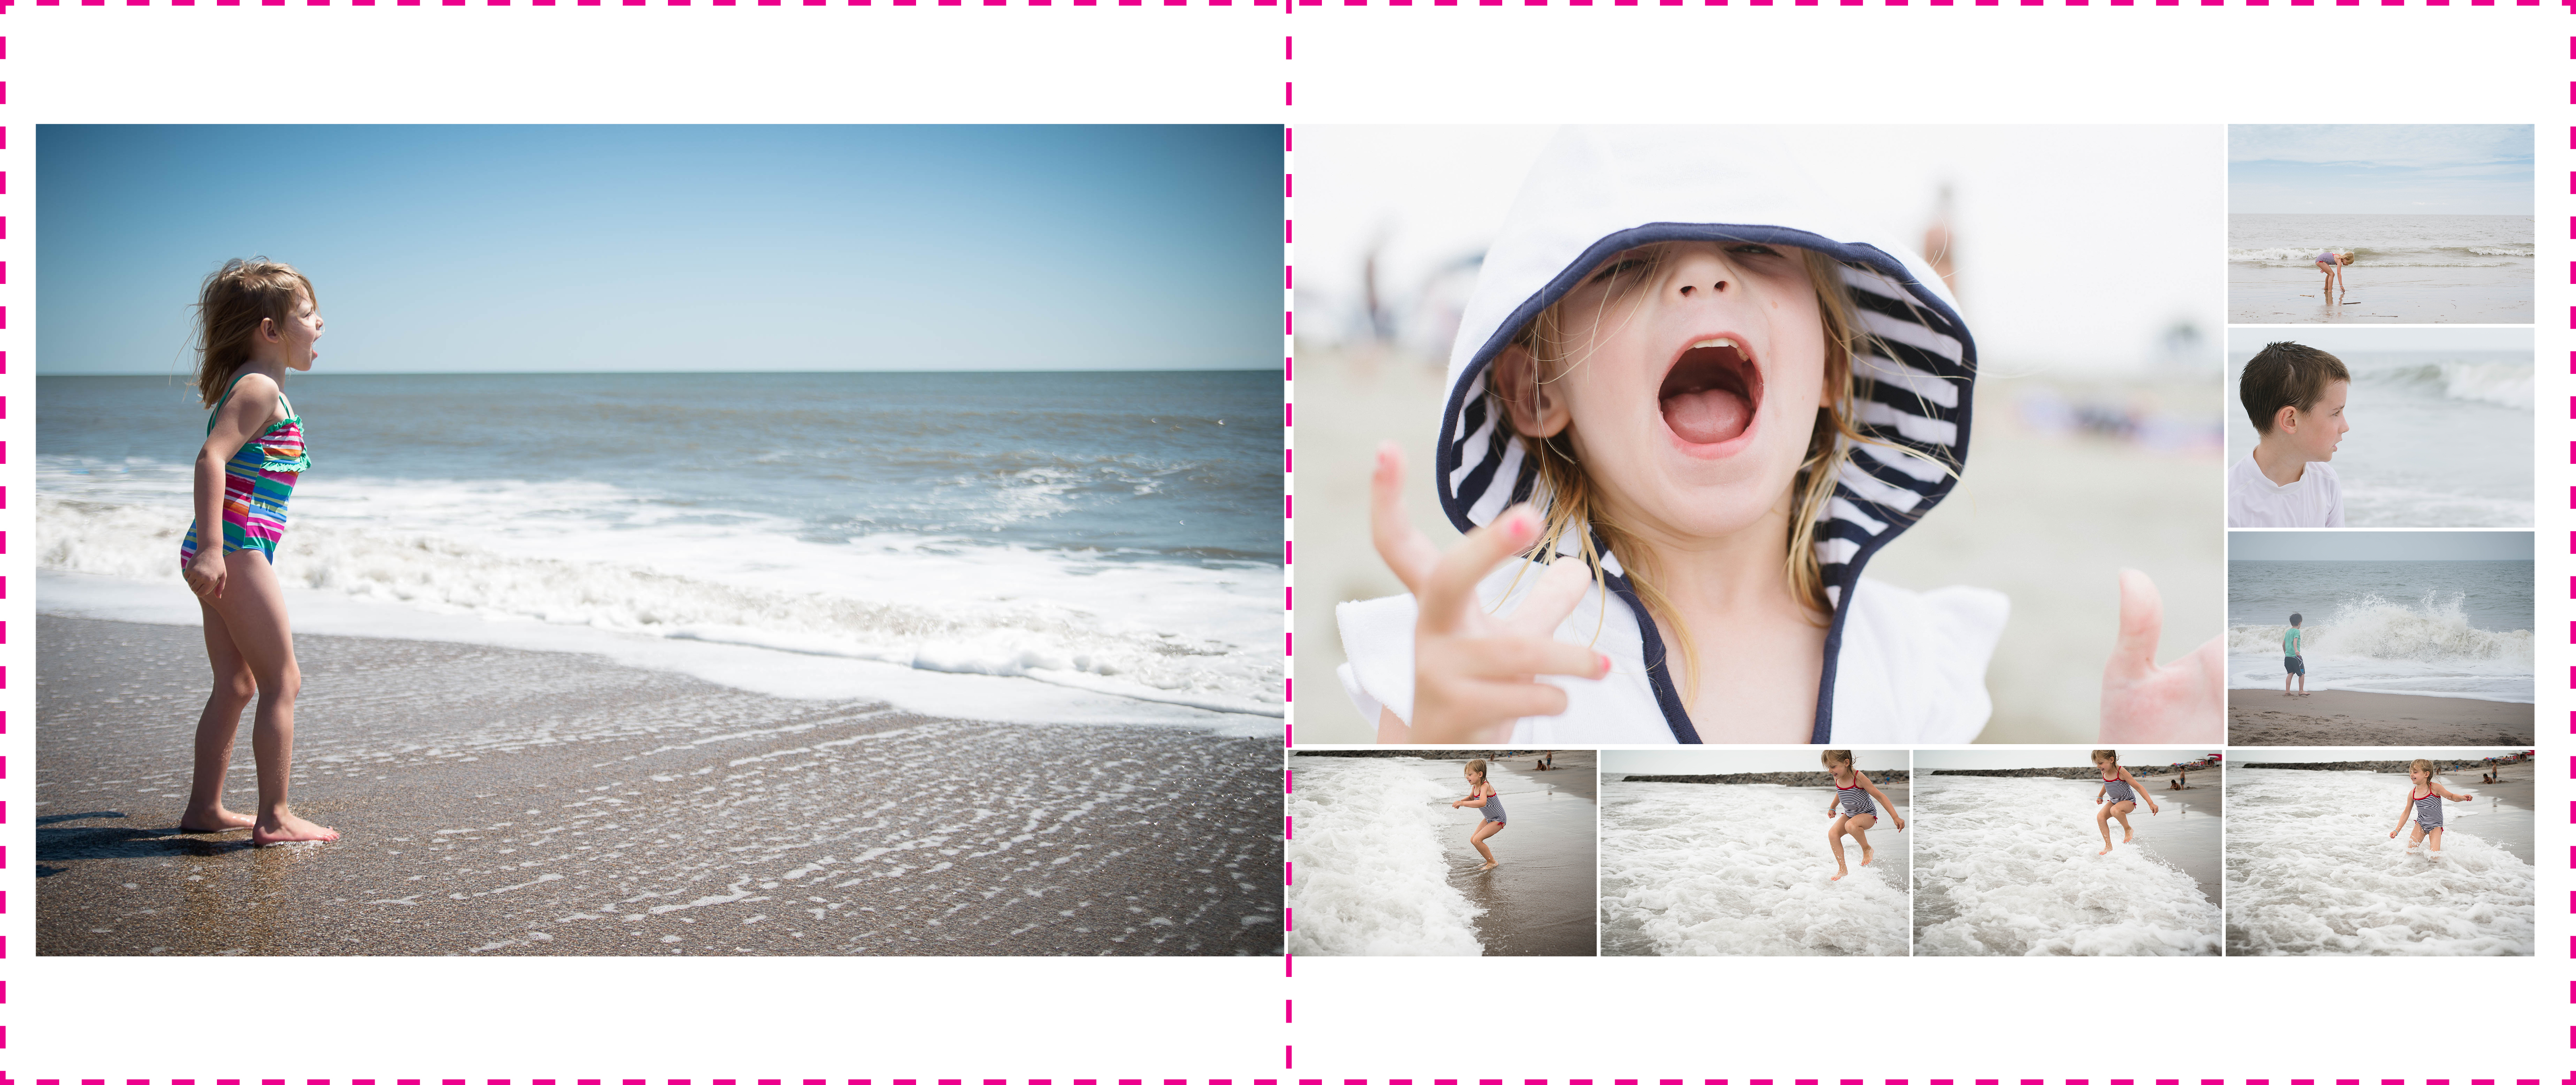
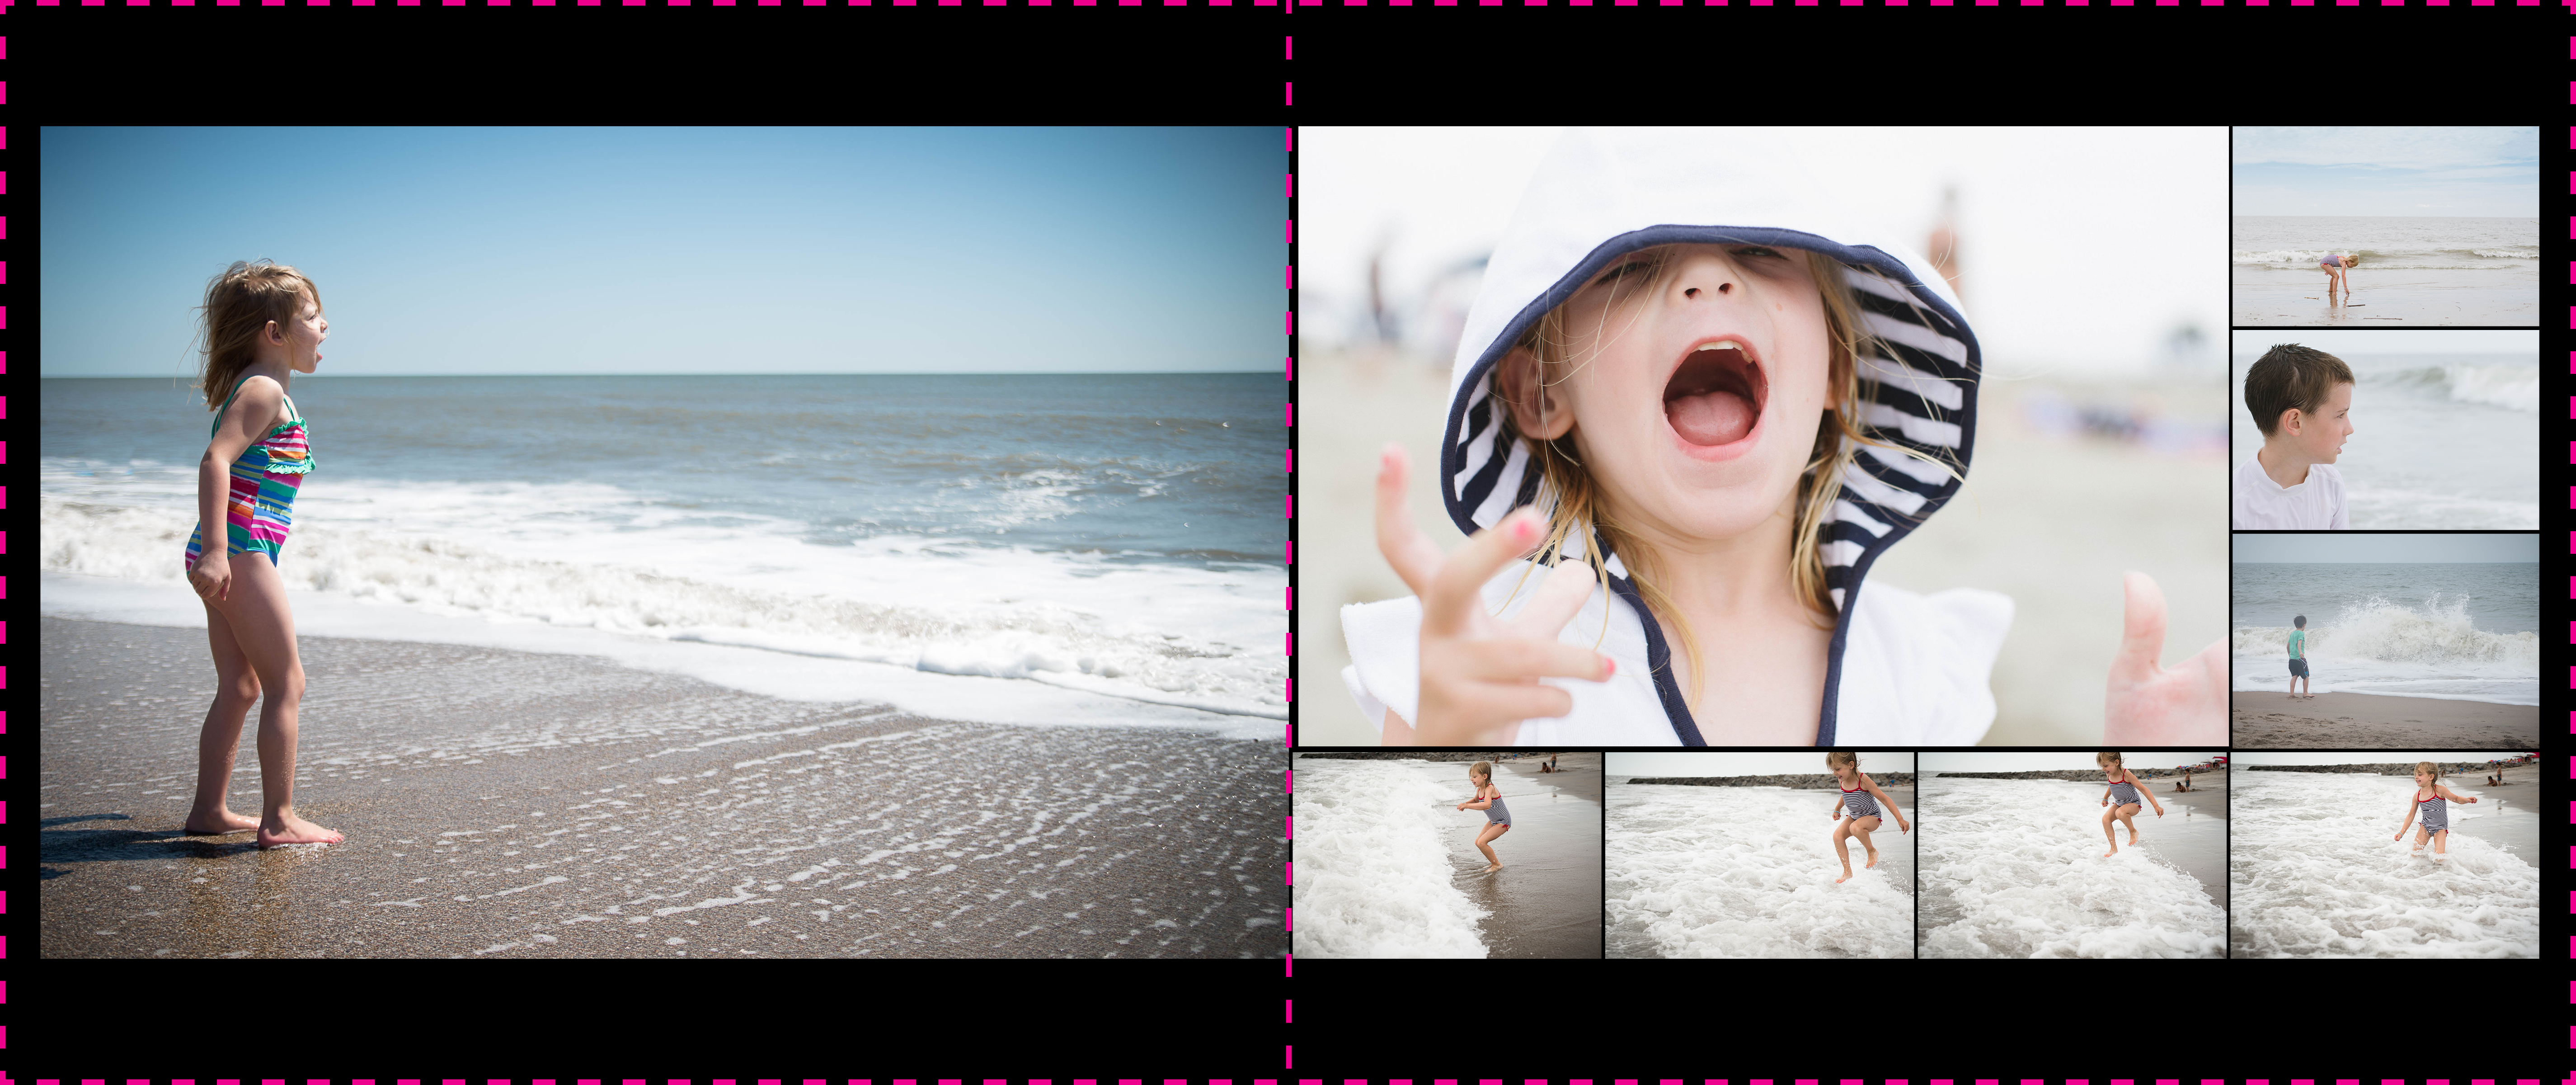
As I mentioned at the beginning, using color really does come down to personal preference. So, I thought it would be fun to share two layouts with both a white and a black background for you to determine what you think works best.

Creative Use for a Color Background

If you prefer white backgrounds but want to try color or a color variation on some pages, a great idea is to create a color section of your annual book to highlight a vacation or a particular photography project. This sets these pages apart from the rest of your photo book without having to commit completely to a particular color.

The great thing about using a color background on important pages, particularly if it covers a decent amount of spreads, you’ll be able to quickly find this section of your photo book by looking at the edge of the book.

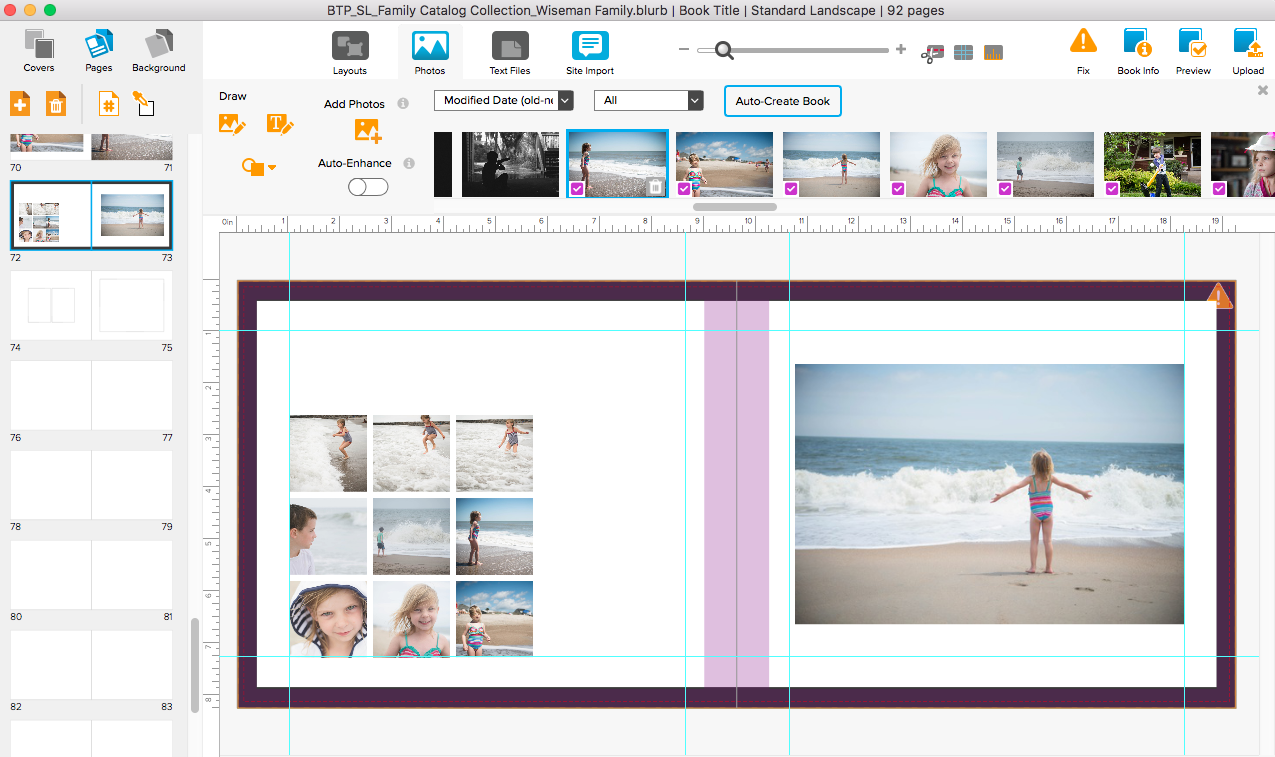
In my recently released Catalog Collection photo book template, I spent quite a bit of time analyzing catalogs and one of the things I noticed in a J. Crew catalog was their use of a white background for the pages featuring women’s clothing. For the men’s clothing, the pages had a small black border around the edge of the page. It created a bit of separation without it becoming too apparent. True to their brand, it was classic, refined, structured, and intentional.

How to Add a Color Background

Now that we’ve covered why and when to use color backgrounds, the next step is to help you with how to add a color background to your photo book. In this video tutorial, I’m showing how you can create a color background in BookWright and InDesign.
Tips for Creating a Magazine-Style Layout

Tips for Creating a Magazine-Style Layout

As I recently wrote, in my Photo Book Club, we are working on a special photo book project in 2017. I’m planning to document 2 weekends spaced over 6 months in 1 photo book.


With this project, the goal is to reduce the amount of photos – only use photos from a particular time period – in order to focus on the design. Fewer photos means less to select, edit, and decide how to incorporate in layouts. This opens up some time and energy to exploring design concepts you wouldn’t normally try.


When it comes to photo books, I tend to be more engaged and finish a project if I’m able to try something new that excites me.


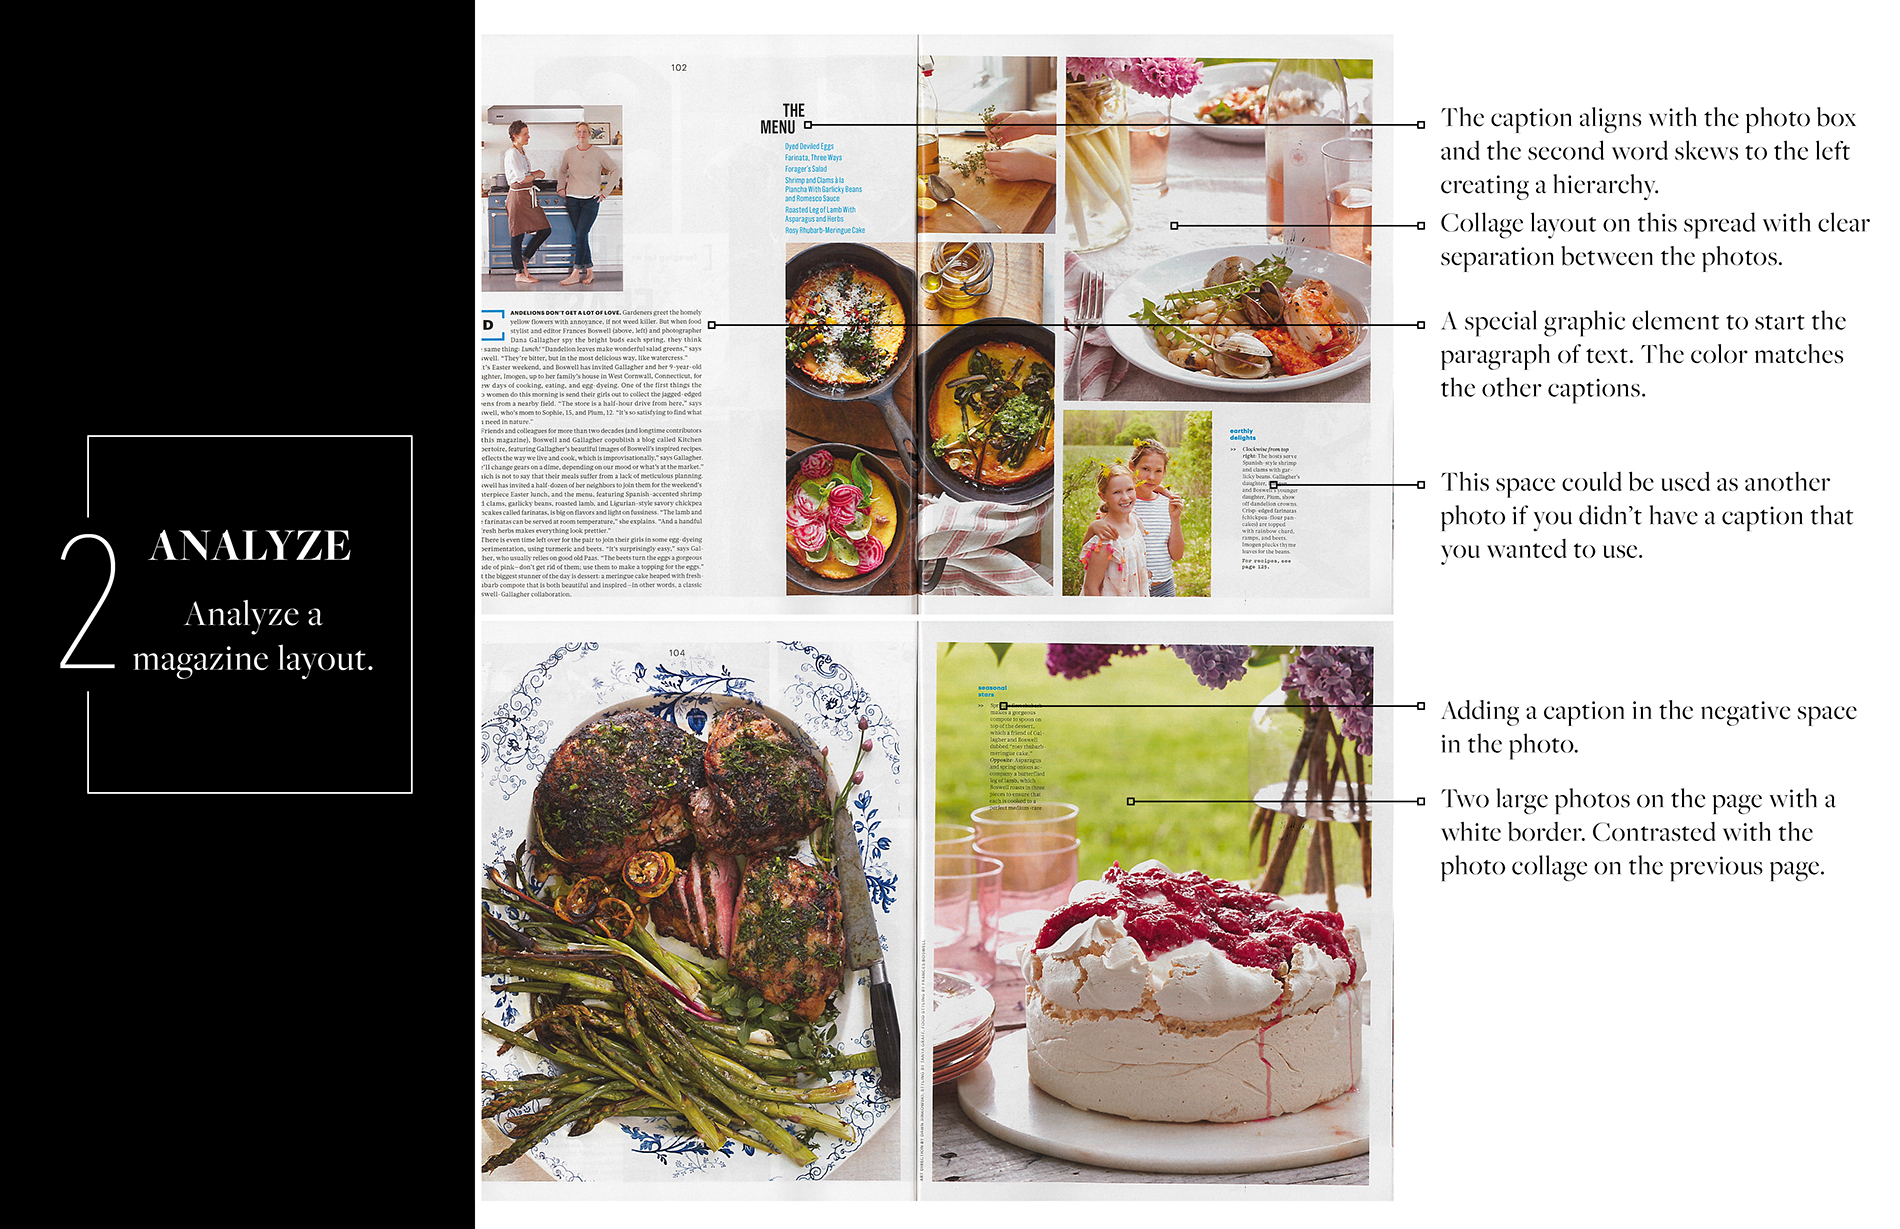
As I’ve been working with my photo book club members, a lot of the students are interested in trying a magazine-style layout. I wanted to share a few key points with you. If you want to go deeper, all photo book club members get access a PDF with more detail and my analysis of existing magazine layouts. And bonus – you’ll get a new inspiring PDF every month.


1: Orientation

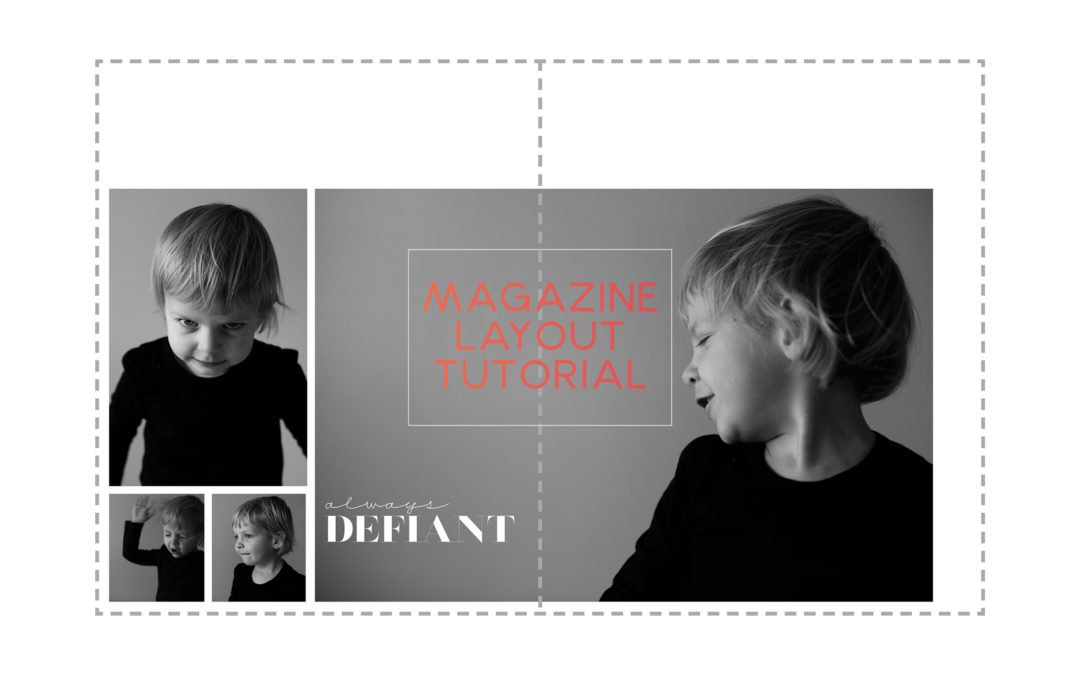
Most of my workshop participants prefer to use the landscape orientation for their photo books. Either the standard size (similar to a size of paper) or the oversize version. This makes sense, particularly if you normally shoot in a landscape orientation.  However, magazine are almost always portrait (vertical) orientation. So the first easy step to achieving a magazine-style photo book is to flip the orientation and make a portrait book.


2: Text

I know, I know….adding text  to a photo book is another layer of work that people just don’t get it. I completely get it!  I’m the same way. After I get through the photos, and layout the pages, it’s hard for me to go back in and add a caption to the photos. However, if you’re looking to make a layout more magazine-like, it helps to have some amount of text on the spread. Whether it’s a title, a quote or a caption, find small ways you can add text.


3: Negative Space

While this may not be true for all magazines, I tend to notice negative space – either in the photos or the layouts. Having negative space gives a little extra room so the layouts don’t feel too overwhelming. For me, if I’m looking through a photo book or magazine crammed with a lot of photos, page after page, I start to get overwhelmed. Plus, incorporating negative space adds space for text, as I discussed in tip #2.


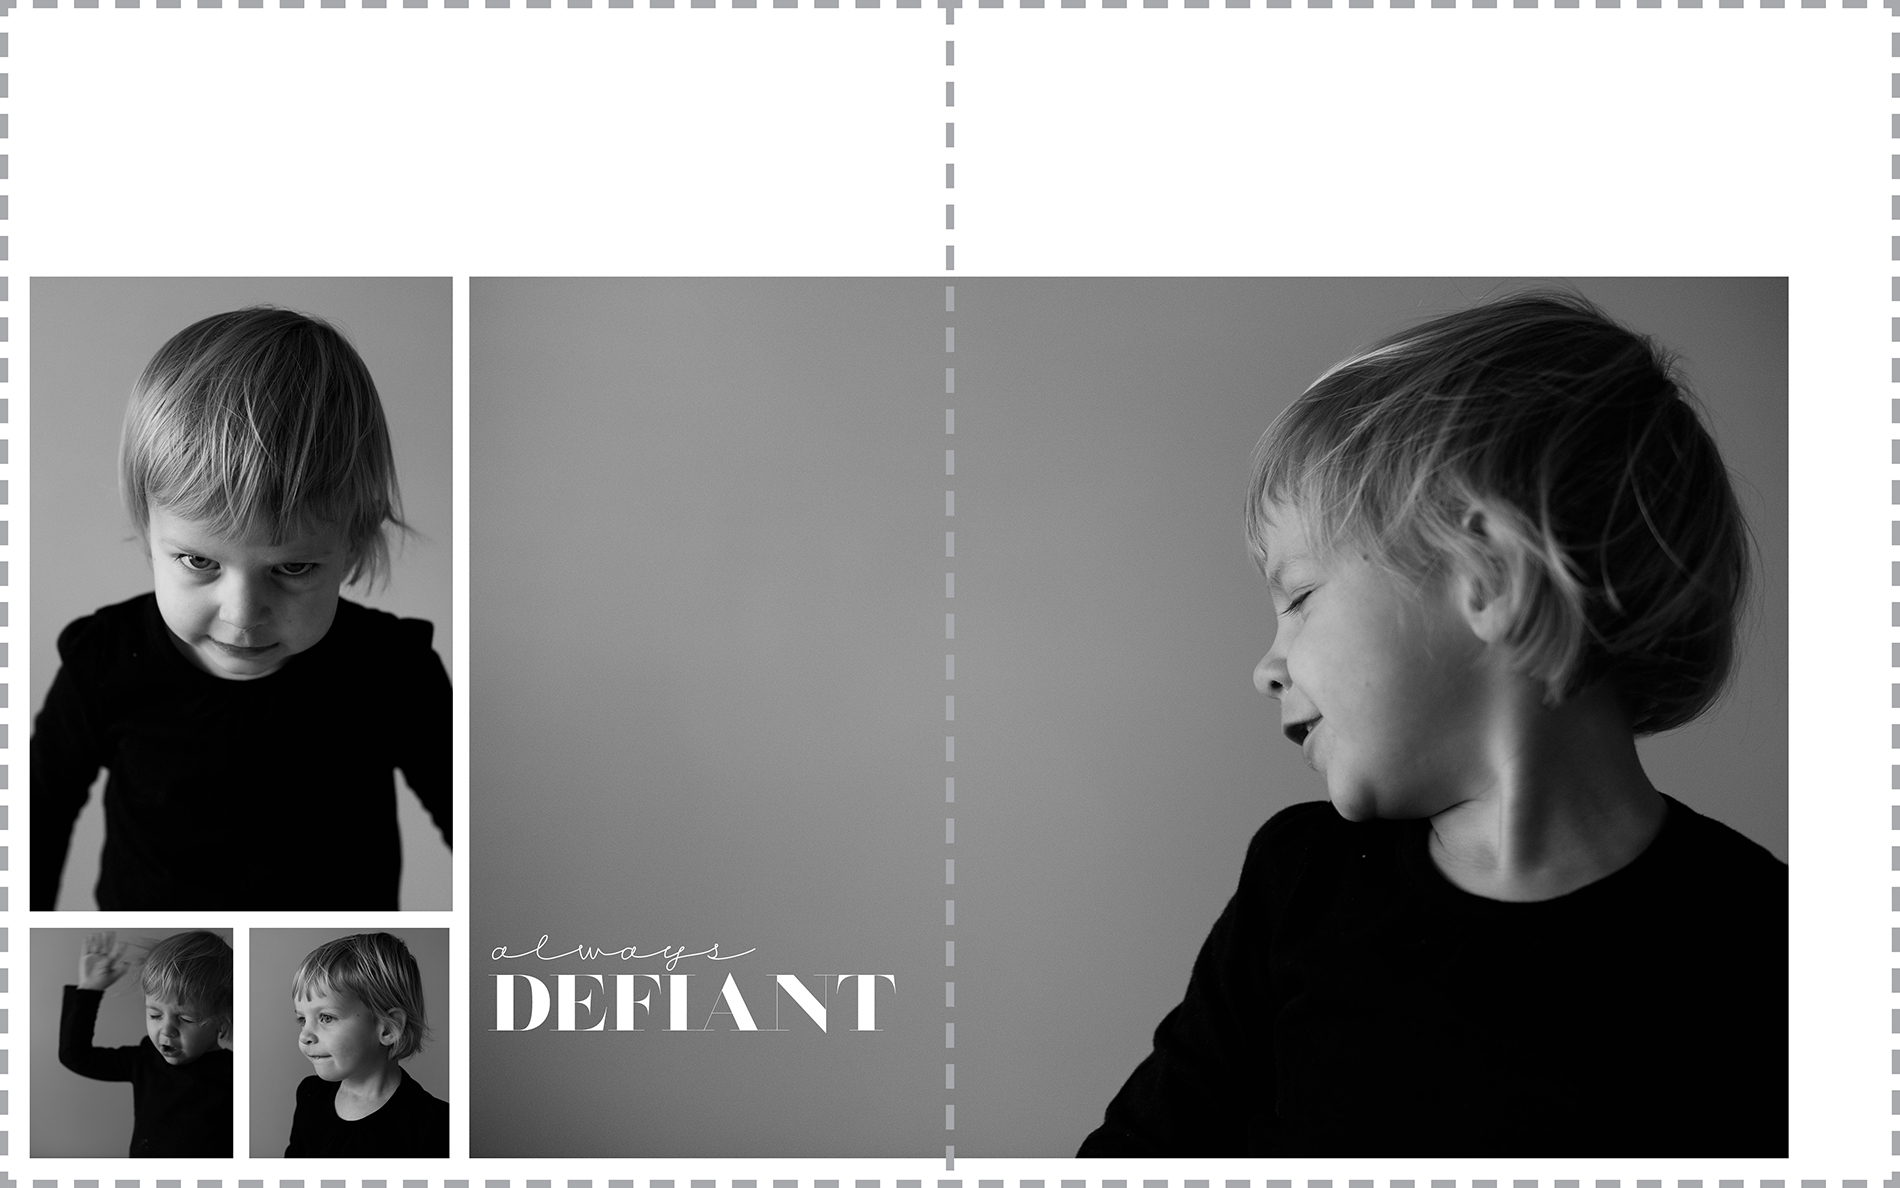
Here’s a sample of the first three tips in one layout:

4: Sketches

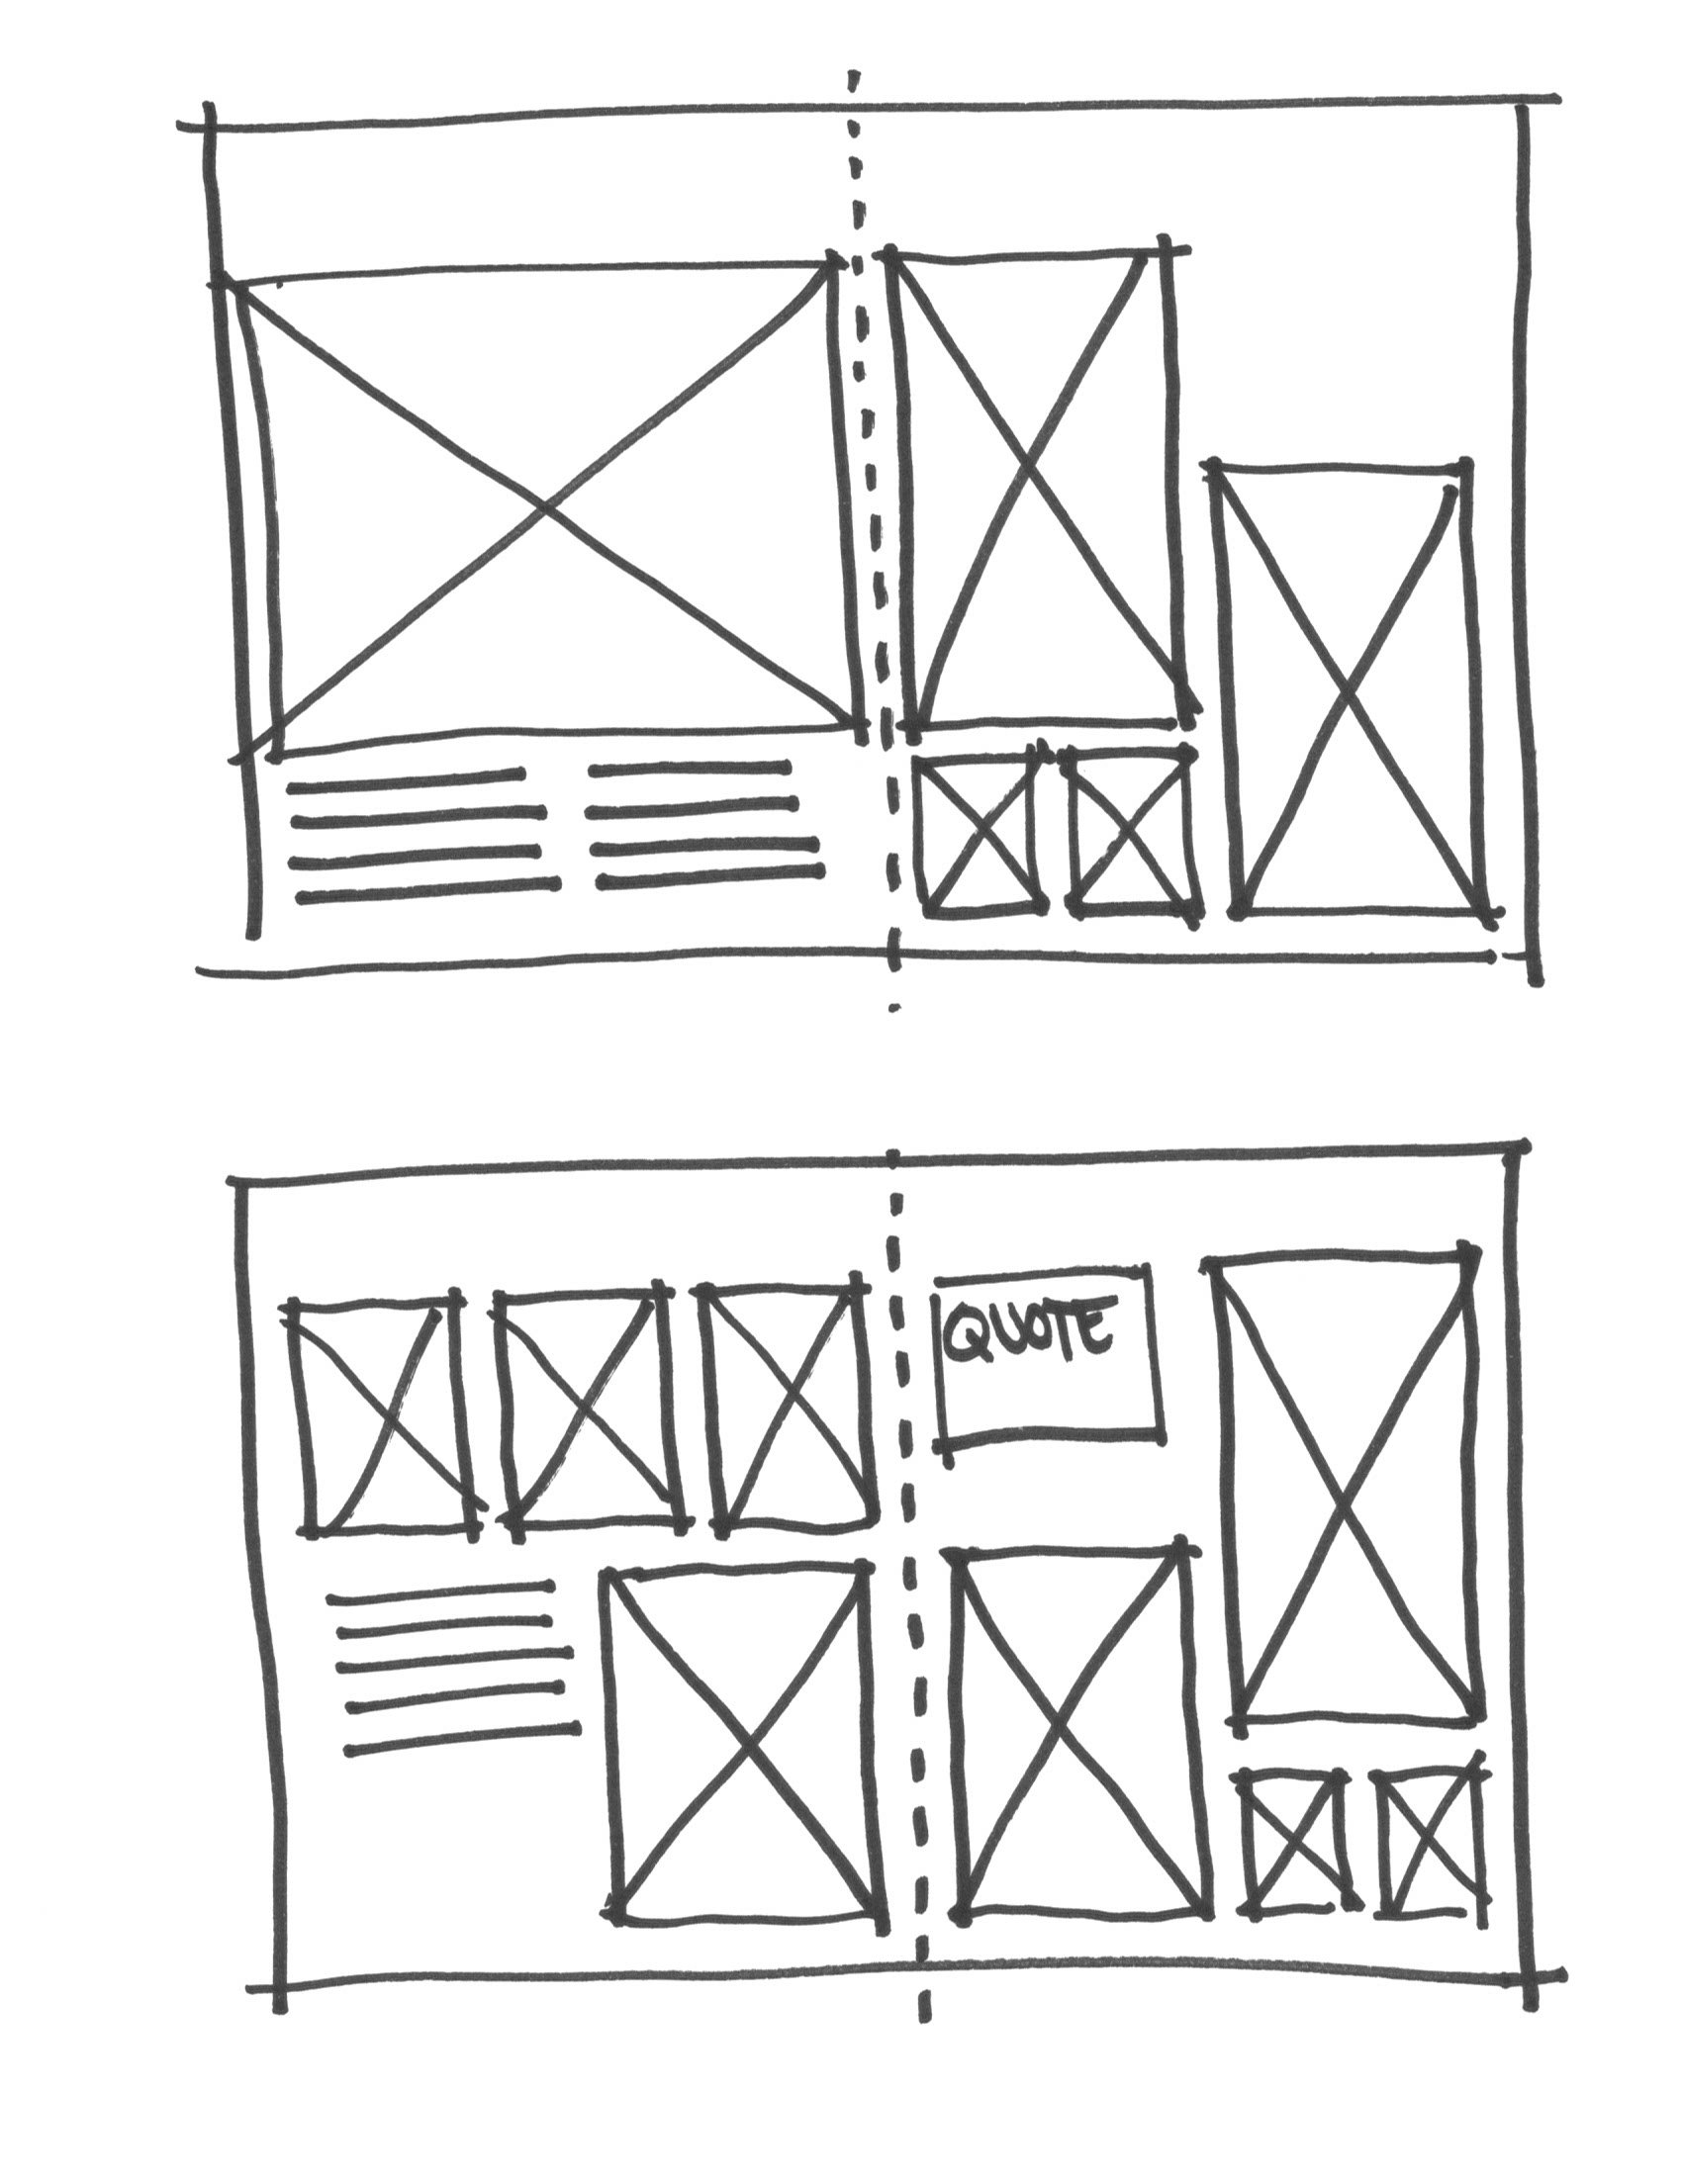
One of the best pieces of advice I can share to understanding a layout you love is to sketch it out. As silly as it sounds, I firmly believe that translating something from eye to hand provides a better knowledge of why something works. Next time you see a layout you really like, take out a piece of paper and sketch out the photo boxes and how the positioned on the spread. It may take several tries – but this all helps in the absorbing the mechanics of the layout.

If you want to sketch inspiring layouts, download my free sketch template that is proportional to 3 standard Blurb photo book sizes: Magazine, Portrait and Landscape. 

5: Photo Selection

It’s important to take and select photos that have your design vision in mind. In my latest Photo Book Club PDF, I share how to analyze photos used in magazines and examples on pinterest to help you align your photos with a concept. 

Here’s one page from my April Photo Book Club PDF.

The full lesson is included in my Photo Book Club Guide which you can check out here

100 Days of Summer Photo Book

100 Days of Summer Photo Book

ARE YOU DOCUMENTING YOUR SUMMER?

Here we are, halfway through summer! It’s hard to believe!!!

Whether you are participating in the 100 Days of Summer (taking a photo everyday this summer) or are capturing the fun activities you are doing with your kids while they are out of school, it’s always a great idea to print your photos.

Printing your summer photos in a photo book is a fantastic and manageable project to describe your summer in a way you’ll always remember.

If you own Lightroom but have never used the LR Book Module, check out this video tutorial to find out how easy it can be to make a Blurb photo book.

The steps are simple:

  1. Tag your summer photos – use something like “100DAYS” or “2016summer”.
  2. Create a smart collection using this tag.
  3. Add any captions describing the photos.
  4. With the smart collection selected, move into the Book Module.
  5. Autofill the pages with a layout you want for a majority of the pages.
  6. Edit layouts as needed to fit the content of the photos.
  7. Add captions to the photos.
  8. Review and print.

Now watch it all come together:


Questions? Leave in the comments below!

Here’s to printing your summer photos!!!

BookSmart vs BookWright. Which program should you use?

BookSmart vs BookWright. Which program should you use?

One of the reasons I love using Blurb for photo books, is the variety of ways to make a photo book. You can make a book entirely online with Bookify. You can use the Book Module within Lightroom so you’re using only 1 program to organize, edit, and print your photos. You can use their downloadable free programs, BookSmart or BookWright. Finally, you can even use a plug-in for Adobe In-Design to create stunning custom layouts and print with Blurb.

As Barry Schwartz writes in the Paradox of Choice, sometimes having more choices makes it difficult to actually choose any. And that’s how I feel when it comes to which free downloadable Blurb software you should use for your next book. I’ve put off giving you my thoughts on BookSmart or BookWright for a while – partly because I’m mixed.

Being completely honest and transparent here, there are some advantages with their new program BookWright that I love. But they didn’t put everything that I love from BookSmart into their new program. So when it comes to giving a recommendation….I have a hard time telling you to use one versus the other.

But I know this can be a big sticking point for some so I’m going to provide a few considerations to help you make your decision. If you want to go even deeper and learn how to use BookSmart or BookWright for your next photo book, I hope you’ll sign up for my Intro to Photo Book Design Workshop. I cover both programs in more depth  (with screenshots and videos) so you can make the best decision for your book and know exactly how to use the programs.

Custom Layouts

While you can’t create custom layouts in Bookify or the Lightroom Book Module, Blurb’s free downloadable programs offer the ability to design custom layouts to fit your photos. Within BookWright, it’s extremely easy to add the photo and text boxes you want on the page and save it to your library. While it can be done in BookSmart, it’s a little more cumbersome and takes extra time. You have to utilize a separate work space to customize your layouts. Essentially, it adds another layer or process, distancing you from the actual context of your book.

Advantage: BookWright

Text Styles

If you want to use text for your photo book – even as page numbers – it’s easier to set up the characteristics of each type of text you want to use (headings, captions, and page numbers) in order to have consistency throughout your book. This is not as easy in BookWright. Each type of text you’ll want to include will require separate formatting….or copying and pasting each time.

Advantage: BookSmart

Alignment

One of the best ways to make your book look more professional is to align your photos. It’s even better if you can align them between the left and right page. In BookSmart, you have to use a grid on each page to align the photos. BookWright makes alignment extremely easy and intuitive with guides showing you when you align your photo boxes.

Advantage: BookWright Want to see how these two programs look?

In the end, even though BookWright is very easy to use….I still think I prefer BookSmart when it comes to Blurb’s free software programs. It gives me the level of control I prefer when I’m designing photo books. I’d love to hear from you! Do you have experience with both programs? Which one is your favorite program?